
A blog style guide can transform your blog into a professional-looking publication. Done well, it streamlines both your own creative process and the process of working with others.
And it’s remarkably easy to create one – we’re going to walk you through it today in a few simple steps.
Let’s get started!
What is a blog style guide?
Your blog style guide is a document with rules and guidelines for the content on your blog. It establishes the colors you work with, the type of images you’ll use, and the style of language you’ll write with. All of this is kept in one document you can use as a reference or provide for anyone contributing to your blog.
Your blog style guide should be a miniaturized version of your brand style guide, which encompasses all the style and design rules for your business.
Why create a blog style guide
The main reason to create a blog style guide is to streamline the writing and design process. It provides a checklist you can use to maintain consistency and quality across all of your articles and graphics. All blog owners should create a style guide for this purpose, ideally when they first start blogging.
The other big reason to create a style guide is to keep things consistent when you bring on other writers. Freelance writers, guest bloggers, and editors need to understand what you want. A style guide is the easiest way to accomplish this – just send it to new collaborators when you start working together.
How to create your blog style guide
You can create your blog style guide in six steps:
- Step 1: Establish your target audience
- Step 2: Choose brand colors
- Step 3: Create rules for images
- Step 4: Decide what fonts and font sizes to use
- Step 5: Create rules around language and tone
- Step 6: Organize it all in one document
Step 1: Establish your target audience
Everything in your style guide should be designed to connect with your audience in a specific way, but that’s only possible if you know the audience you’re trying to reach. You absolutely must build a target audience profile before you can create an effective style guide.
Step 2: Choose brand colors
Most blog style guides leave this out, but including a set of colors encourages your writers to go above and beyond, creating infographics and other images branded to your blog.
Choose three to five colors that your blog will use in its theme and in all self-made graphics. These can be the same colors as your official brand colors, or they can be altered to make the blog stand out from your main brand. You can use the Adobe Color CC tool for color inspiration.

Step 3: Create rules for images
These can be as simple or as complicated as you want. Some rules to consider:
- Where the first image is placed in an article
- Minimum and maximum sizes for images
- How images are credited
- How captions should be formatted
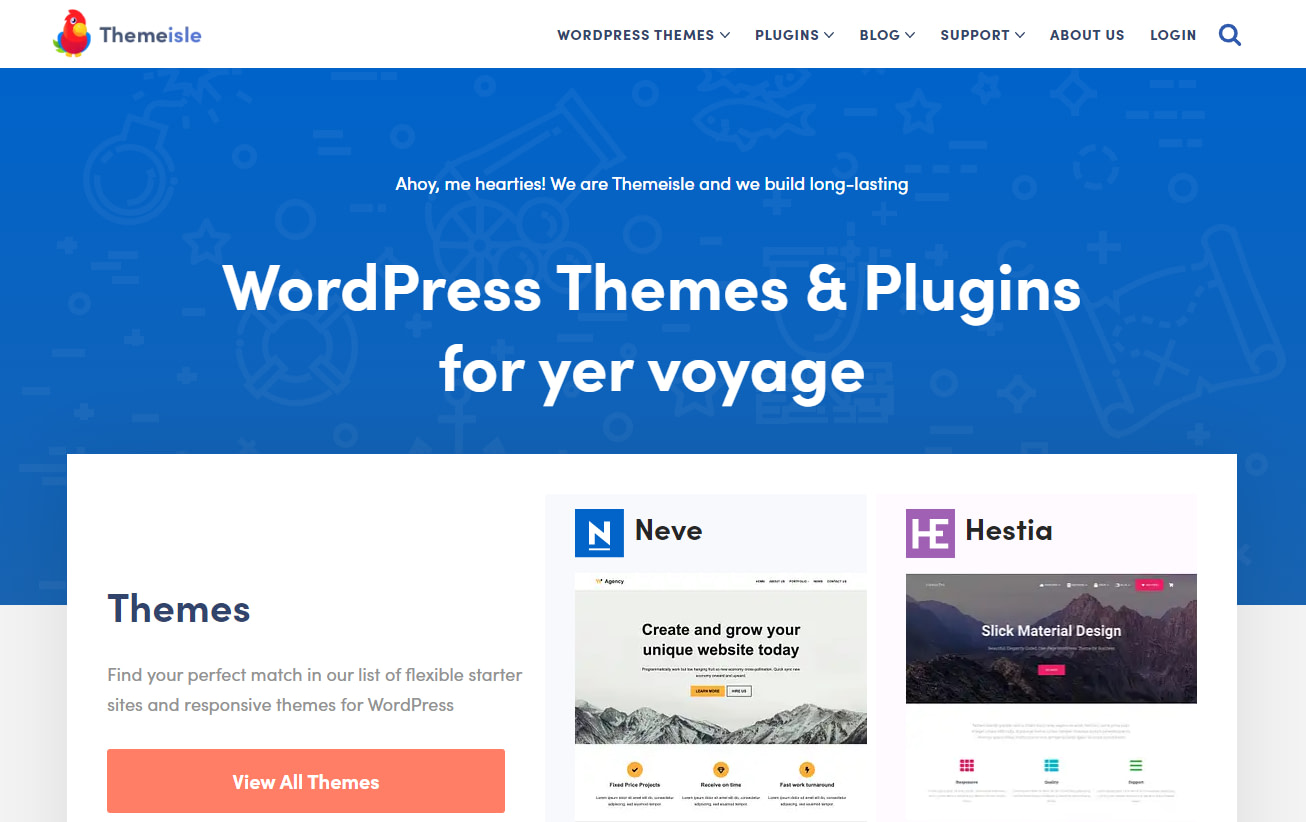
Do you prefer images that imitate the web browser, like the following one, or normal images?
You can take a look at the Wikipedia style guide for ideas on how to structure this section.
Step 4: Decide what fonts and font sizes to use
WordPress themes automatically implement their own fonts when you transfer text, but font rules still matter. For starters, you should know the font family and font sizes that you’re working with. If you’re working with other people, you want to receive files in an easy-to-read format, and sticking with your blog’s font/font size is one of the easiest ways to make it happen.
There’s no hard and fast rule to the number of fonts you should use on your blog, but a good rule of thumb is to start with three fonts: a font for headings, another for subheadings, and a third for the main text.
Not sure where you should start? Check out our guide to choosing WordPress fonts.
Step 5: Create rules around language and tone
The Style Manual you use will dictate most of the rules around language, but there are several things you should establish separately in your own style guide:
American English or British English 🇺🇸 🇬🇧
Who is your primary target audience? Write in the English they’re most likely to use.
Style Manual 📖
Most brands use either The Chicago Manual of Style or the AP Stylebook. Both of these manuals offer online subscription services. You can create a single account for this and share it with your employees in this document.
Tone 🗣️
What does the voice of your brand sound like? Are you serious or playful? Friendly or distant and authoritative? Brainstorm all the words that describe the tone of your existing work, and choose 3-5 words to emphasize in your style guide.
Adult language 🔞
We tend to assume that a professional blog never swears, but bloggers like Mark Manson have used minimal swearing to great effect. Some, like author Chuck Wendig, swear several times per article and build their success on their reputation for creative cussing. No matter what size of the fence you’re on, this is worth considering before it becomes an issue.
Abbreviations 🏧
What abbreviations are commonly used on your blog? How are those abbreviations punctuated?
Sourcing 🔖
How do people make citations? You may also want to reiterate how images are attributed here.
The Oxford comma 🆗 🙅♂️
How people feel about the Oxford comma varies greatly even within groups that use British English. Make your stance on it 100% clear to new writers.
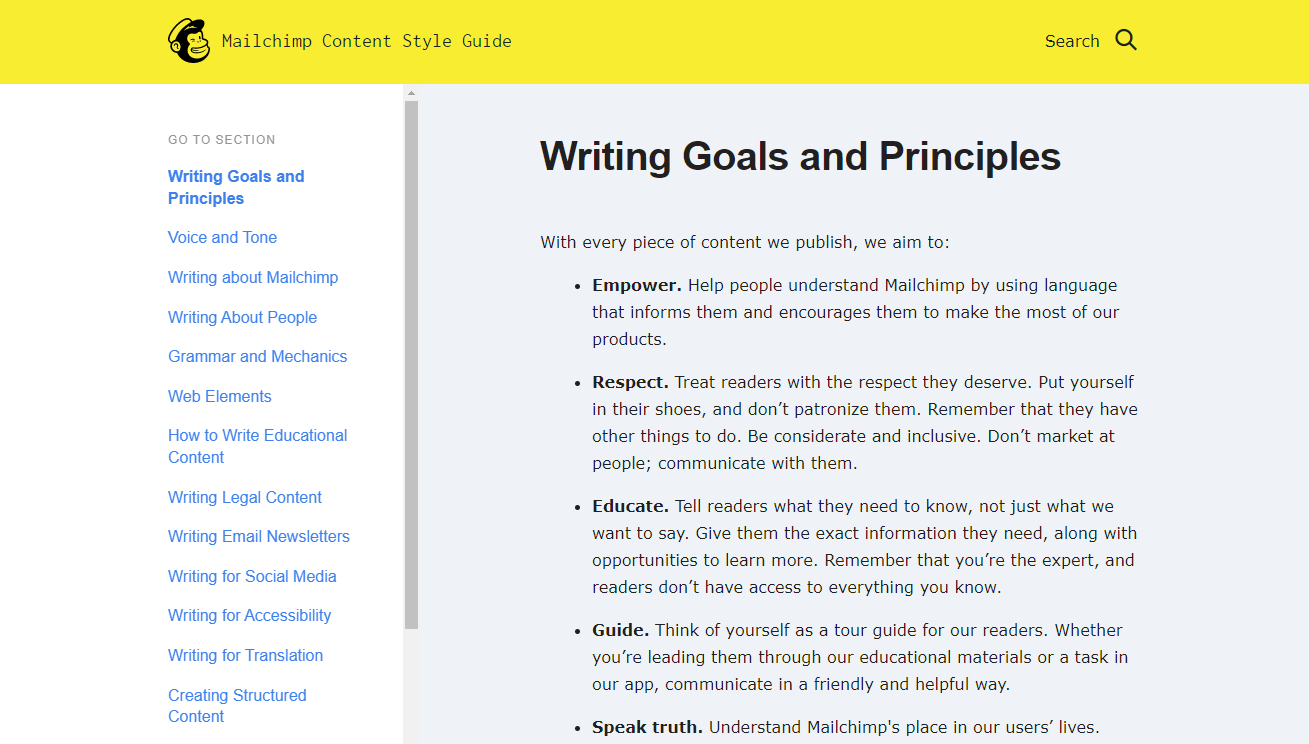
You might also want to include additional guidelines for different types of content. Take a look at the MailChimp writers’ style guide for ideas of other sections you might want to add.
Once you’ve established the rules, you can move on to the final step of creating your blog style guide:
Step 6: Organize it all in one document
Establishing rules for the categories we just went through is great, but it doesn’t actually make a guide. To do that you’ll need to organize your rules into a single cohesive document. You should also create examples demonstrating each rule. You can easily accomplish this with a handful of screenshots. The document should internally follow the style guidelines as well, making the entire thing a visual example.
When you’ve created detailed examples for each rule and organized them into sections, export the guide as a .PDF file. This will ensure that it retains the same formatting when people look at it on different computers.
Tips for using your blog style guide
Now that you’ve created a style guide you can use it in a few different ways:
- Use it as a reference to keep your own content consistent
- Give it to any freelance writers and/or graphic designers you work with
- Share it with guest contributors to maintain quality across your guest post program
- Make it accessible to all staff (uploading to Google Docs or something similar is a great way to do this)
- Use it as your main source of criteria when editing
Final advice 🏁
Your blog style guide is an extension of your brand style guide that will help you maintain consistent messaging and quality across all of your work. It’s also one of the first things you should do – but the last thing many bloggers end up doing.
📚 Set yourself apart from the rest by creating your blog style guide today in six simple steps:
- Establish your target audience
- Choose your brand colors
- Create some basic rules for using images
- Decide what fonts and font sizes to use
- Create basic rules for the language and tone used on your blog
- Organize it all into one document
Once you’ve completed all of these steps your style guide is “complete”, but it should be treated as a living document. Revisit it once every one to three years, tweaking it so that it evolves consistently with your blog and your business.
Have you created your own blog style guide yet? Struggling with anything? Let us know in the comments below.


Or start the conversation in our Facebook group for WordPress professionals. Find answers, share tips, and get help from other WordPress experts. Join now (it’s free)!