
Searching for a solution to set up a WooCommerce Apple Pay payment gateway? 💳
Apple Pay, a digital wallet and mobile payment solution, provides yet another way for you to get paid through your online store. Much like other mobile payment gateways and money-sending apps (like Venmo, Amazon Pay, and Google Pay) the Apple Pay system offers a simpler, convenient way for customers to pay, allowing for secure purchases right from their devices.
As a short description, Apple Pay works like a credit card, except the payment information gets stored inside a user’s device (usually a phone) so they don’t have to pull out their credit card whenever it’s needed for in-person or online payments.
Apple Pay users link their debit and credit cards and store them in the iPhone’s Wallet app. As long as an online or physical store accepts Apple Pay, they’re able to process payments within seconds. ⏱️
Therefore, Apple Pay is yet another way for your customer to pay you, so it’s important to offer that support on your website, whether you’re running a large WooCommerce store or selling a few products through your blog.
📚 Table of contents:
- Install and configure WooCommerce
- Install and activate the Stripe for WooCommerce plugin
- Link Stripe to your website
- Link Stripe using the API keys
- Activate a WooCommerce Apple Pay button
- Troubleshooting WooCommerce Apple Pay buttons
How to set up a WooCommerce Apple Pay payment option
Accepting Apple Pay through WordPress and WooCommerce requires three free elements in addition to a WordPress site:
Install and configure WooCommerce ⚙️
If you haven’t already set up your WooCommerce store, begin the process by installing the WooCommerce plugin to your WordPress site. Click here if you need help installing a plugin.
Walk through the basic steps of launching an online store, following these guides to ensure your ecommerce shop functions properly:
The overall goal is to have a section of your site, or the entire thing, ready to go as an online shop, including product pages, a sleek design, and things like tax calculations and shipping rates.
After that, you can add a payment gateway that accepts Apple Pay.
Install and activate the Stripe for WooCommerce plugin (and create a Stripe account) 🔌
The Stripe payment gateway provides Apple Pay support, and it’s a reputable processor with reasonable fees and an intuitive setup process. There are also a few plugins to link Stripe with WooCommerce.
To get started, install and activate the Stripe WooCommerce plugin on your WordPress site.
You should also sign up for a Stripe account through its website, filling in everything from your company information to bank details.

Once you have all the pieces in place, go to the WordPress dashboard.
Link Stripe to your website 🖱️
In your WordPress dashboard, go to WooCommerce → Settings.
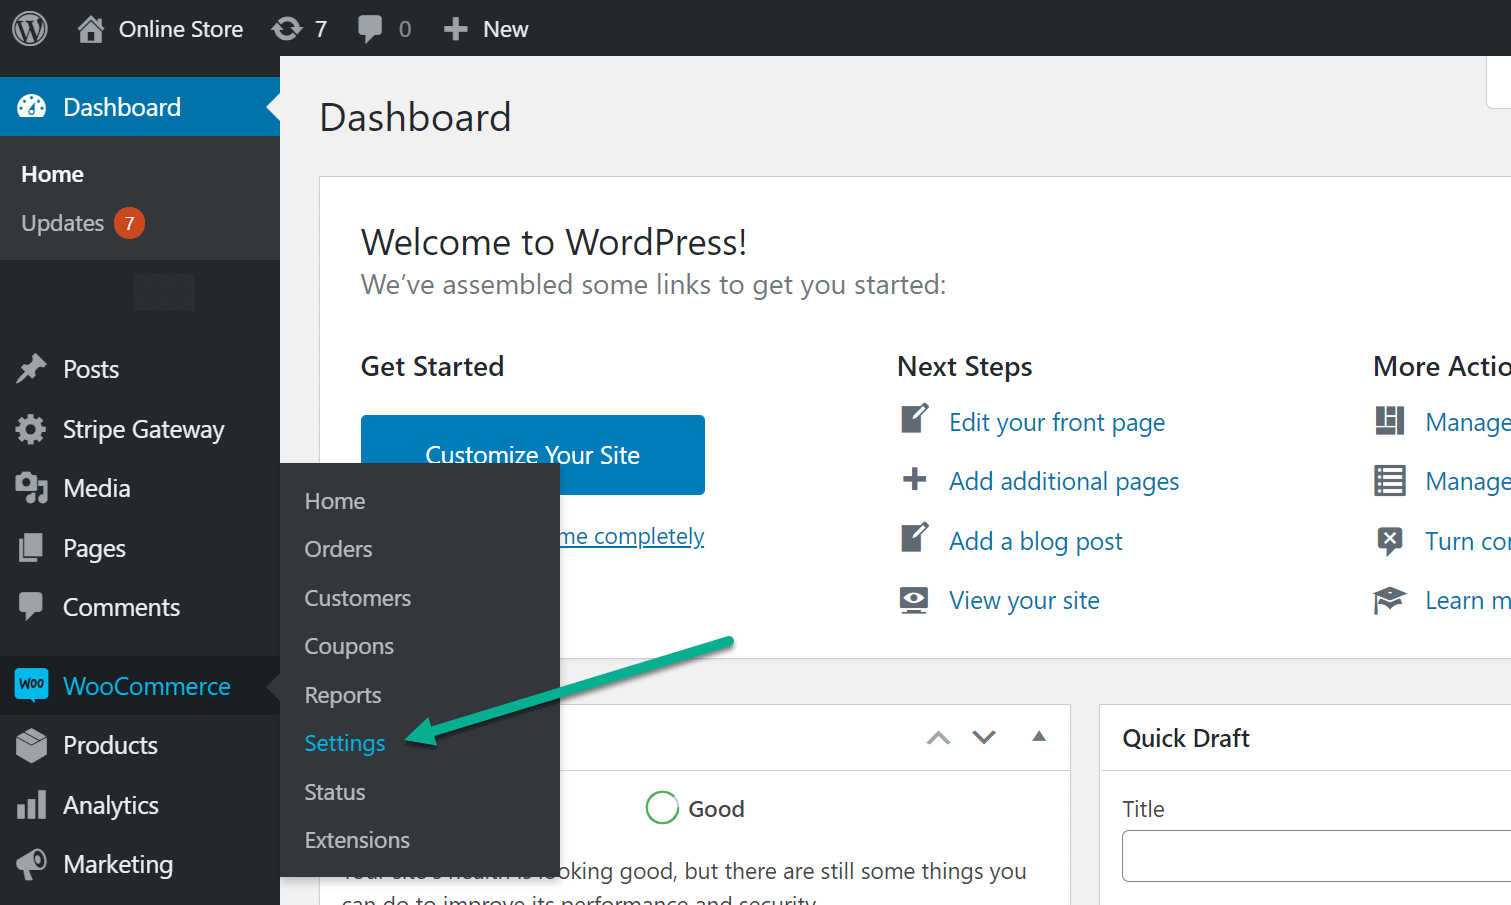
Click the Payments tab to reveal all available methods like Direct Bank Transfer, Check Payments, and Stripe.
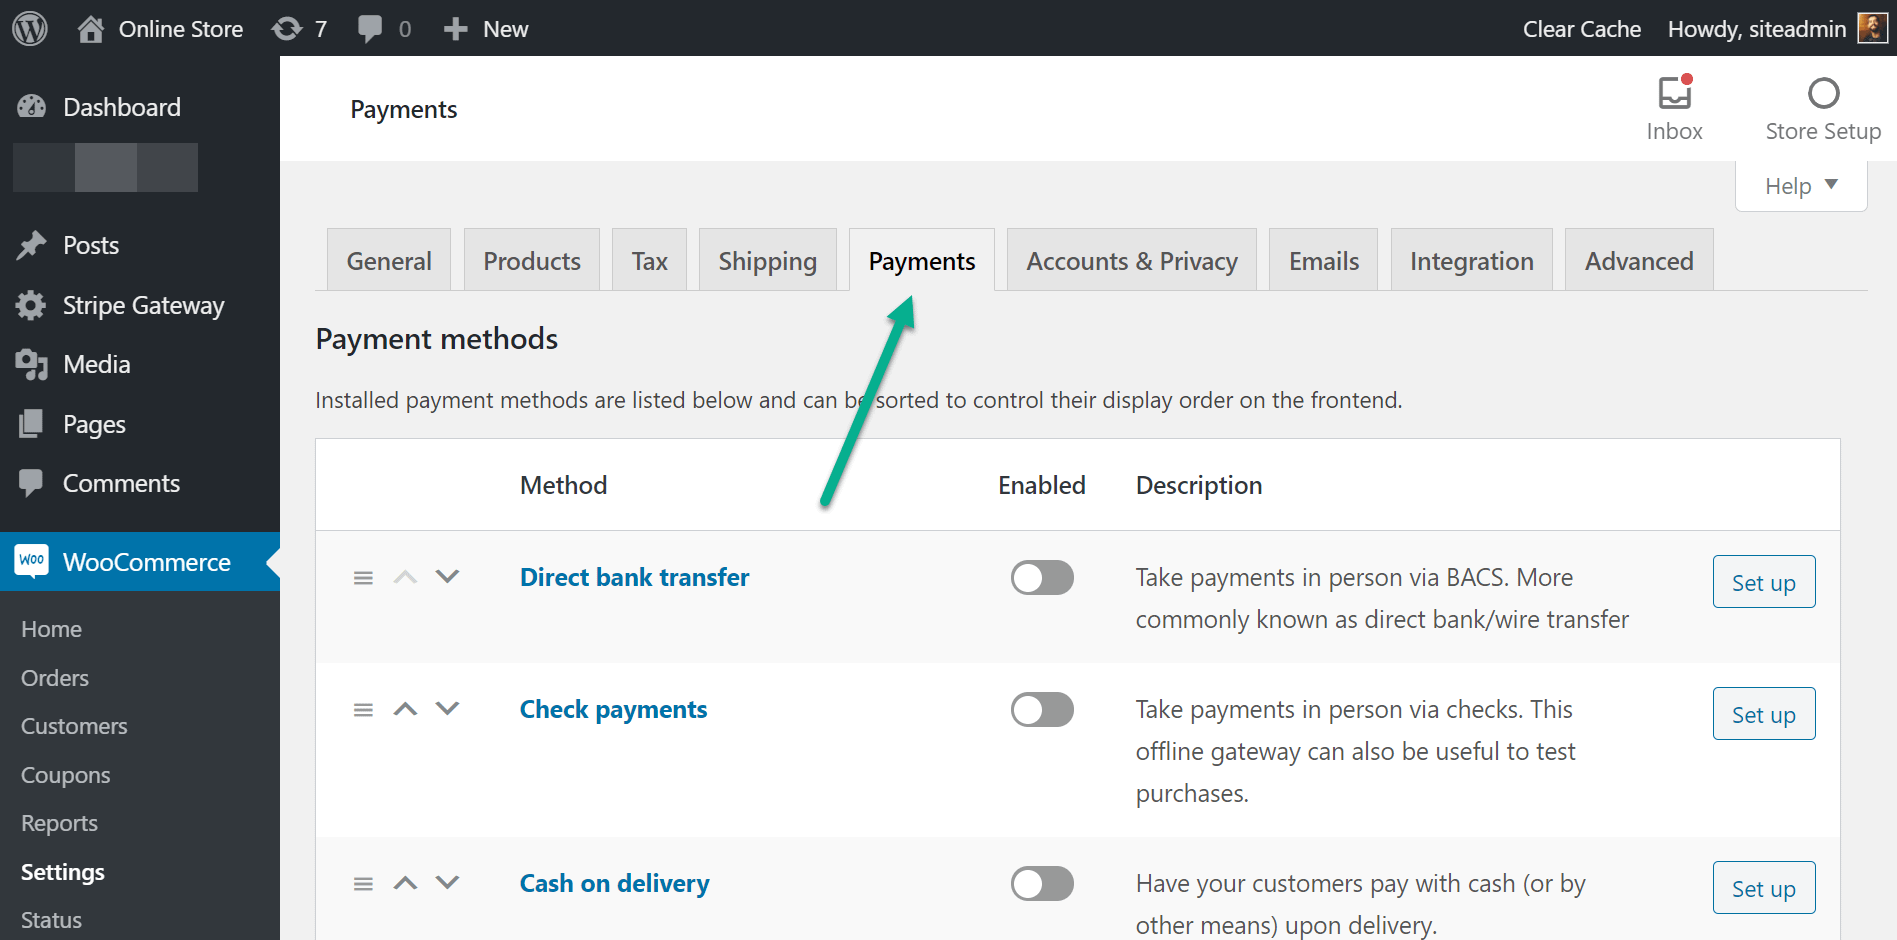
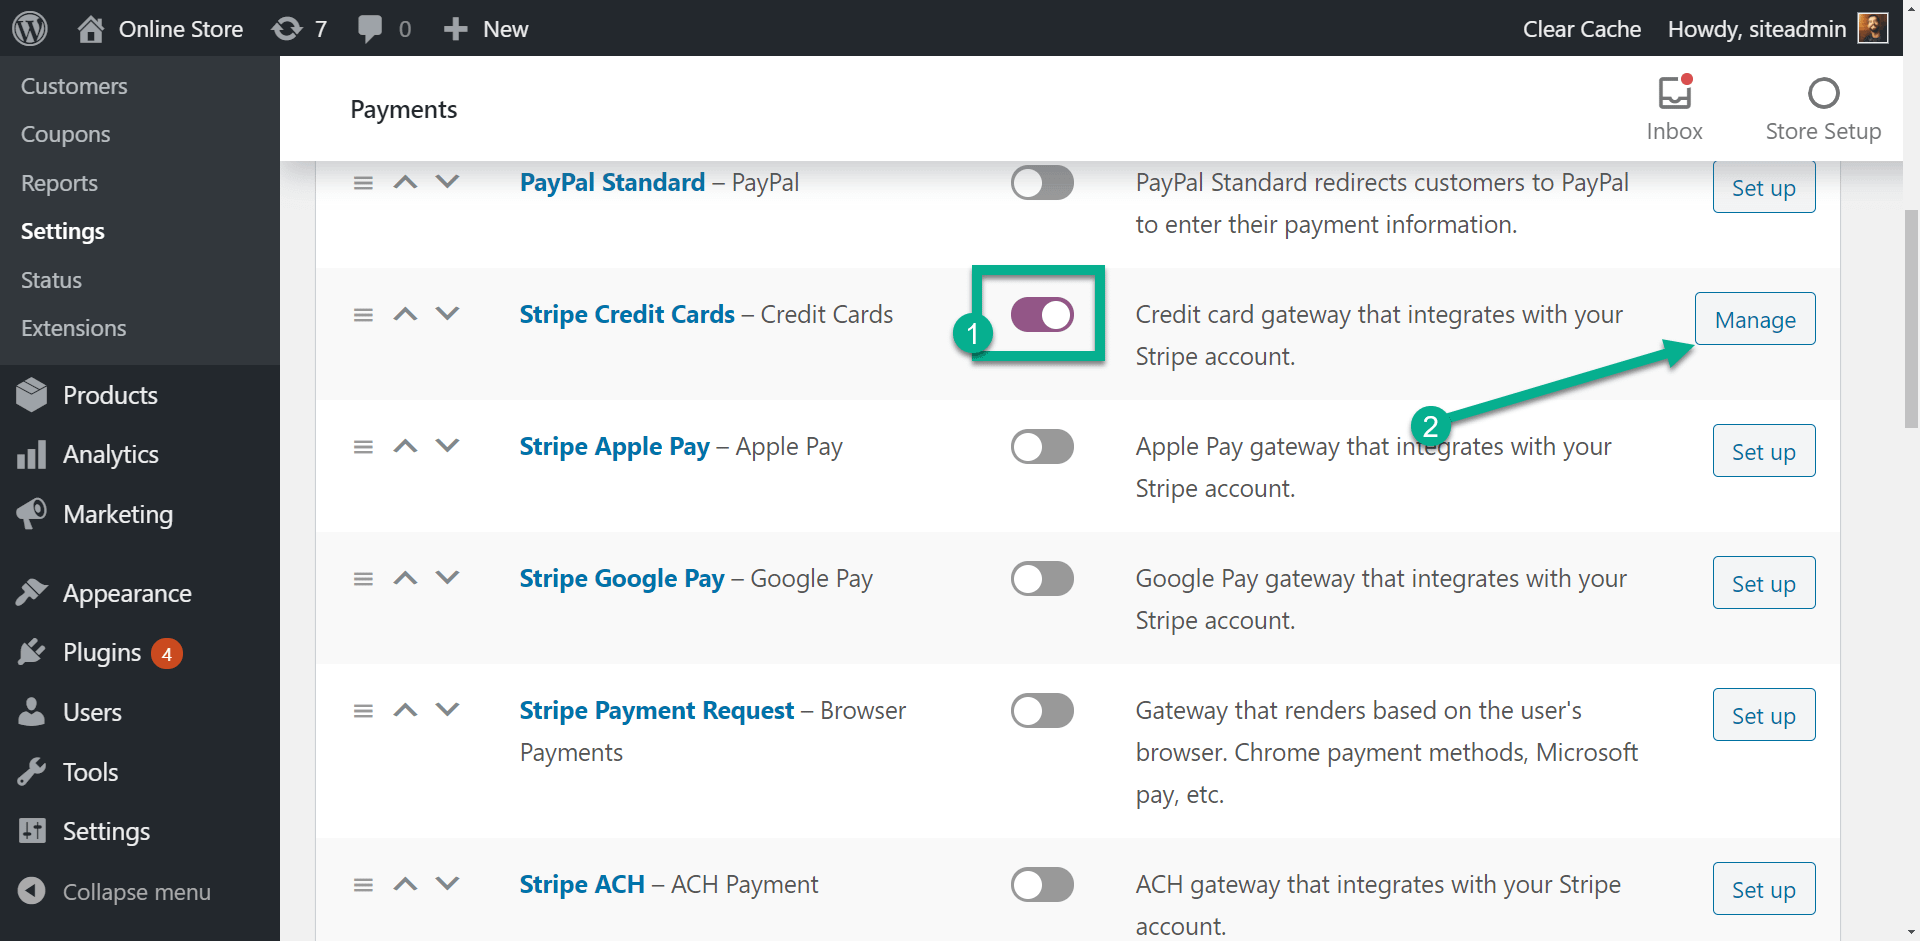
Scroll down to locate the Stripe Credit Cards payment option. You may notice some other fields with Stripe in the titles, but skip those for now; you must turn on the basic Stripe Credit Cards functionality before doing anything.
Turn the Stripe Credit Cards switch to the On position. After that, click the Set Up or Manage button, depending on which appears for you.
Link Stripe using the API keys 🖱️
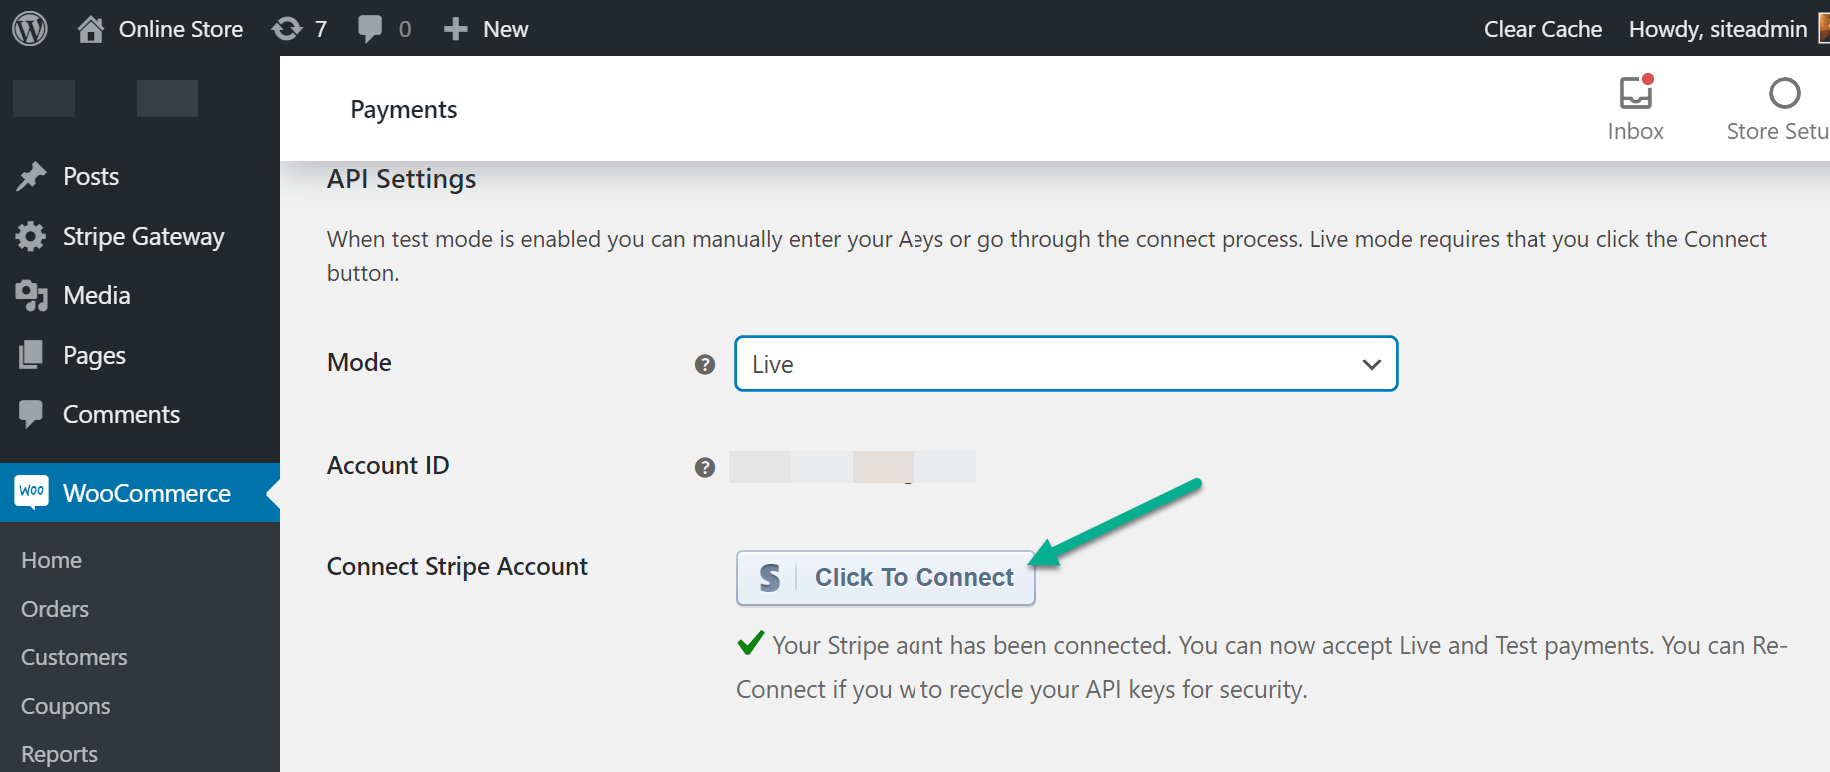
On the new page, go to the API Settings section.
You can switch the Mode to Live if you’re ready to collect payments. If not, stick to the Test Mode.
Press the Click to Connect button for the Connect Stripe Account field. This sends you to a new page where you log into your Stripe account and connect Stripe with WordPress.
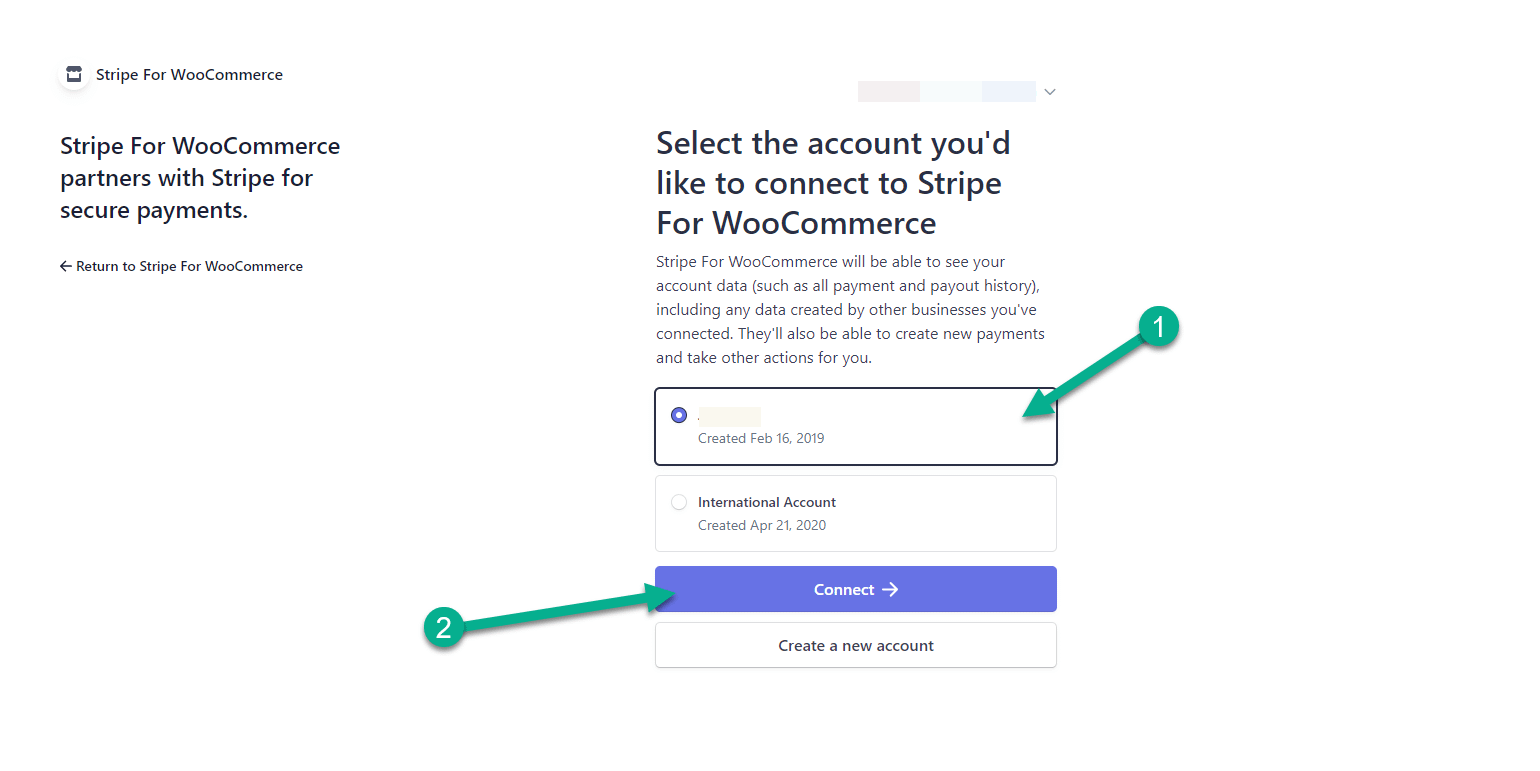
WordPress now brings you to the third-party connection page, pulling up your Stripe account as long as you’re logged in. Therefore, you must log into your Stripe account if they prompt you to do so.
Once logged in, choose the Stripe account you want to add to the WooCommerce website.
Click the Connect button.
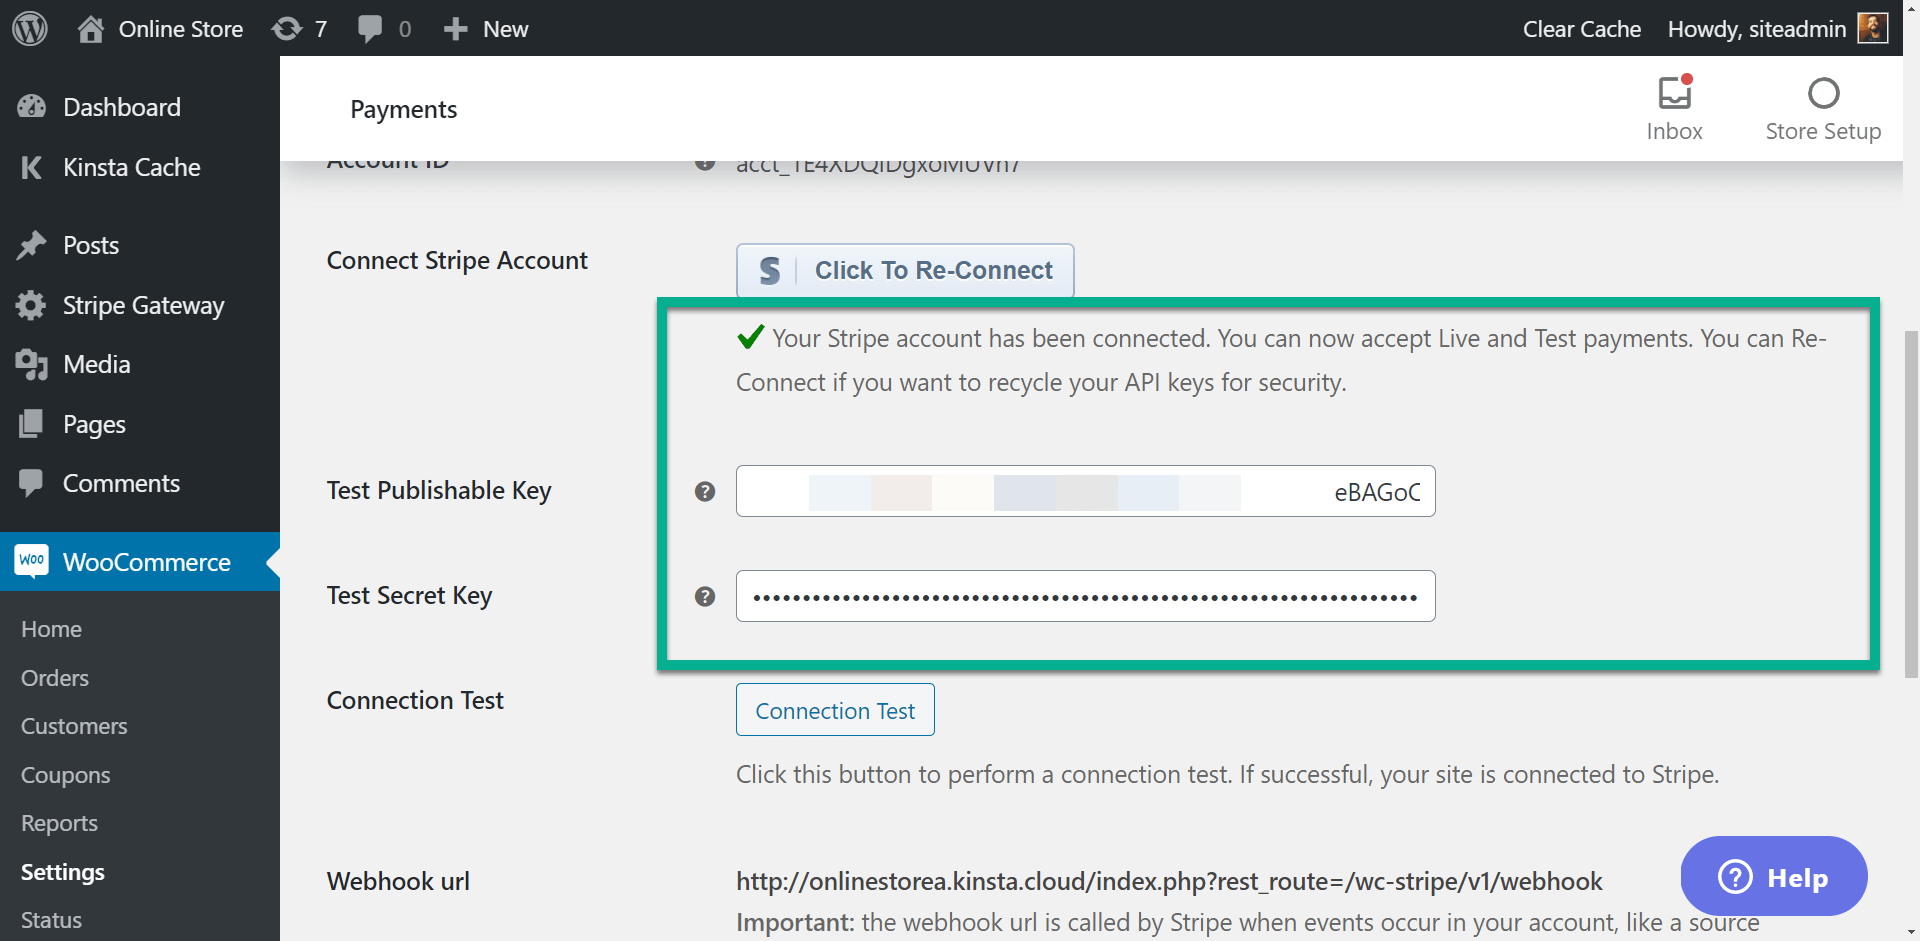
You should now see a green checkmark and a message telling you that the Stripe Account Has Been Connected.
This automatically generates a Publishable Key and a Secret Key, both of which are automatically added to the appropriate fields in the WordPress dashboard.
⚠️ Note: The corresponding keys also show up in the Stripe API section. This is important because you can go to the Stripe dashboard to get the keys if you need to. It’s also a great area to re-generate keys if the automated process doesn’t work.
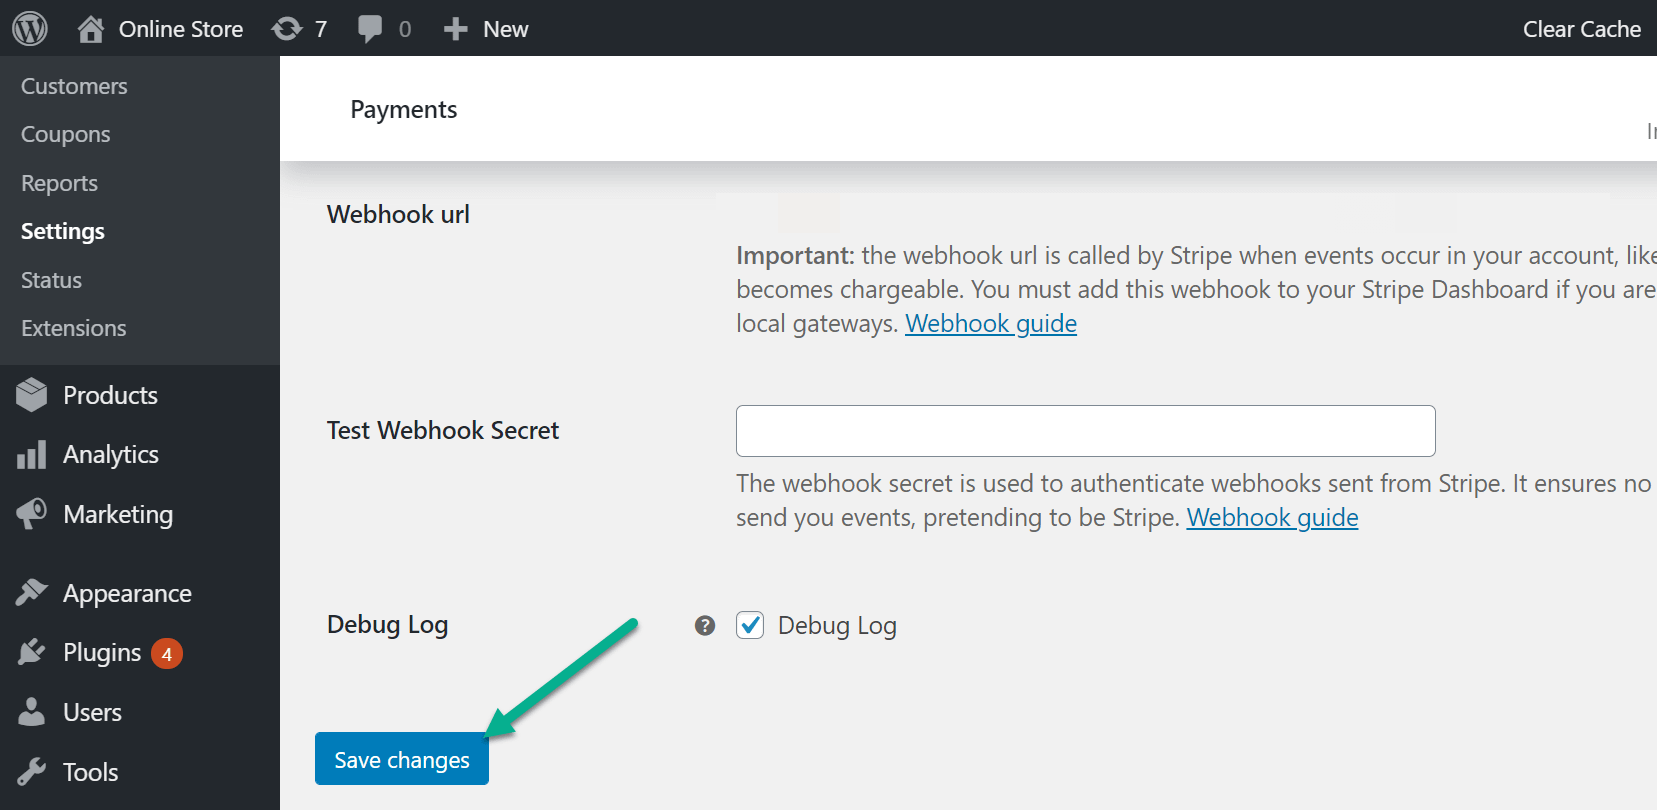
Scroll down on the WooCommerce Payments page to click the Save Changes button. This ensures it stores your Stripe keys within WordPress and readies them for payment processing.
Activate a WooCommerce Apple Pay button 🕹️
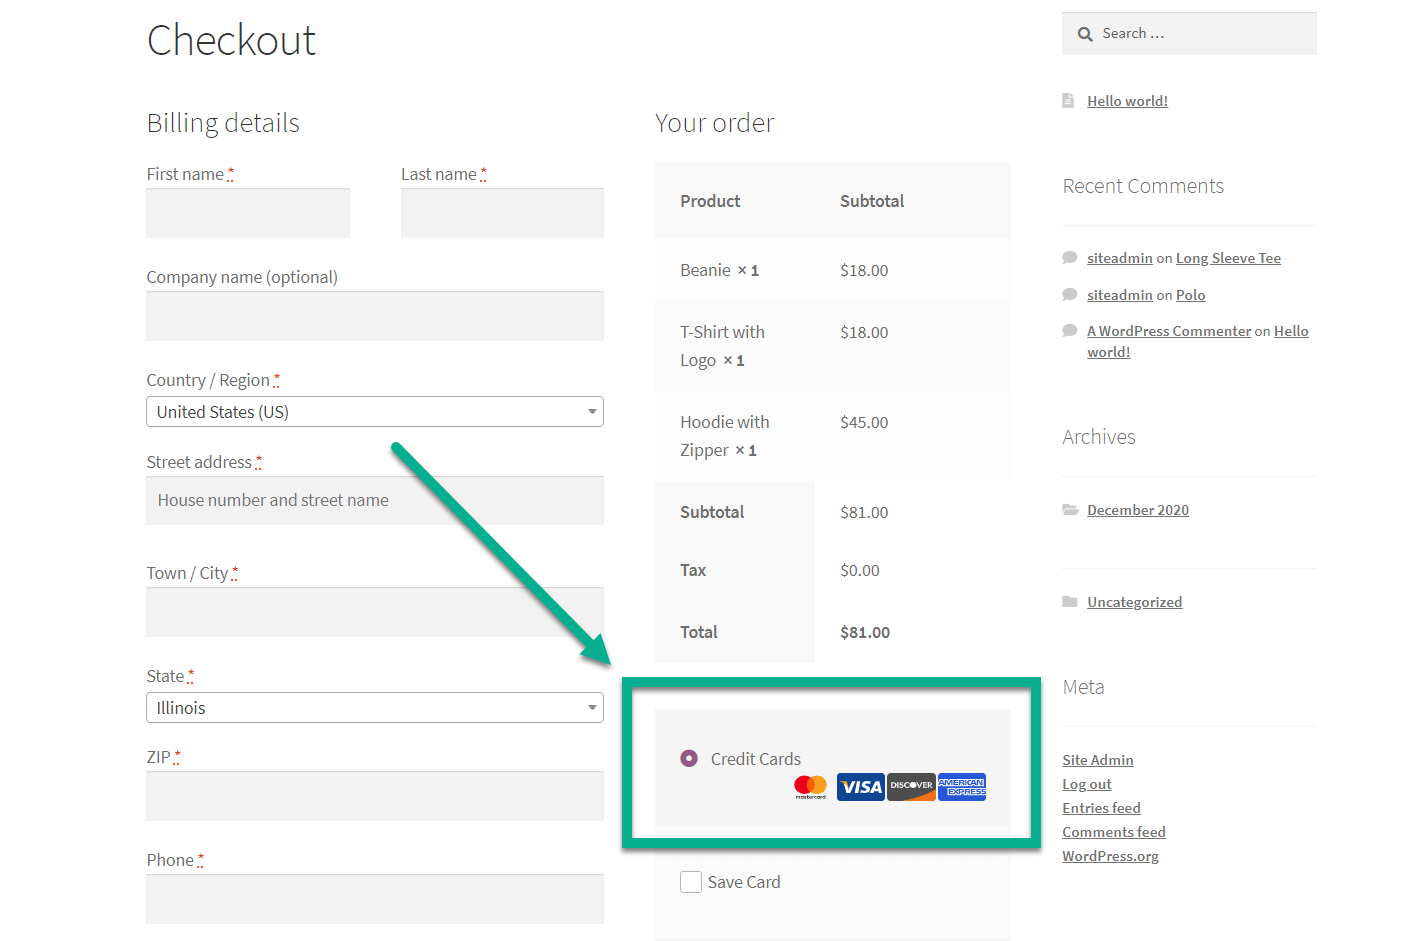
Right now, the Stripe integration with your WordPress site enables processing of credit cards when a customer goes through the store’s checkout.
And that’s a necessary step towards adding the Apple Pay button, but it requires a few more steps.
Back on the WordPress dashboard, go to WooCommerce → Settings → Payments.
Click the Apple Pay tab underneath the Payments section.
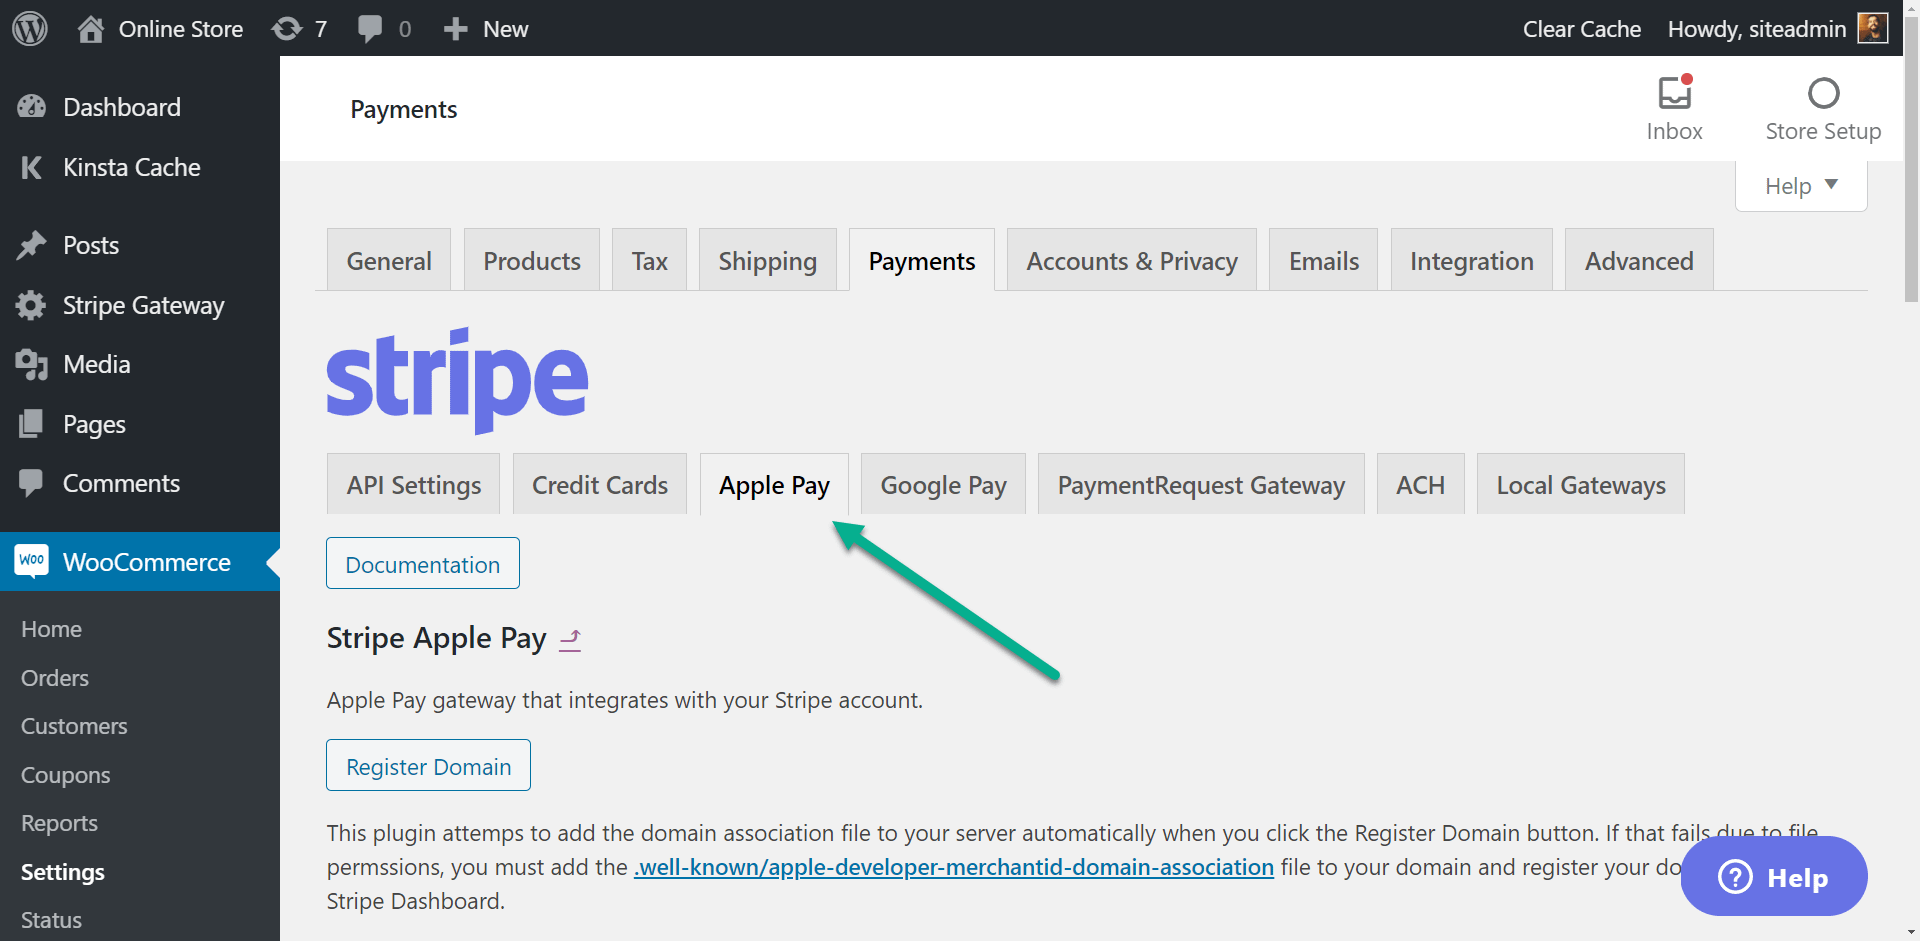
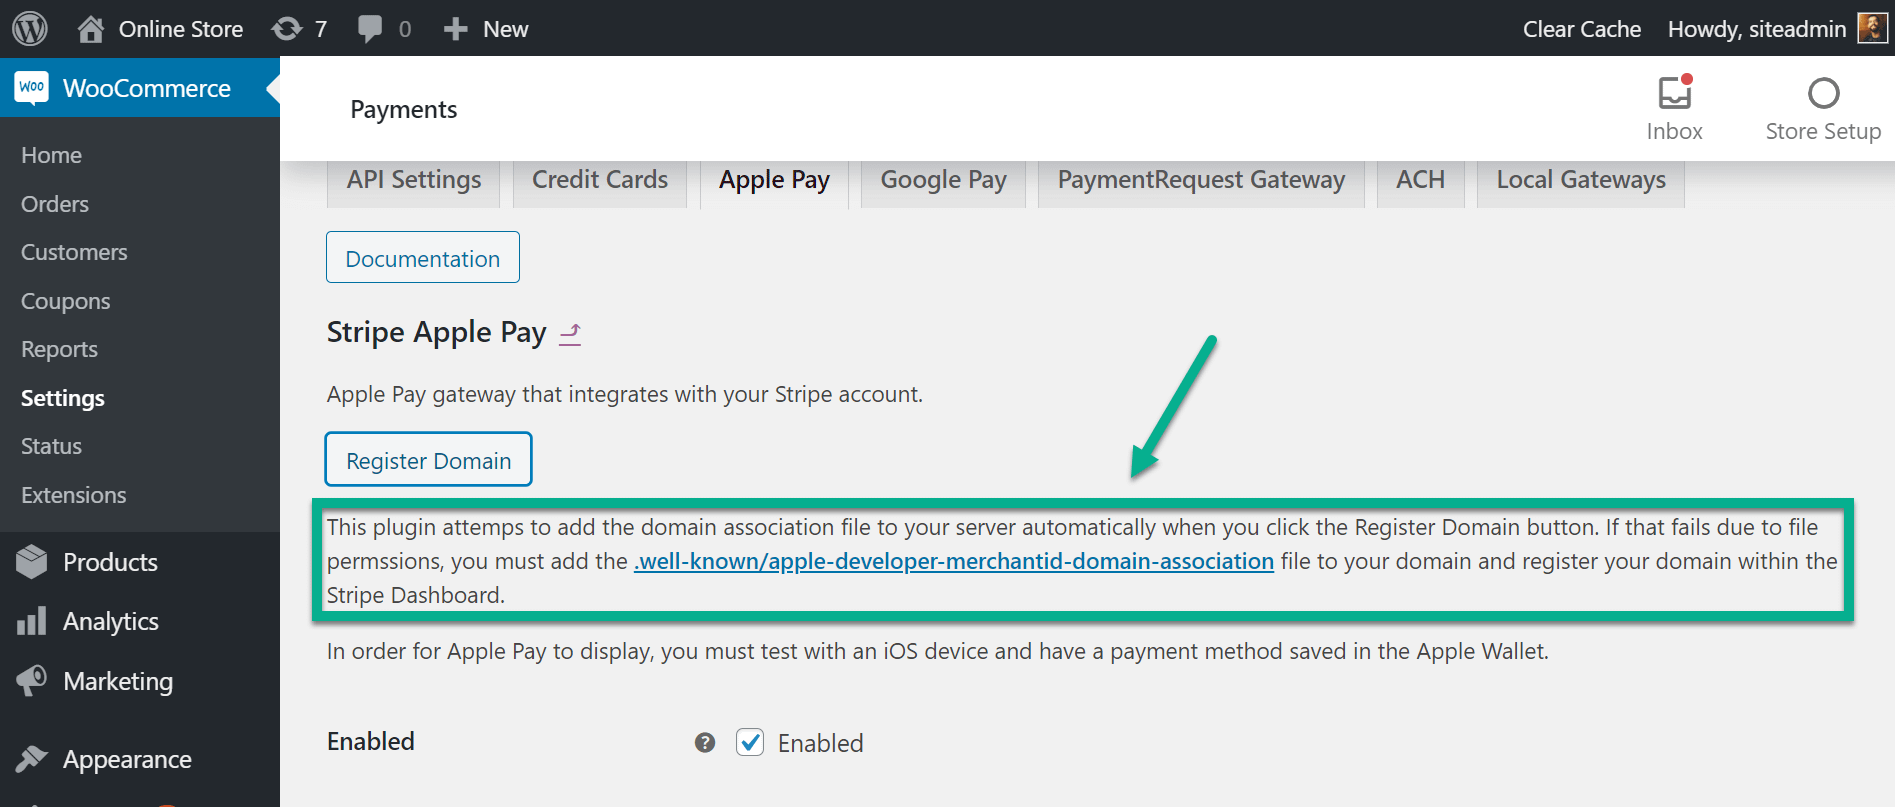
Apple Pay requires Stripe to ensure that you actually own this domain.
Therefore, it asks that a verification document be uploaded to a section of your hosted website files.
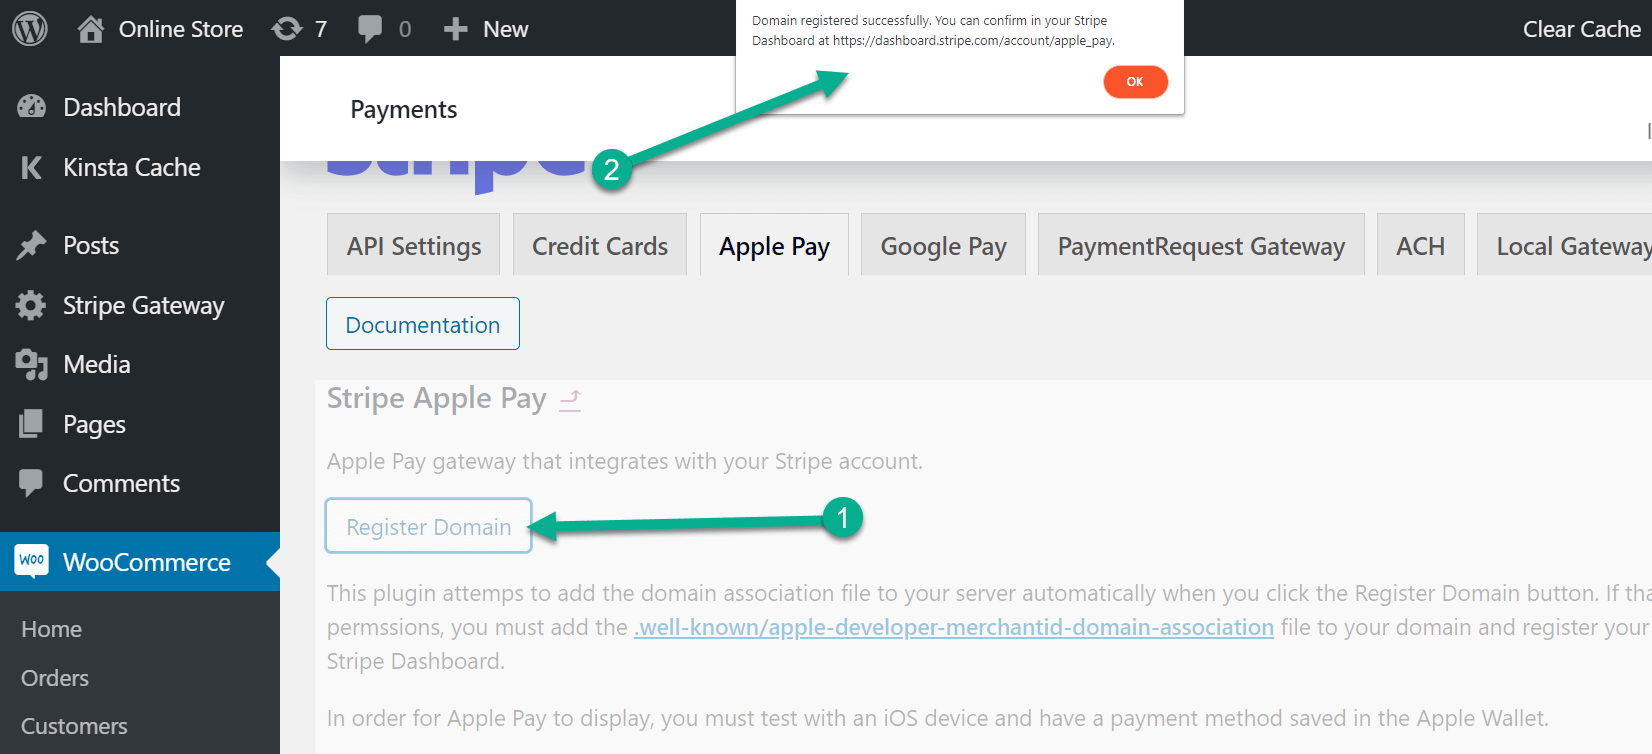
The good news is that you rarely have to handle this process manually. Simply click on the Register Domain button in the Apple Pay section.
After that, you should see a message that tells you the Domain Registered Successfully.
To make sure everything is working properly, go to the Stripe dashboard and click on Settings → Payment Methods → Apple Pay.
Your domain name should appear under the Web domains list.

If you receive a failure message, or you’re unable to find the connected web domain on your Stripe dashboard, follow the link in the WooCommerce Apple Pay Settings to manually upload the right verification document.
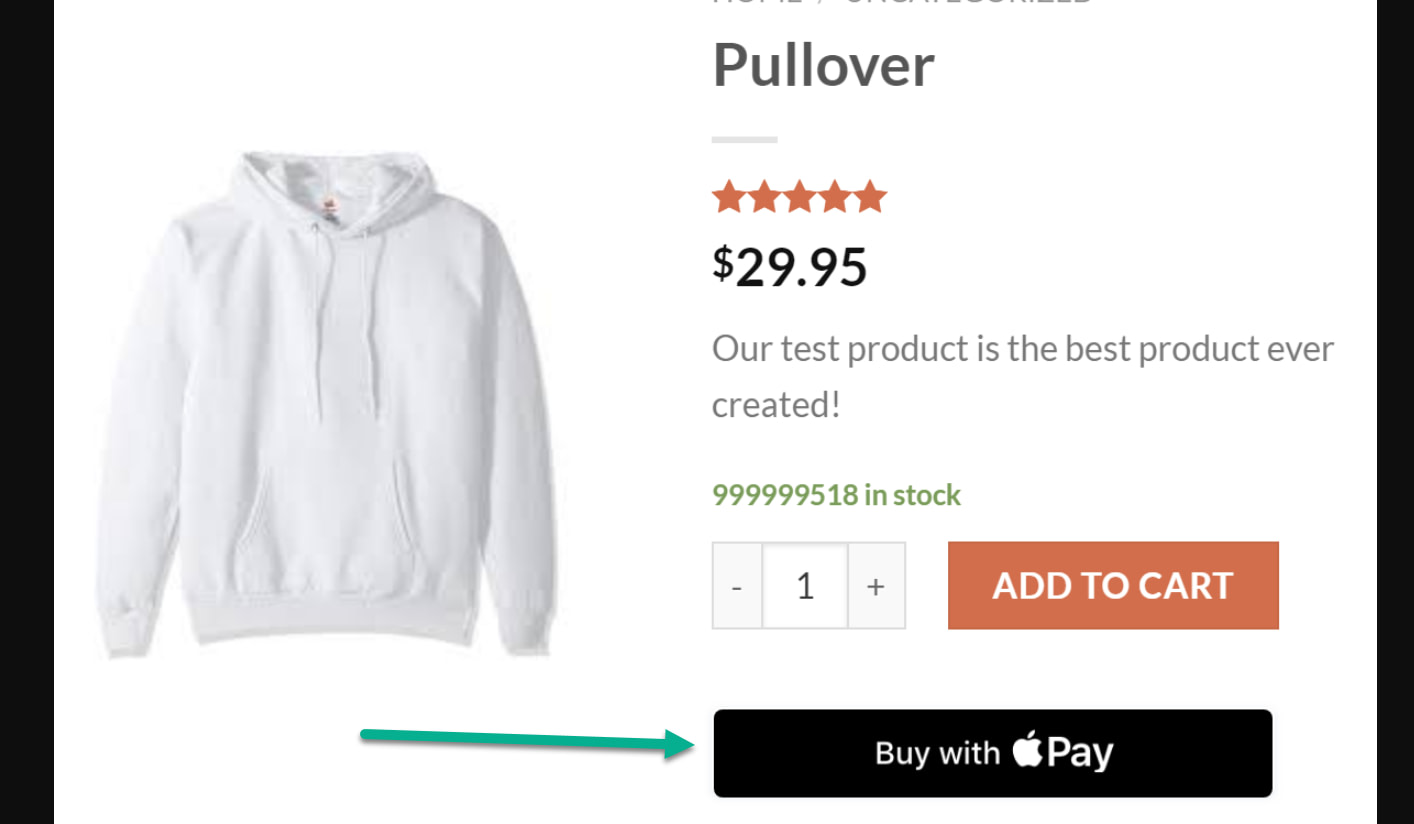
Once that domain name is verified (whether automatically or manually) your checkout module now shows the Buy With Apple Pay button when a customer accesses your website through a mobile device with their Apple Pay account configured.
Troubleshooting WooCommerce Apple Pay buttons 🔧
If you’re receiving errors, or you think the process went smoothly but you’re still not seeing any Apple Pay button on your site, consider these common problems to troubleshoot your issue:
- The user isn’t accessing the site with an Apple Pay-activated mobile device – Apple Pay only works if someone has their Apple Pay account running on a phone, so we recommend linking a credit card to your Apple Pay app in an iPhone in order to test and see how the button works for your own site.
- The site isn’t live – Different API keys get generated for test and live sites. Although Stripe runs fake transactions in its Test Mode, the Apple Pay button won’t show up if you’re in the Stripe Test Mode. You must be live.
- You need an SSL certificate and to be using HTTPS – Stripe blocks payment functionality (especially Apple Pay) if you lack an SSL certificate and an “https://” (not an http://) before the domain.
- The plugin wasn’t able to automatically generate the Stripe API keys – Although the Stripe for WooCommerce plugin usually does the trick, sometimes you must go into the API section of the Stripe website to render them manually.
- The plugin can’t verify ownership – If this is the case, follow the steps provided in the error message to upload a verification file to your website.
Final thoughts on adding Apple Pay to WooCommerce 🏁
WooCommerce Apple Pay benefits both you and the customer with security, more payment options, and a mobile-first approach.
During our testing, we found that the above steps make for the easiest route to adding a WooCommerce Apple Pay button to your website.
For instance, the default WooCommerce Stripe extension offers an Apple Pay button. Or you could opt for an entirely different payment gateway to activate Apple Pay, like through the Braintree plugin.
Regardless of your approach, we recommend testing out at least a few of the alternatives, seeing as how you may enjoy, or require, a different plugin or payment gateway.
For some other thoughts on accepting payments on WooCommerce, check out our roundups of the best WooCommerce payment gateways and some of the top PayPal alternatives. 🔁
Still have any questions about setting up a WooCommerce Apple Pay button? Ask us in the comments!


Or start the conversation in our Facebook group for WordPress professionals. Find answers, share tips, and get help from other WordPress experts. Join now (it’s free)!