
The standard WooCommerce product pages are pretty functional, and good looking as well! But we can do better, especially by coupling WooCommerce and Elementor!
In this guide, we show you how to build custom (and beautiful) WooCommerce product pages to “WOW” your customers and generate more sales.
What you need
Apart from what you already have – a working WordPress installation and WooCommerce added on top of that – you need the Elementor page builder plugin.
Elementor comes in two flavors – free and paid. While there are some customizations available in Elementor free that can be used for WooCommerce, to get to the real good stuff and access to pre-built Elementor Pro templates, you need to upgrade to the pro version. This is going to cost you $59.00 for one site.
Note; Elementor is not the only page builder that works with WooCommerce and lets you build custom WooCommerce product pages. Here are some alternatives if you’d like to explore what else is out there. That said, Elementor is our favorite solution for WooCommerce customizations.
Before you can get to work, you have to install both the Elementor free and Elementor pro plugins on your site:
- Installing Elementor free is simple. Just go to Plugins → Add New and enter Elementor into the search box. Install and activate.
- To install Elementor pro, you first have to complete your purchase on Elementor.com. You’ll be able to download the Elementor pro package from your user profile – it’s a ZIP file. Go to Plugins → Add New and click on the Upload Plugin button. Select the Elementor ZIP from your desktop and upload it to your site. Activate the plugin.
Elementor will ask you to validate your license before everything becomes operational.
Create a new WooCommerce product page with Elementor
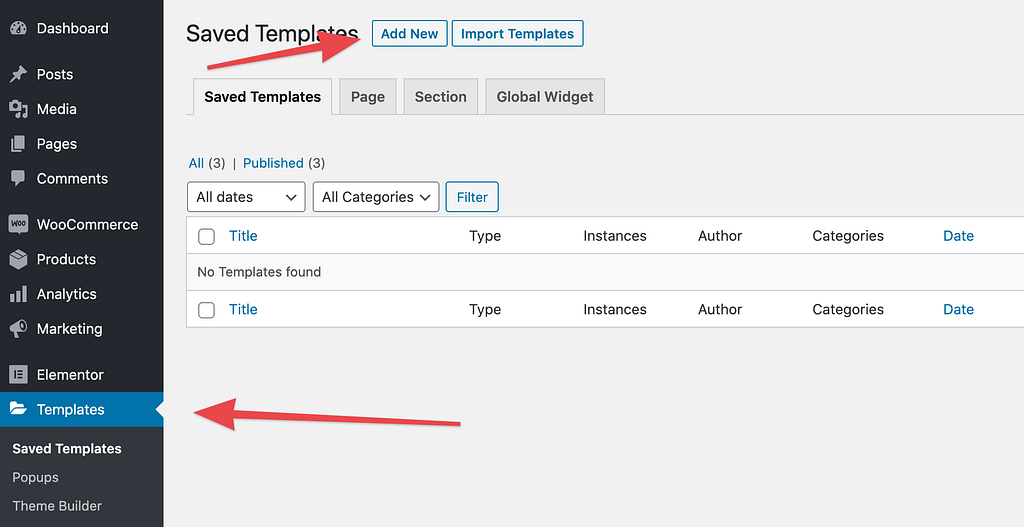
To begin, go to Templates and click on Add New.
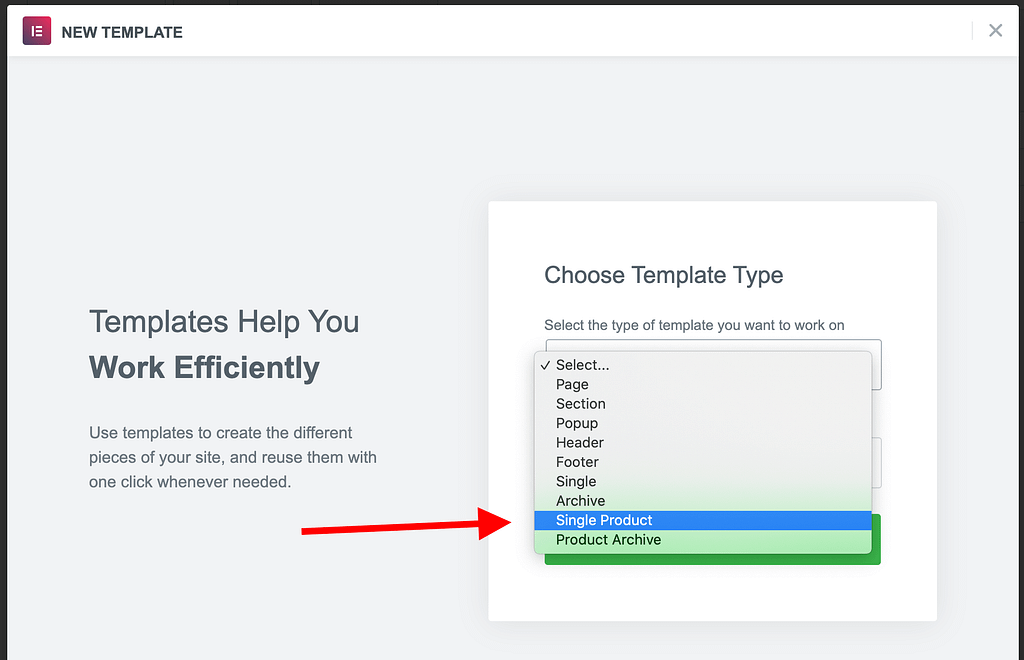
From the list, select Single Product.
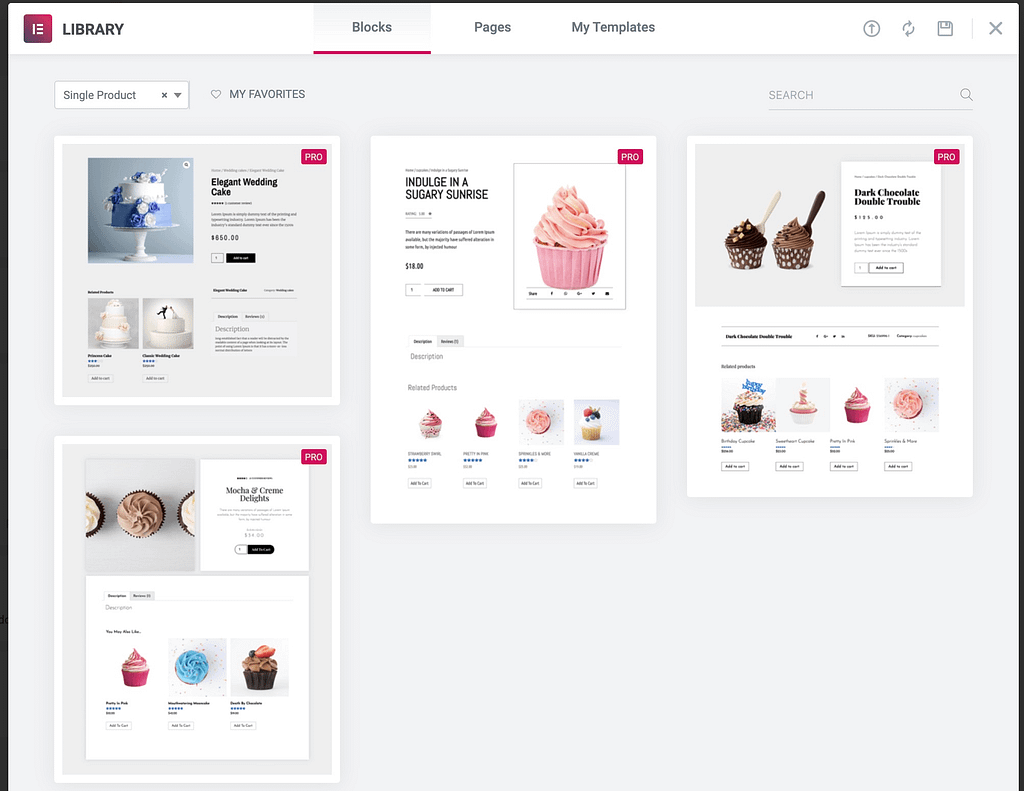
Elementor will show some ready-made WooCommerce product pages templates that you can start with. Picking one that looks the closest to what you want is the best path to take for most users. Creating a product template from scratch will generally take a lot more time. It’s just easier to modify an existing template. Click on Insert to get the template fetched.
You’ll see your template added onto the Elementor canvas. You can now customize the template however you see fit – add new elements to the page, customize the current ones, remove the stuff you don’t need, etc.
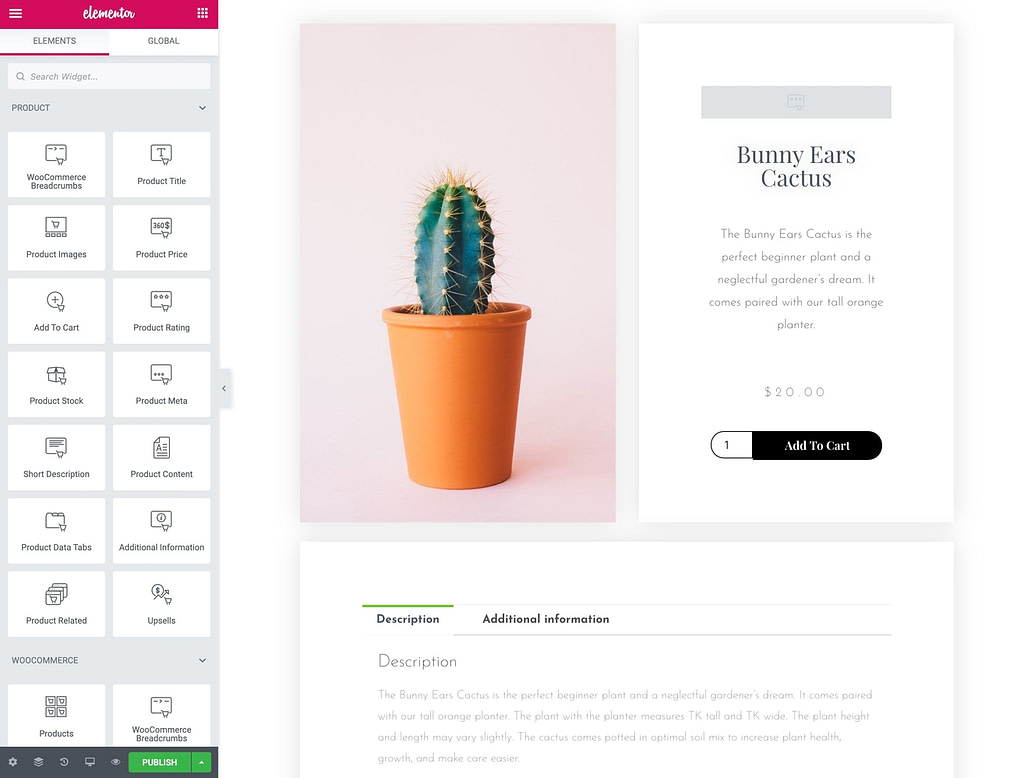
In the left sidebar, you’ll notice a range of WooCommerce elements, such as Product Title, Product Images, Product Price, and every other piece of data that WooCommerce displays about your products.
You can take each of these elements and drag them onto the canvas in the exact spot where you need them.
Here are some customizations you can do first:
Add your branding and colors
The stock Elementor product templates look nice, but they probably don’t match your brand perfectly. One quick change we can do to fix that is to adjust the background colors, font colors, and various typography settings in general.
To adjust any block that’s on the page, click on the pencil icon in the top right corner of the block.

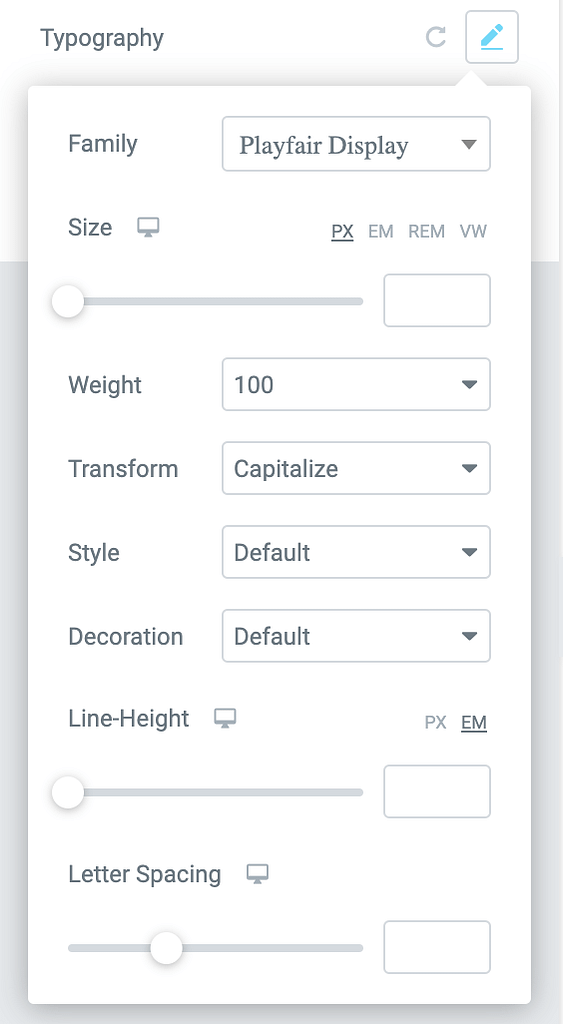
Then, in the left sidebar, switch to the Style tab. This is where you can perform all styling- and looks-related customizations. For example, for the Product Title block, you can change the color of the text, the typography, and the shadows.

Let’s click on Typography. This will show another box where you can change the font and all the parameters of it.
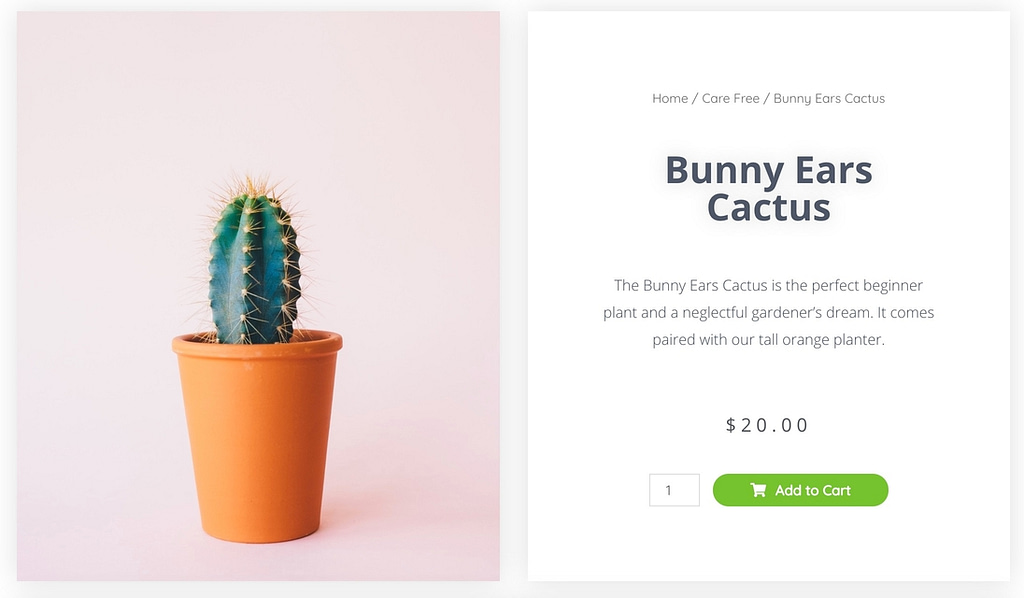
Proceed through all the texts one by one and edit them until they look like you want them to. Pay special attention to what the price block looks like – it needs to be clearly visible so that it doesn’t confuse the customer.
Realign/move the product description
WooCommerce displays your product descriptions in a handful of places. We don’t need to get into all the specifics right now, but let’s just focus on two things:
- the short description
- your product data tabs
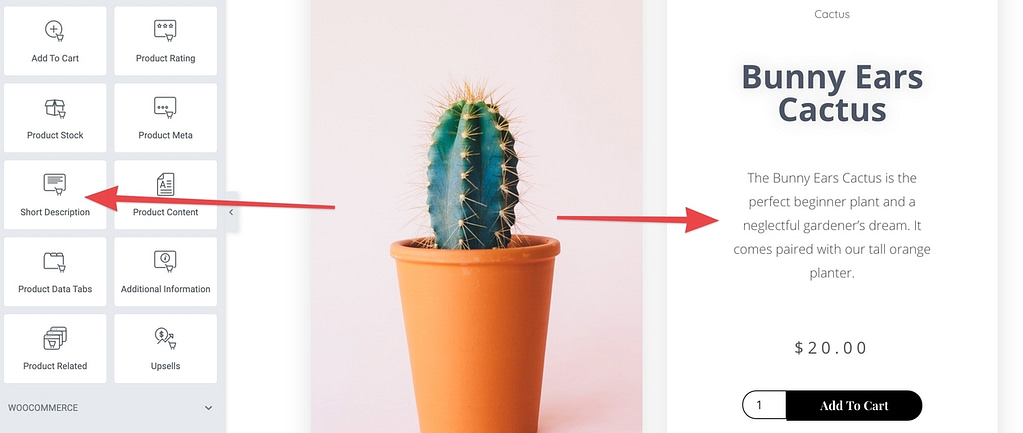
The short description is just what it sounds. WooCommerce takes this text from the Short Description box (one of the fields you fill out when creating a new product). It’s a good idea to have the short description displayed somewhere near the top of the product page.
You can take Elementor’s Short Description block and drag and drop it where you need it.
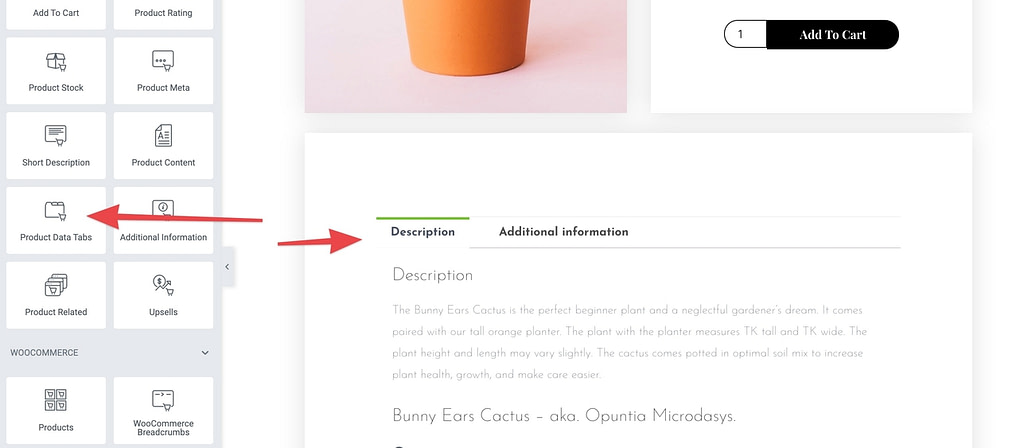
The product data tabs is effectively the block that houses the main information about the product. Make sure it’s in a visible spot in your new WooCommerce product page template.
Don’t forget to style the colors and typography of those blocks as well.
Tweak your “add to cart” button
The “add to cart” button is the single most important button on any eCommerce site. You really want it to stand out and catch the eye of your customer.
You can use two different block types for the “add to cart” button in Elementor. There’s the Add to Cart block, and the Custom Add to Cart block.
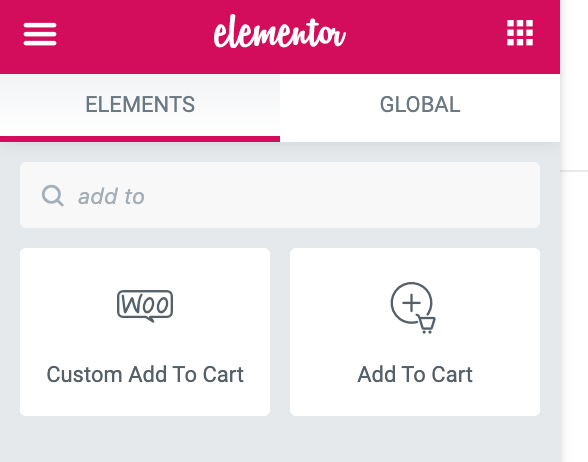
Experiment with both of them to see which is better in your case. Click on the pencil icon and see what’s available in the sidebar when it comes to the given block’s settings.
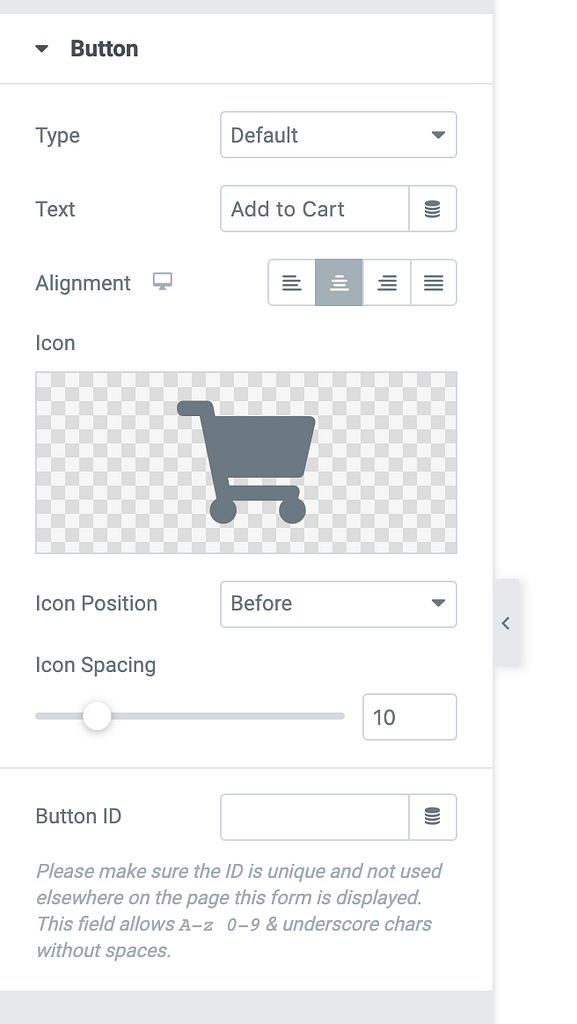
With a couple of clicks, you can get your button looking much better.
Add/remove product ratings
Displaying product ratings can be a great way to give your customers that final nudge to buy your stuff. The only problem is that you need to have some ratings in the first place. 🤷♂️
When your store is brand new, and you don’t have any ratings yet, it’s better not to have the ratings block on the page. Right click on the Product Rating element and delete it.
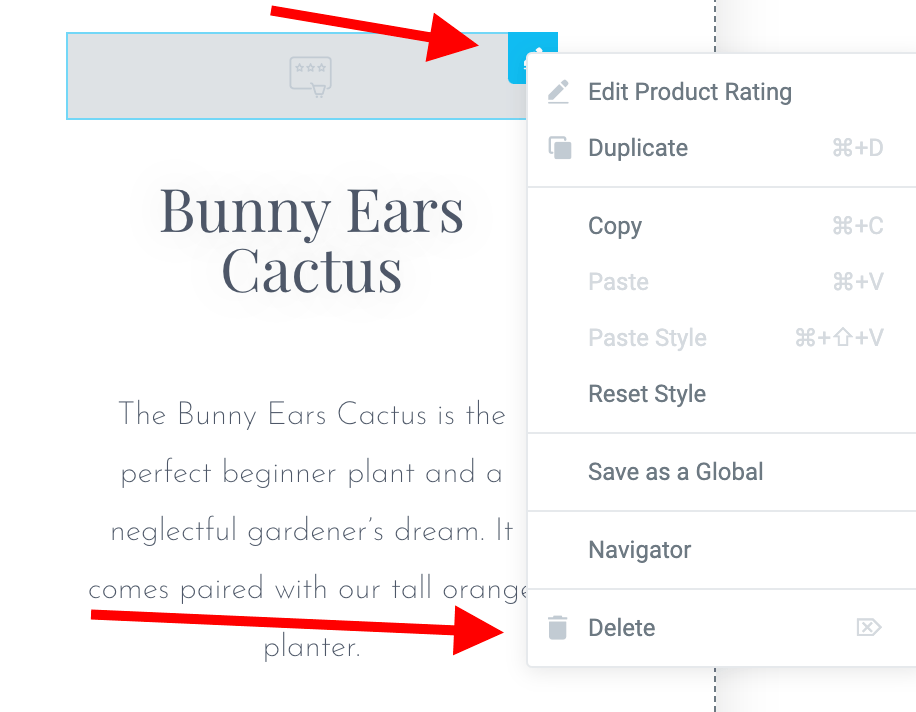
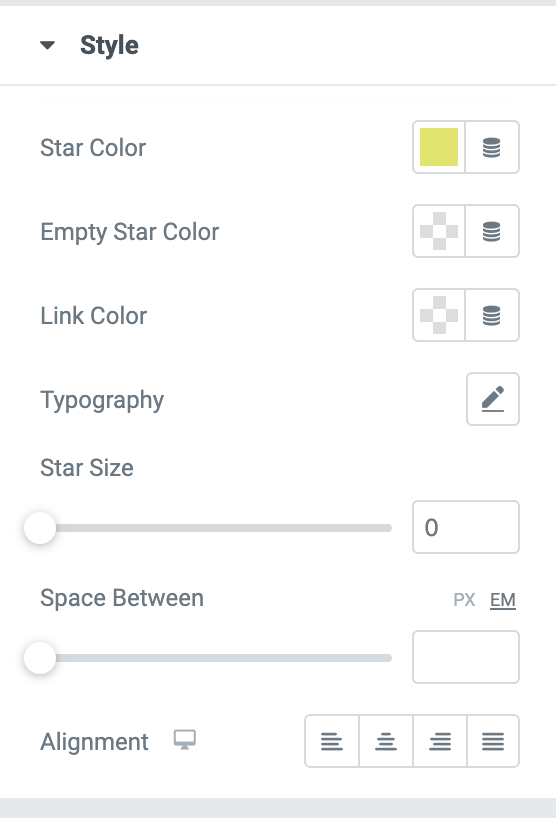
Later on, you can add that block back in and even customize how it looks. Some of the things you can change are the colors of the stars and the spacing of things.
Tweak the mobile and tablet views
These days, more people access the web from their smartphones than from desktop computers and laptops. For that reason, your store must be optimized for mobile viewing, or you will lose sales!
WooCommerce is already mobile-optimized out the gate, but since we are creating a custom product page, we need to make sure that your new product template looks good as well.
In the bottom left corner of the Elementor interface there’s a button labeled Responsive Mode.
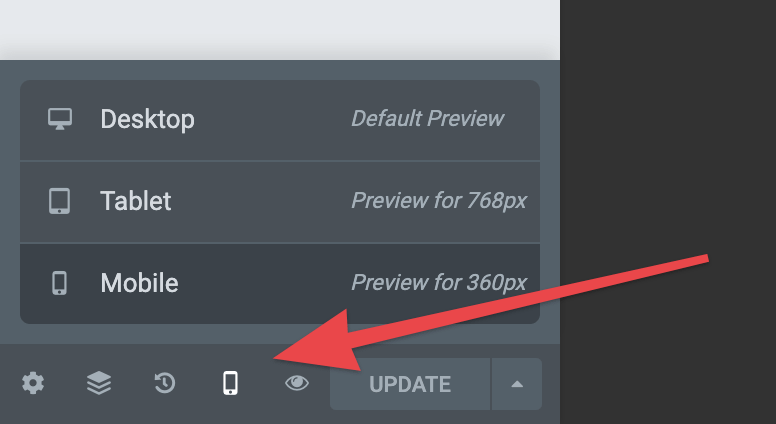
When you click on it, you will be able to switch between the Desktop, Tablet, and Mobile views. Pick one of them and tweak the design if needed.
What’s cool here is that you can change the display settings of your blocks in a way that they take effect only on mobile or tablet. For example, if you think that the price should be bigger on mobile, click on the pencil icon in the price block, then click to edit the typography, and lastly switch to Mobile next to font size:
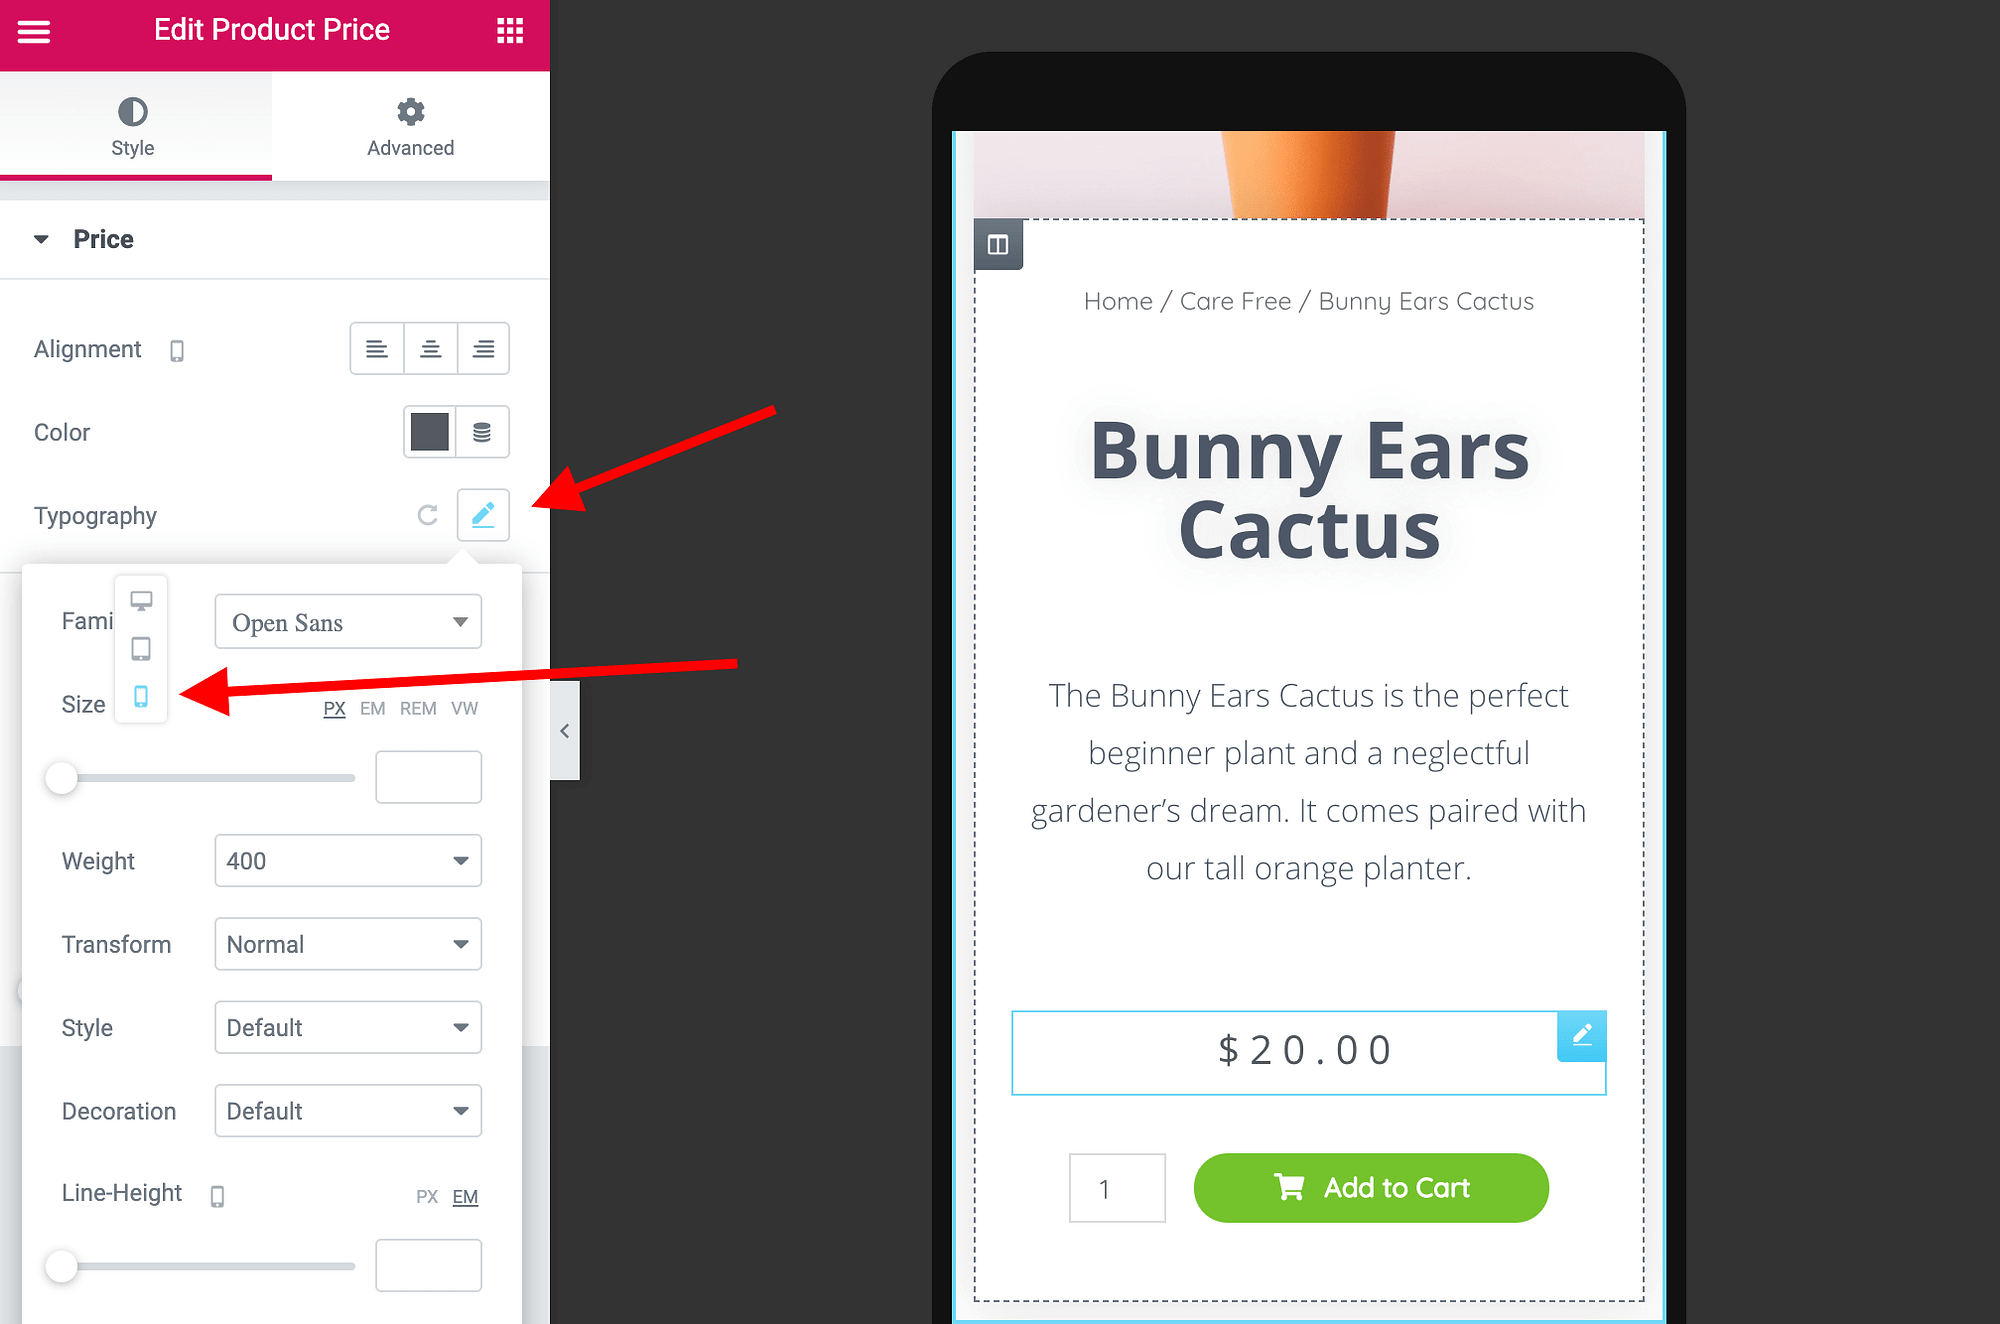
If you change the font size now, only the mobile view will be affected.
Go through your template element by element until you have the whole thing configured for mobile and tablet viewers.
Publish custom WooCommerce product pages
When your new product template is ready, click on the Publish button in the bottom left corner of the Elementor interface.
Elementor will ask you to add a condition for when the template should be used.
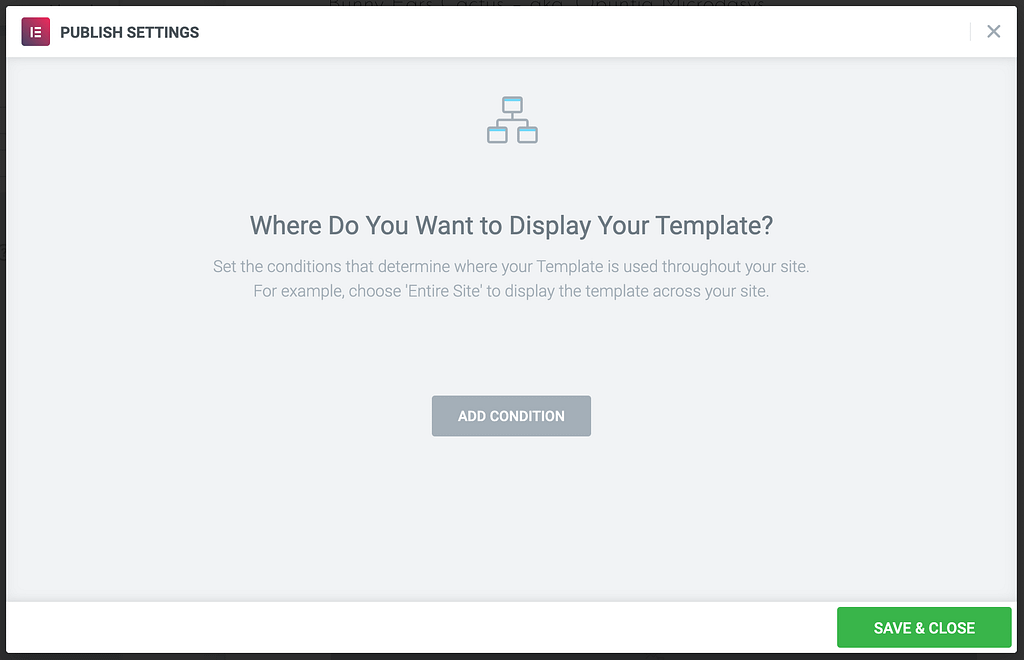
To have the template used for all products, simply select “Products” from the list, like so:

Click on SAVE & CLOSE to finalize everything.
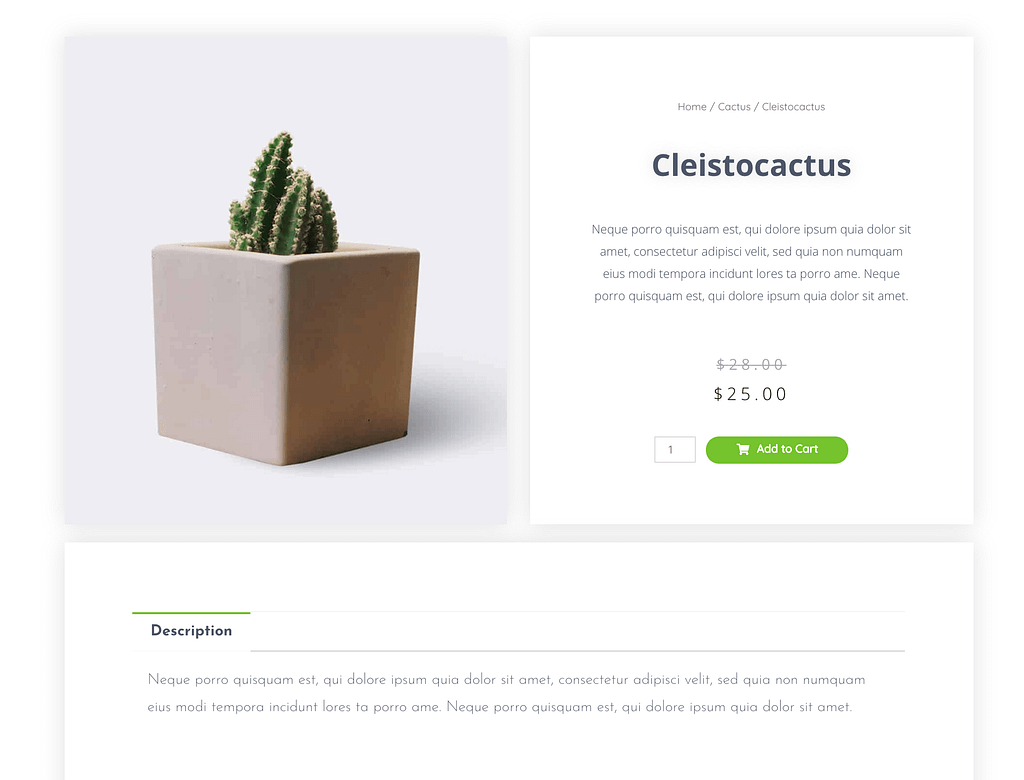
That is it! 🍾 With this done, your custom WooCommerce product page has been saved and replaced the default product page.
You can see your product page in action when you visit any of the products in your store.


Or start the conversation in our Facebook group for WordPress professionals. Find answers, share tips, and get help from other WordPress experts. Join now (it’s free)!