There is no shortage of email marketing tools available online. However, almost all of them require you to sign up to a new platform and then figure out how to integrate it with your website. Wouldn’t it be great if there were an alternative that enabled you to create a WordPress newsletter campaign within the platform you’re already using?
If your answer is yes, then you’re in luck – MailPoet enables you to do just that. It also happens to be rather easy to use, which isn’t surprising since it’s a WordPress plugin. If you’d like to skip the arduous process of learning to use an entirely new platform to manage your newsletter campaigns, read on.
In this article, we’ll introduce you to the benefits of running a newsletter campaign from within WordPress. Then we’ll explain how to use MailPoet to do so in three steps.
Let’s get started!
How running a newsletter campaign from within WordPress can benefit you

Newsletter campaigns are one of the best and most straightforward marketing tools at your disposal. They can benefit you by:
- Directing more traffic to your website. Once you have a healthy list of subscribers, you may start seeing serious bumps to your traffic when you link back to your site from your campaign emails.
- Prompting more conversions. From time to time, you might use your emails to promote specific products or services, which can lead to more conversions than just posting on your site.
- Giving you an evergreen asset. Google search rankings can drop, but your email newsletter is always there.
If newsletter campaigns are so useful on their own, being able to manage them within WordPress is even better because of how much it streamlines your workflow. You can always opt for a third-party service, but handling all the tasks related to your newsletter from your WordPress dashboard makes everything a bit more convenient.
Plus, depending on the tool you choose, you may even get access to an array of features that rivals big names like MailChimp. Let’s find out more about one of those options.
How to create a WordPress newsletter campaign using MailPoet (in 3 steps)
For this tutorial, we’re going to use the MailPoet WordPress plugin. It’s not the only option out there, but it is one of the most polished, and it brings plenty of useful features to the table. In fact, it almost feels like using a regular email marketing service.
Before moving on to the first step, you’ll want to install and activate MailPoet. When you’re ready, keep scrolling down!
- Step #1: Place a signup form on your site
- Step #2: Configure your sending options
- Step #3: Create your first campaign email
Step #1: Place a signup form on your site ⚙️
To effectively grow your newsletter subscriber list, the first essential step is to install a signup form on your website. MailPoet makes this straightforward, offering two main methods: using a built-in widget or embedding forms within your website’s pages and posts.
Adding a signup widget
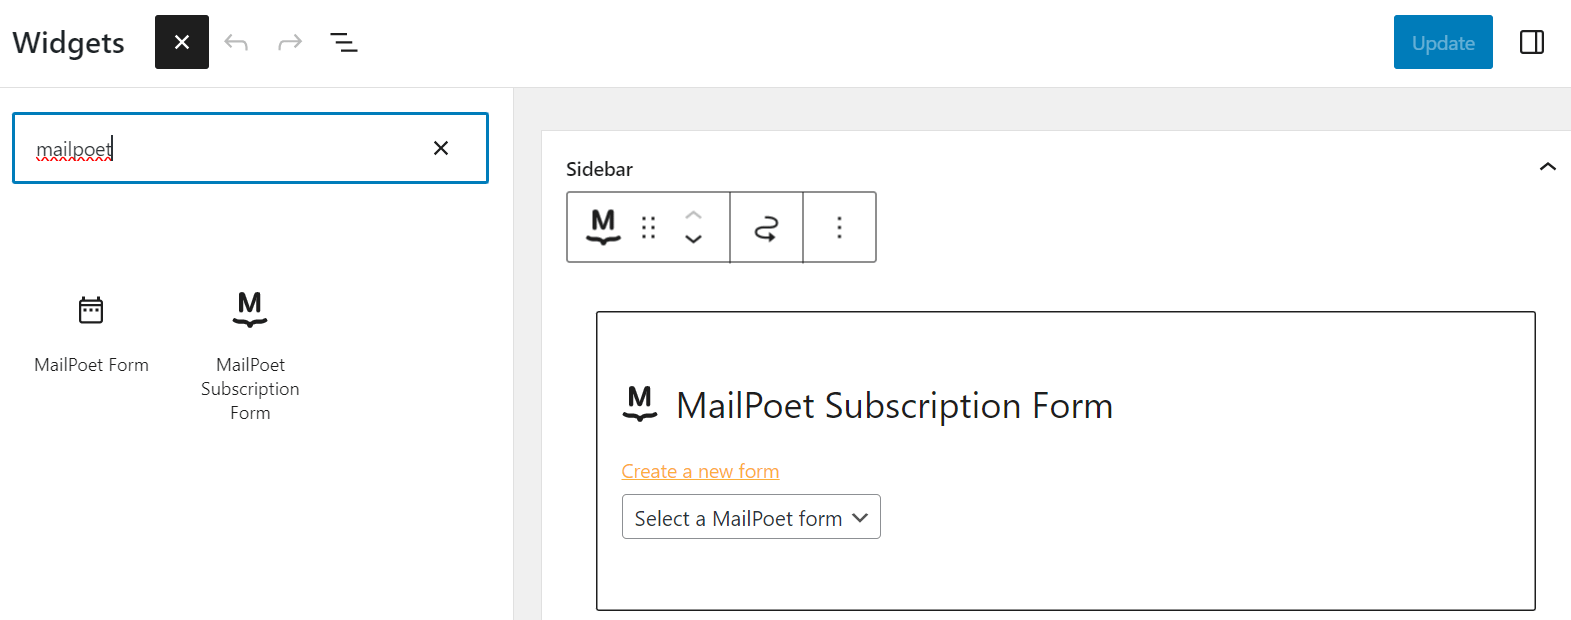
- Go to your dashboard and navigate to Appearance > Widgets.
- Click on the + icon and type “MailPoet” in the search bar.
- Drag the MailPoet Subscription Form widget to your desired location on the page.
Embedding signup forms in posts and pages
- Go to MailPoet > Forms in your dashboard.
- From here, you can either edit an existing form or create a new one.
- Choose a template and customize it using the editor panel on the right.
- After finalizing the design, click the Settings icon to specify which pages, posts, or product listings will display the form.
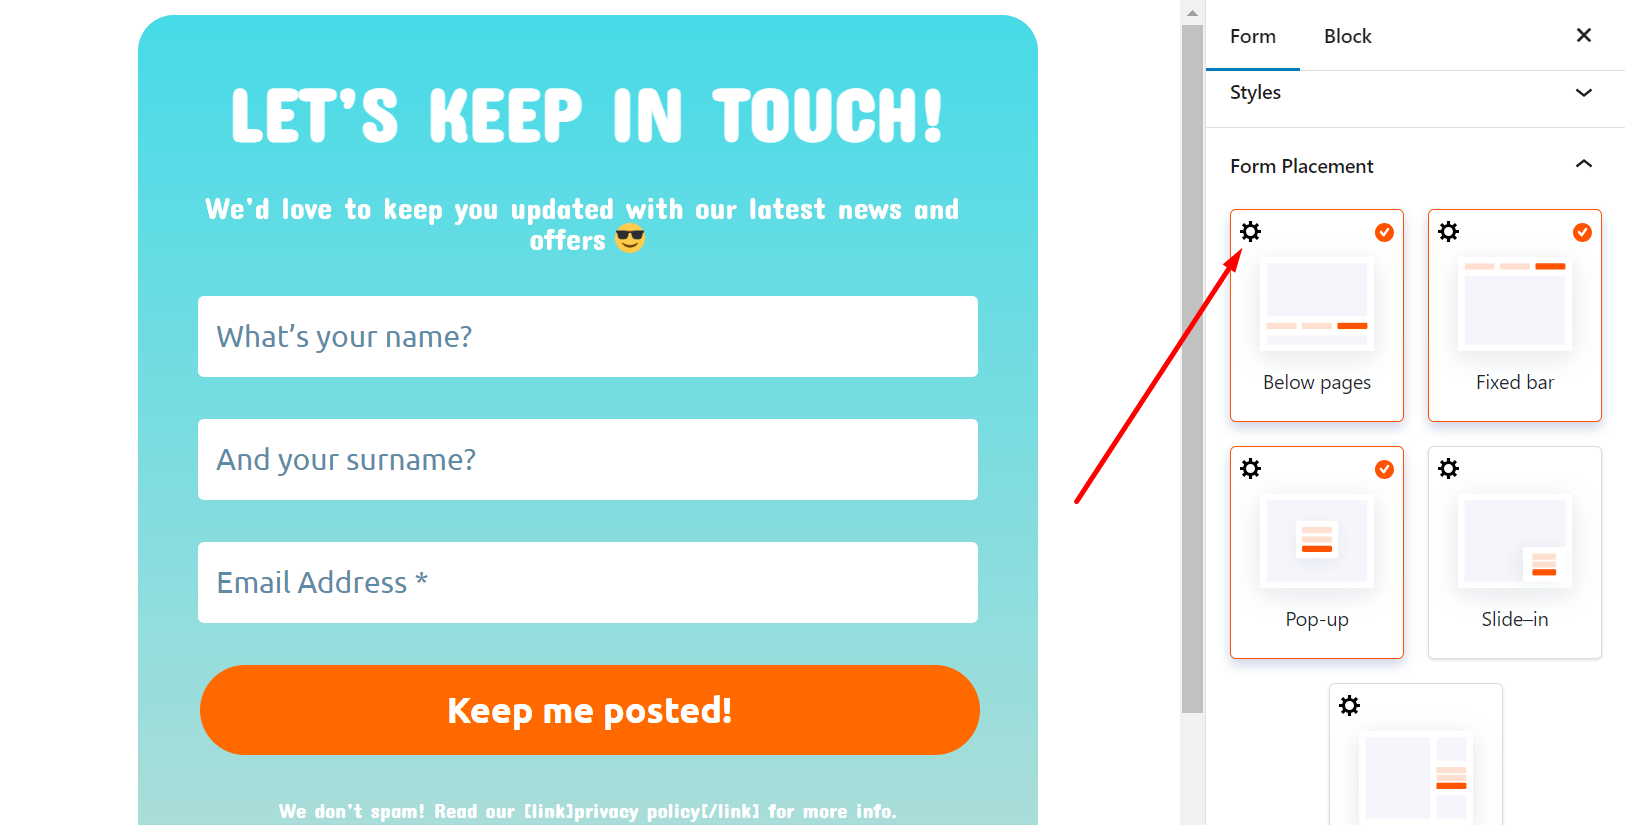
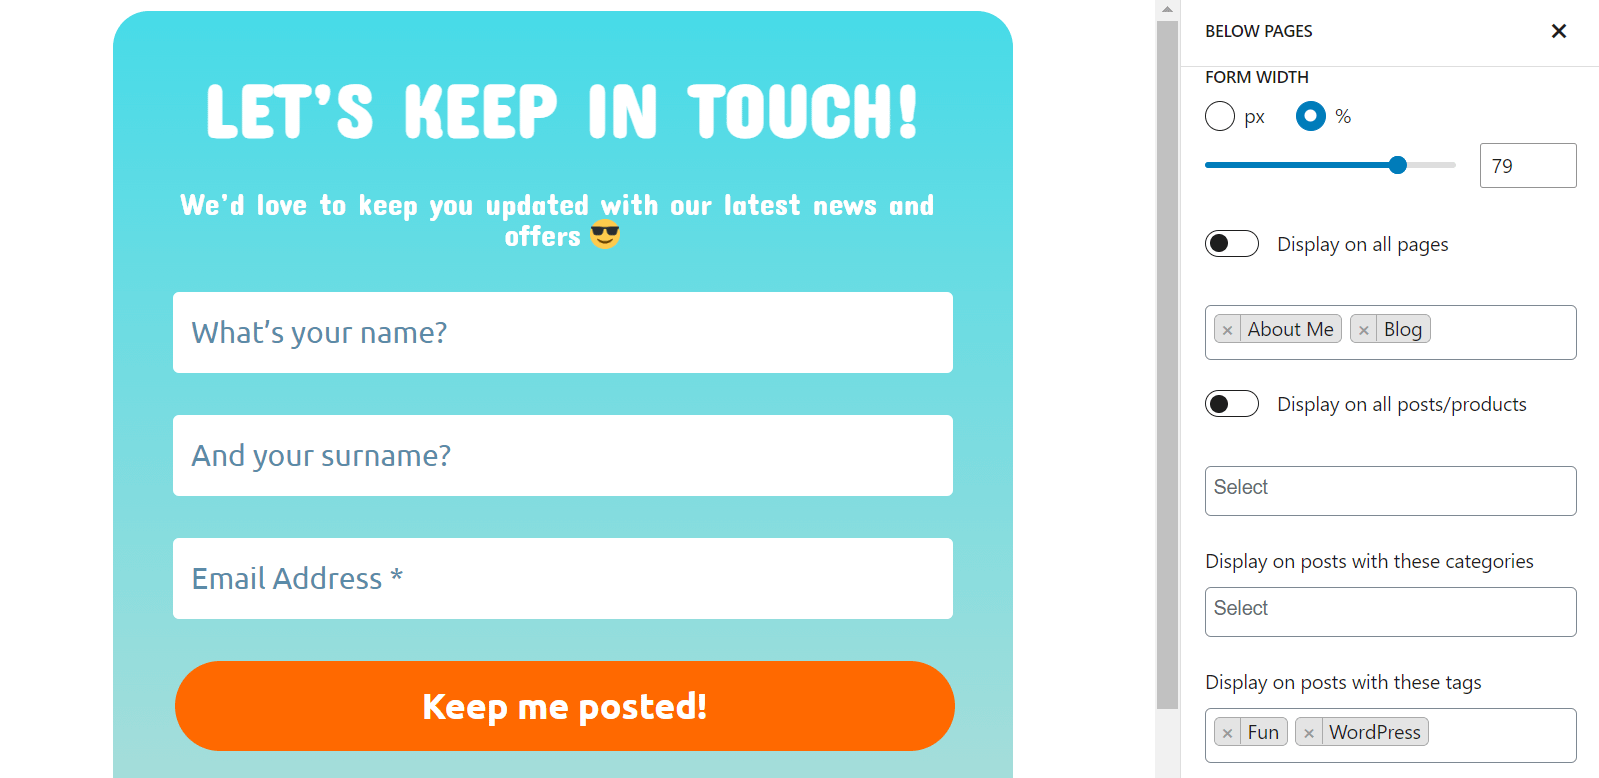
Note: You can opt to display the form across all pages or limit it to selected ones. Similarly, you can display the form in posts that belong to certain categories or have specific tags.
Configuring confirmation emails
You’ll also need to configure your newsletter subscription confirmation email. You can do so by going into MailPoet > Settings > Signup Confirmation and personalizing the default email:
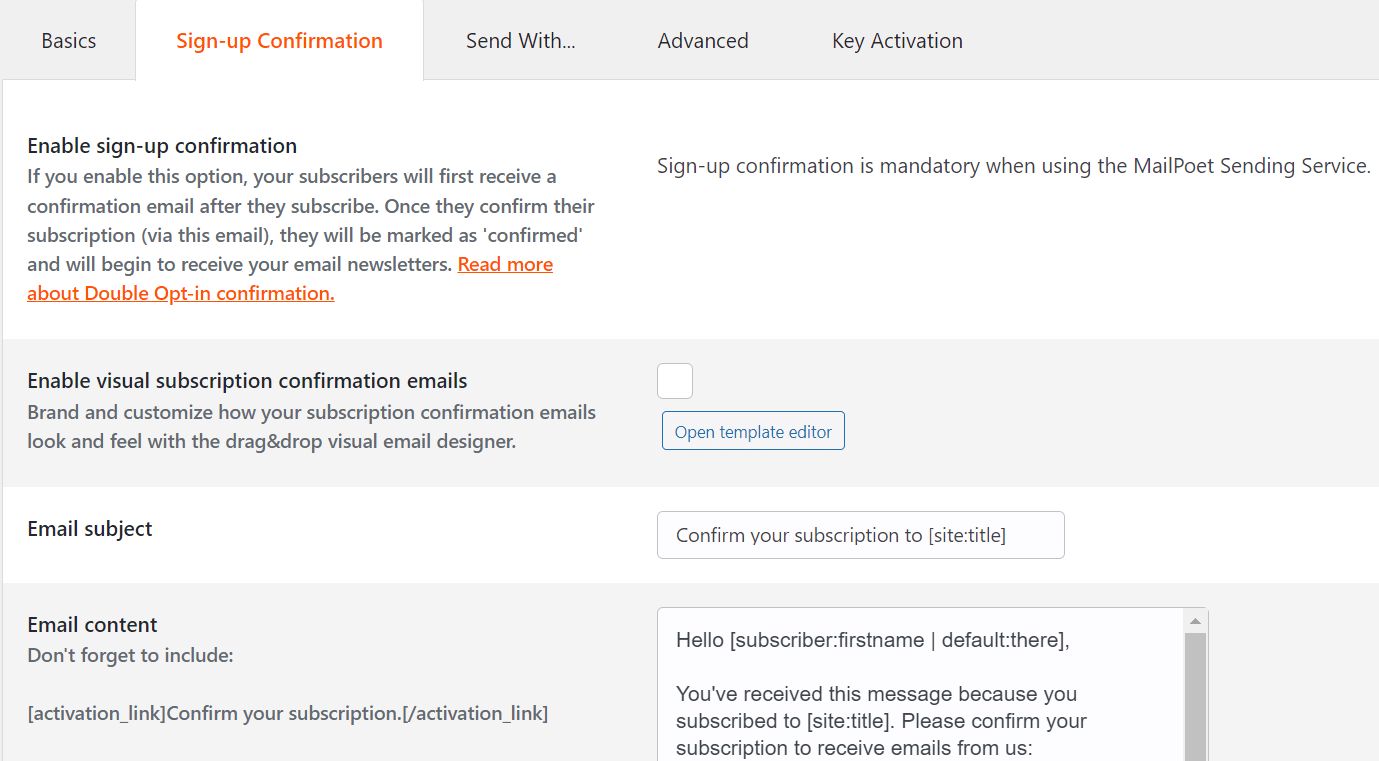
If you’re not into the classic confirmation email, you can create a visual confirmation email by enabling it as seen in the picture above. If you go with this option, you can build your own subscription confirmation template that your subscribers will receive via email instead of just plain text.
That’s it! Now let’s talk about how to customize the way your newsletter emails are sent.
Step #2: Configure your sending options 🖱️
When setting up your WordPress newsletter with MailPoet, you have three primary choices for the sending service: MailPoet’s built-in option, your own website’s server, or a third-party SMTP provider.
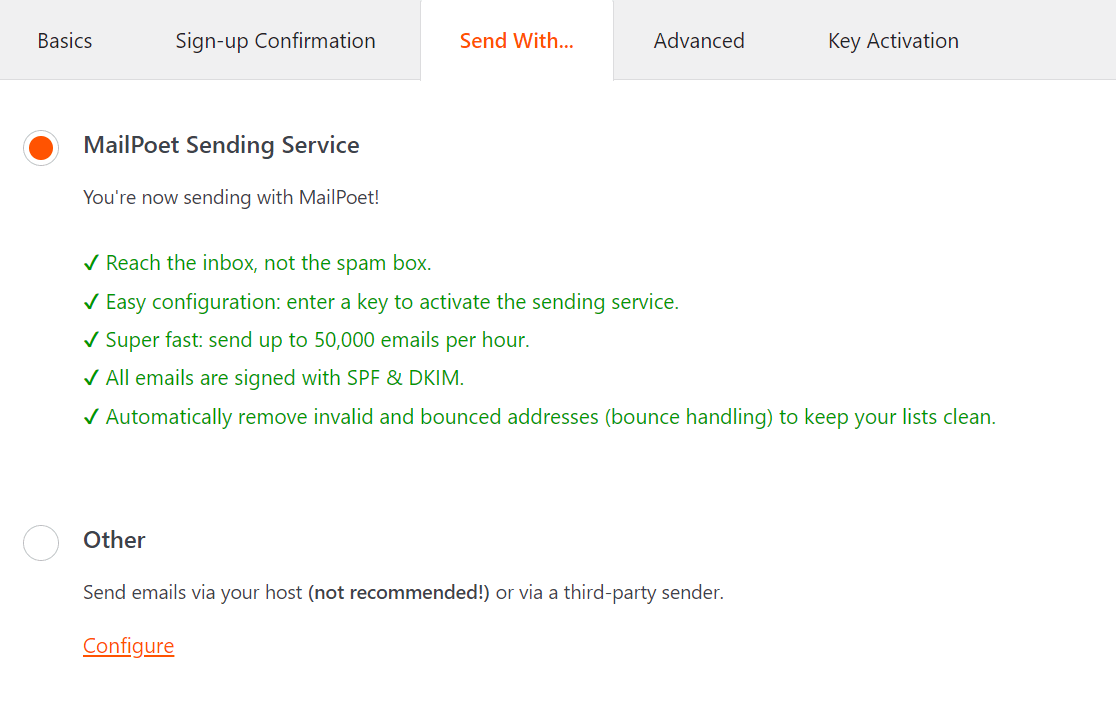
The easiest thing is to go with MailPoet’s own sending service. You just need to get your MailPoet activation key and you’re all set.
If you’re using a shared server, we recommend strongly against choosing your own website, since you may run into problems where your emails go to the spam folder.
If you do want to configure a third-party SMTP provider to send your emails, you’ll need four things:
- Provider’s Hostname
- Login Name
- Password
- The right SMTP port number
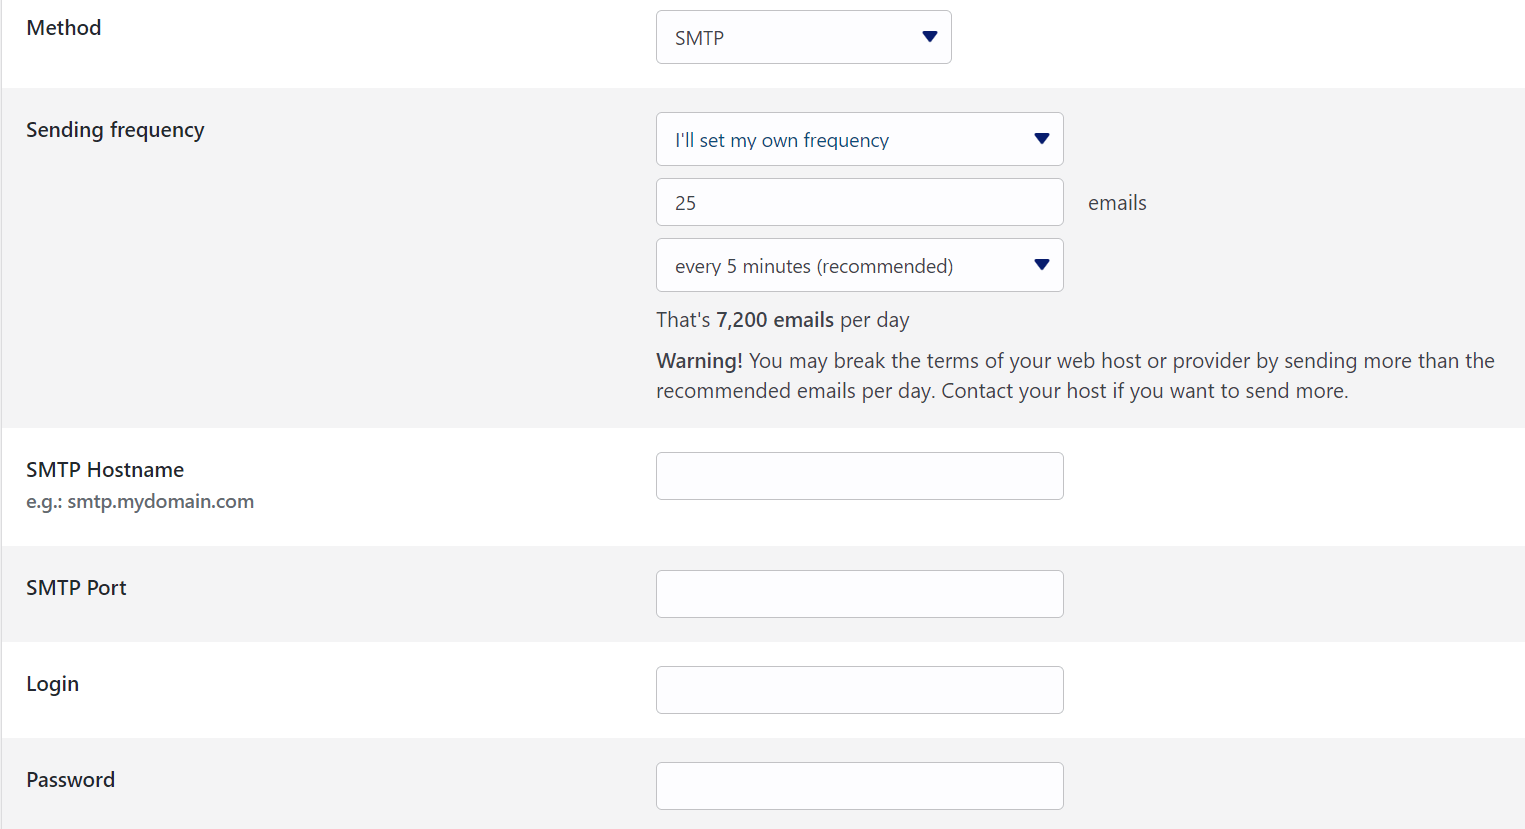
MailPoet recommends that most users use the SendGrid service, since it enables you to send up to 400 emails for free. The plugin developers provide a thorough guide to integrating both platforms on their website.
Of course, you may always opt for an alternative if SendGrid isn’t your cup of tea. The setup process will remain largely the same no matter which SMTP provider you use.
Step #3: Create your first newsletter campaign email 📧
At this point, you’re ready to set up and schedule the first newsletter in your campaign. To do so, head to MailPoet > Emails > Newsletters > Create. Select what kind of email you want to send (e.g. newsletter, welcome email, engagement email) and pick a template.
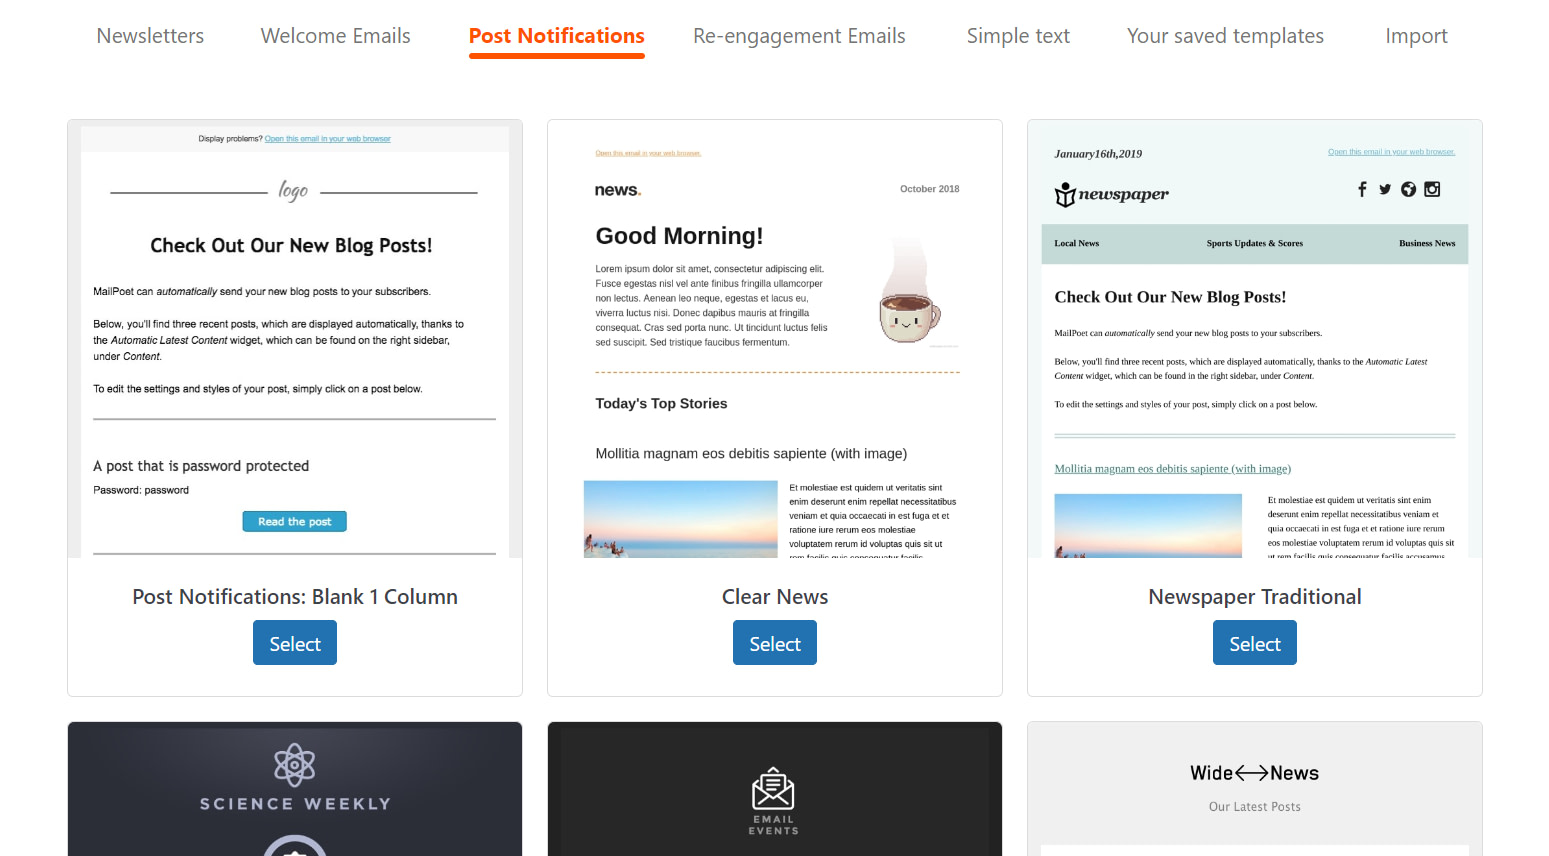
Now it’s time for the fun part. MailPoet enables you to edit your email using a simple drag-and-drop editor. You can include text, titles, images, and social sharing icons:
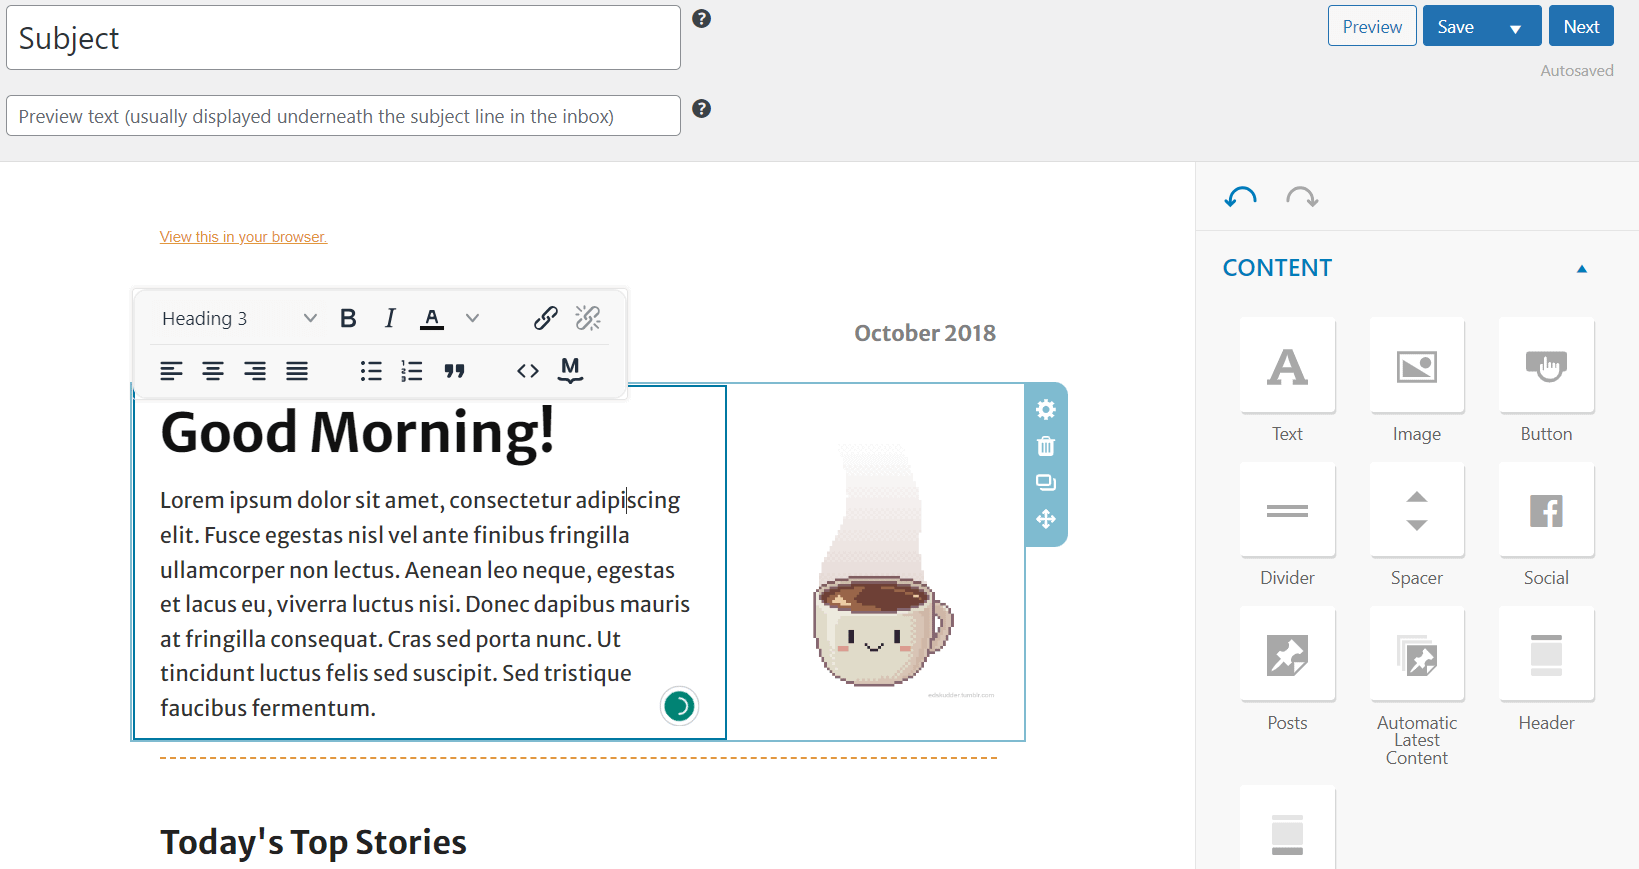
All you have to do is customize the elements you want and drag them into place. For example, clicking on text or titles will enable a miniature editor:

Mousing over images, on the other hand, will display alignment choices, as well as an option to add links:

It’s worth noting that MailPoet will automatically set up headers and footers for you, and it enables you to edit your subscription settings and choose whether to display your newsletter in a browser. These are nice touches that will make your campaign look much more professional (and are also required by law in many jurisdictions).
Once you’re done customizing your newsletter, click on Next at the top/bottom of the page. On the subsequent screen, you’ll have the opportunity to tweak the subject line, schedule your email, select subscriber lists, and add reply-to emails:
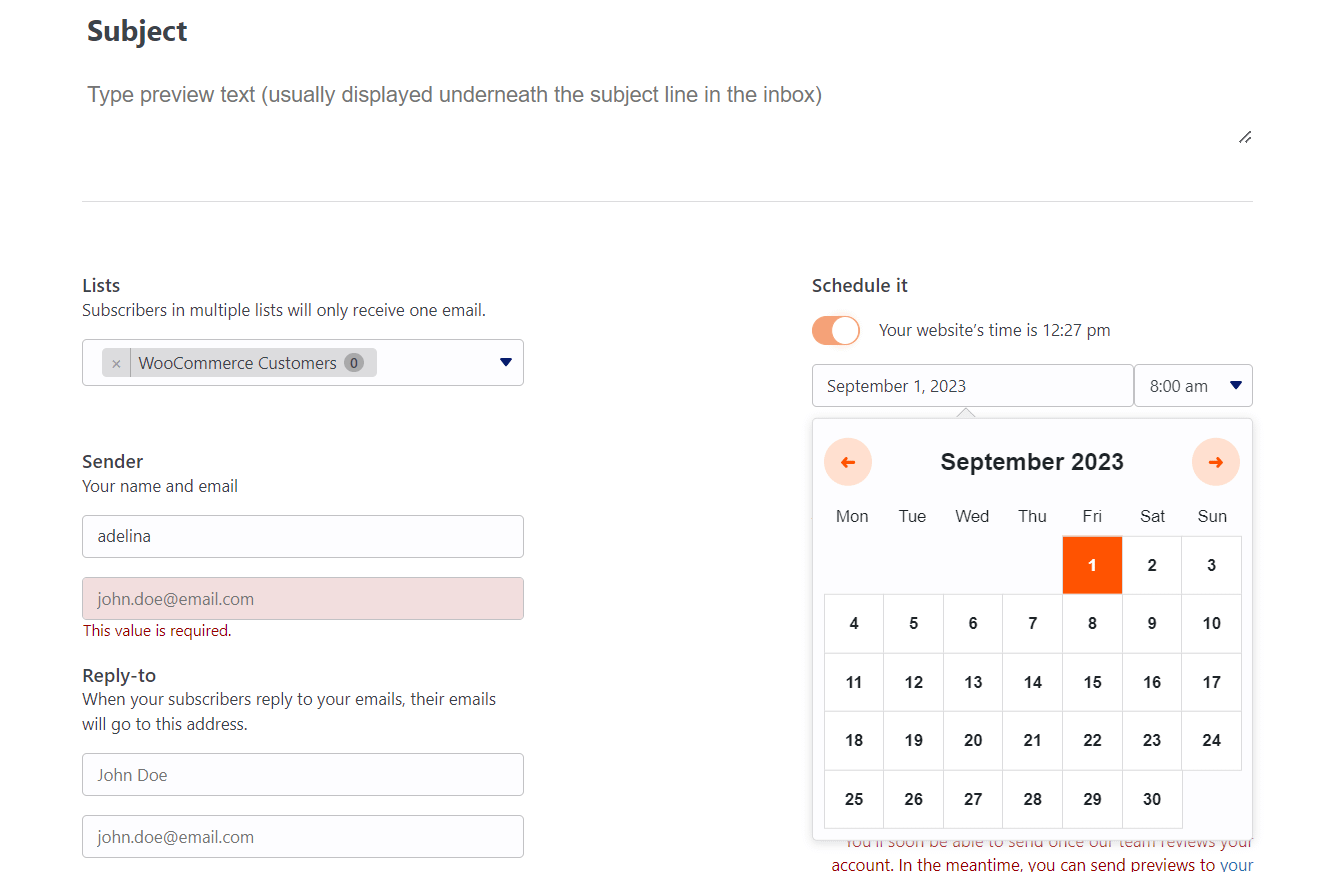
After picking the date you want, remember to click on the Schedule button at the bottom of the page, and your first campaign newsletter will be ready to go!
Conclusion 🧐
MailPoet not only enables you to create an email newsletter campaign, it also lets you do so from within your WordPress admin interface. This can be quite a timesaver, since it means you won’t have to learn how to use a new platform from scratch.
On top of that, you’ll be able to handle all aspects of your WordPress empire without needing to leave your dashboard.
Let’s recap the three steps to starting 🏁 your WordPress newsletter campaign with MailPoet:
- Place a signup form on your site. ⚙️
- Configure your sending options. 🖱️
- Create your first campaign email. 📧
💡 MailPoet is great but it’s not the only option out there. If you want an alternative approach to do this, then check out our guide on how to set up an email newsletter that converts.
Do you have any questions about how to set up a WordPress newsletter campaign? Pick our brains in the comments section below!














It will definitely help Email Marketer’s like us!.. Thanks for Sharing 🙂
Or start the conversation in our Facebook group for WordPress professionals. Find answers, share tips, and get help from other WordPress experts. Join now (it’s free)!