If you want to make money from your website, you’ve probably heard of Google AdSense. It’s one of the most popular advertising platforms online, and is used by over 40 million active sites. However, to get the most out of it, you’ll need to learn how to integrate AdSense with WordPress.
Fortunately, this is easy to do. You can simply sign up for the service, add the necessary code to your website, and then wait for approval. Google will optimize your advertisements automatically, and there are plugins that can help you further refine their placement and appearance.
⌛ In this post, we’ll introduce Google AdSense and talk about what makes it so useful. Then we’ll show you how to integrate AdSense with WordPress in seven short steps. Let’s take a look!
An introduction to Google AdSense

If you’re interested in earning a little extra revenue, Google AdSense is one of the first solutions to check out. AdSense enables you to easily insert ads on your website – you just need to place some code on your site, and Google will handle the rest. Your visitors will see relevant ads, and you’ll get paid based on how many people view and interact with those messages.
This solution is great for beginners. It’s easy to get started, and it integrates with just about any platform – including WordPress. To use Google AdSense, you’ll just need to meet a few basic requirements, such as having an active site that complies with Google’s program policies.
Of course, there are alternatives to Google AdSense, and it’s worth taking a look at those solutions too. However, for most users AdSense is a great first step in monetizing your website.
How to integrate AdSense with WordPress (in 7 steps)
Signing up for the AdSense program and placing ads on your site is a pretty simple process. Let’s walk through it together!
- Step 1: Sign up for Google AdSense
- Step 2: Connect your WordPress website to Google AdSense
- Step 3: Add the Google AdSense code to your website
- Step 4: Optimize your Google ads
- Step 5: Choose your Google ad formats
- Step 6: Control where your ads appear
- Step 7: Request a review from Google
Step 1: Sign up for Google AdSense
To integrate AdSense with WordPress, you’ll first need two things:
- A website
- A Google account
With those in hand, you can visit the Google AdSense website and click on Get Started. You’ll be prompted to choose an account (we recommend using one dedicated to your website and/or business, rather than a personal account). After making this selection, you’ll need to complete a simple sign-up form:

Here, you can enter your website’s URL and your home country. You can also choose whether Google will send you customized suggestions.
Then, check the Terms and Conditions box and select Start using AdSense. This will take you to the AdSense console.
Step 2: Connect your WordPress website to Google AdSense
The next step is connecting your WordPress website to your Google AdSense account. In the console’s left-hand menu, select Sites:

Then click on Add Site. In the subsequent popup, enter your website’s URL:
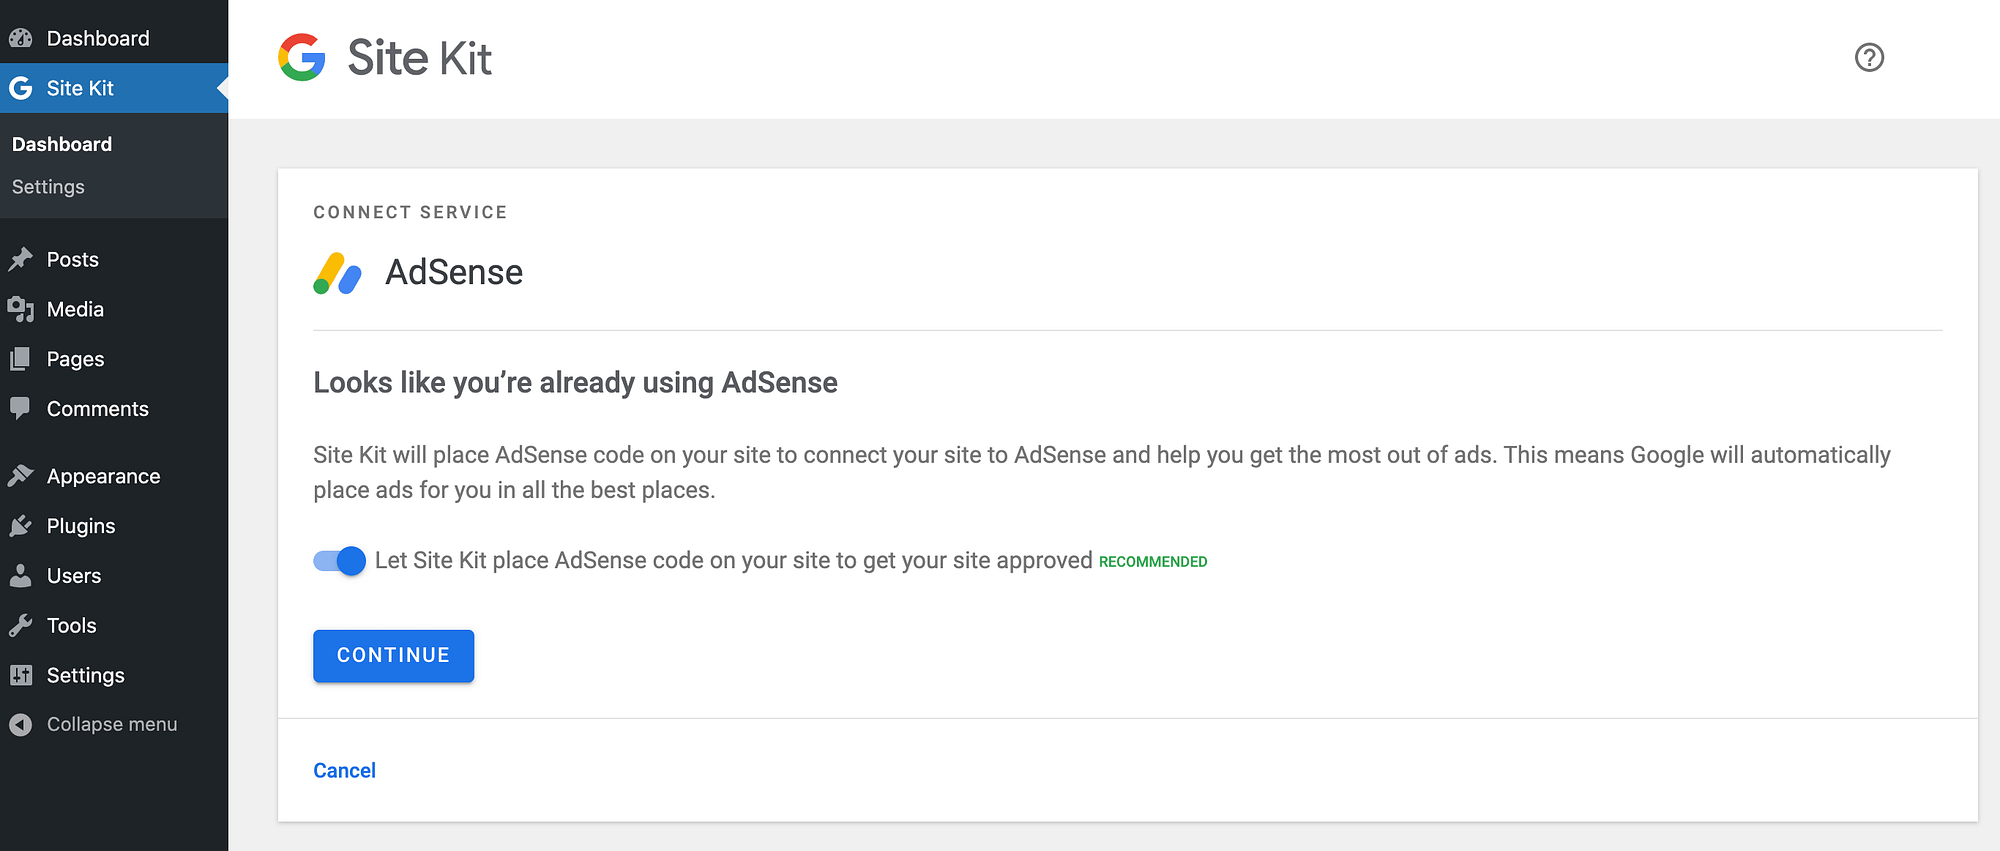
Next, click on Save and continue. Before submitting your application to Google, you’ll need to copy the AdSense code to your WordPress website. There are several ways to add this code, including the Site Kit plugin:
This official plugin is designed to help integrate various Google services with your website, including Google AdSense. Since it’s the easiest method, it’s the one we’ll use in this tutorial. After activating Site Kit, click on Go To Dashboard:

If this message doesn’t appear, you can navigate to Site Kit > Dashboard instead. When prompted, verify that you own this website by logging into your Google account:
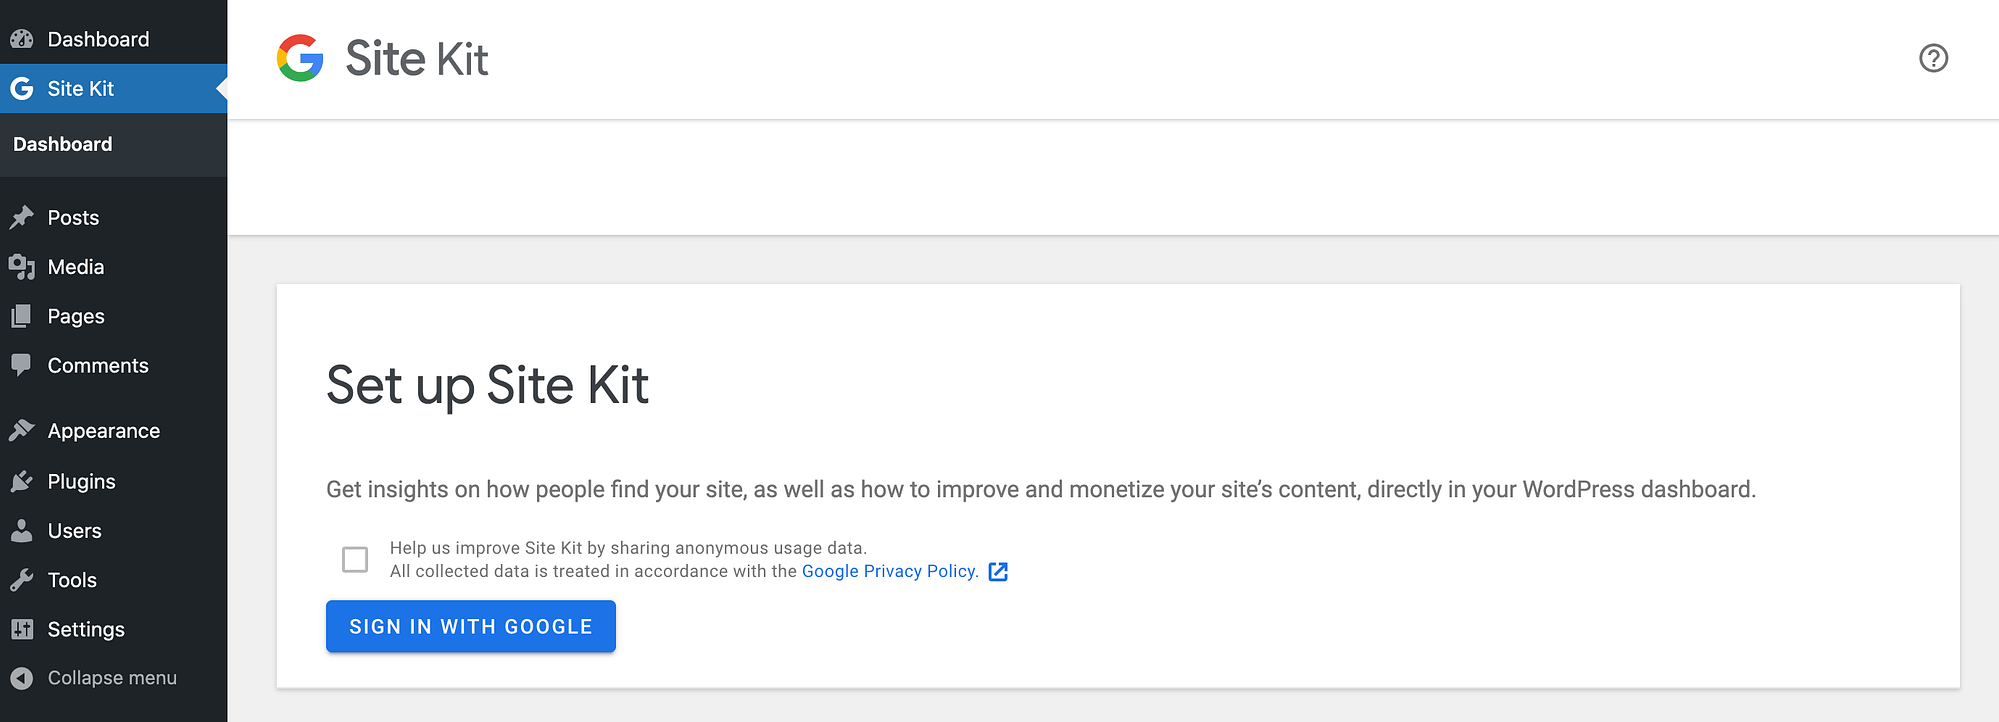
Next, grant Site Kit permission to access your Google account data and Search Console. Your site is now connected to your Google account.
Step 3: Add the Google AdSense code to your website
You can now use Site Kit to set up various Google services. To integrate AdSense with WordPress, navigate to Site Kit > Dashboard. Find the Google AdSense section, and click on its accompanying Connect Service link:
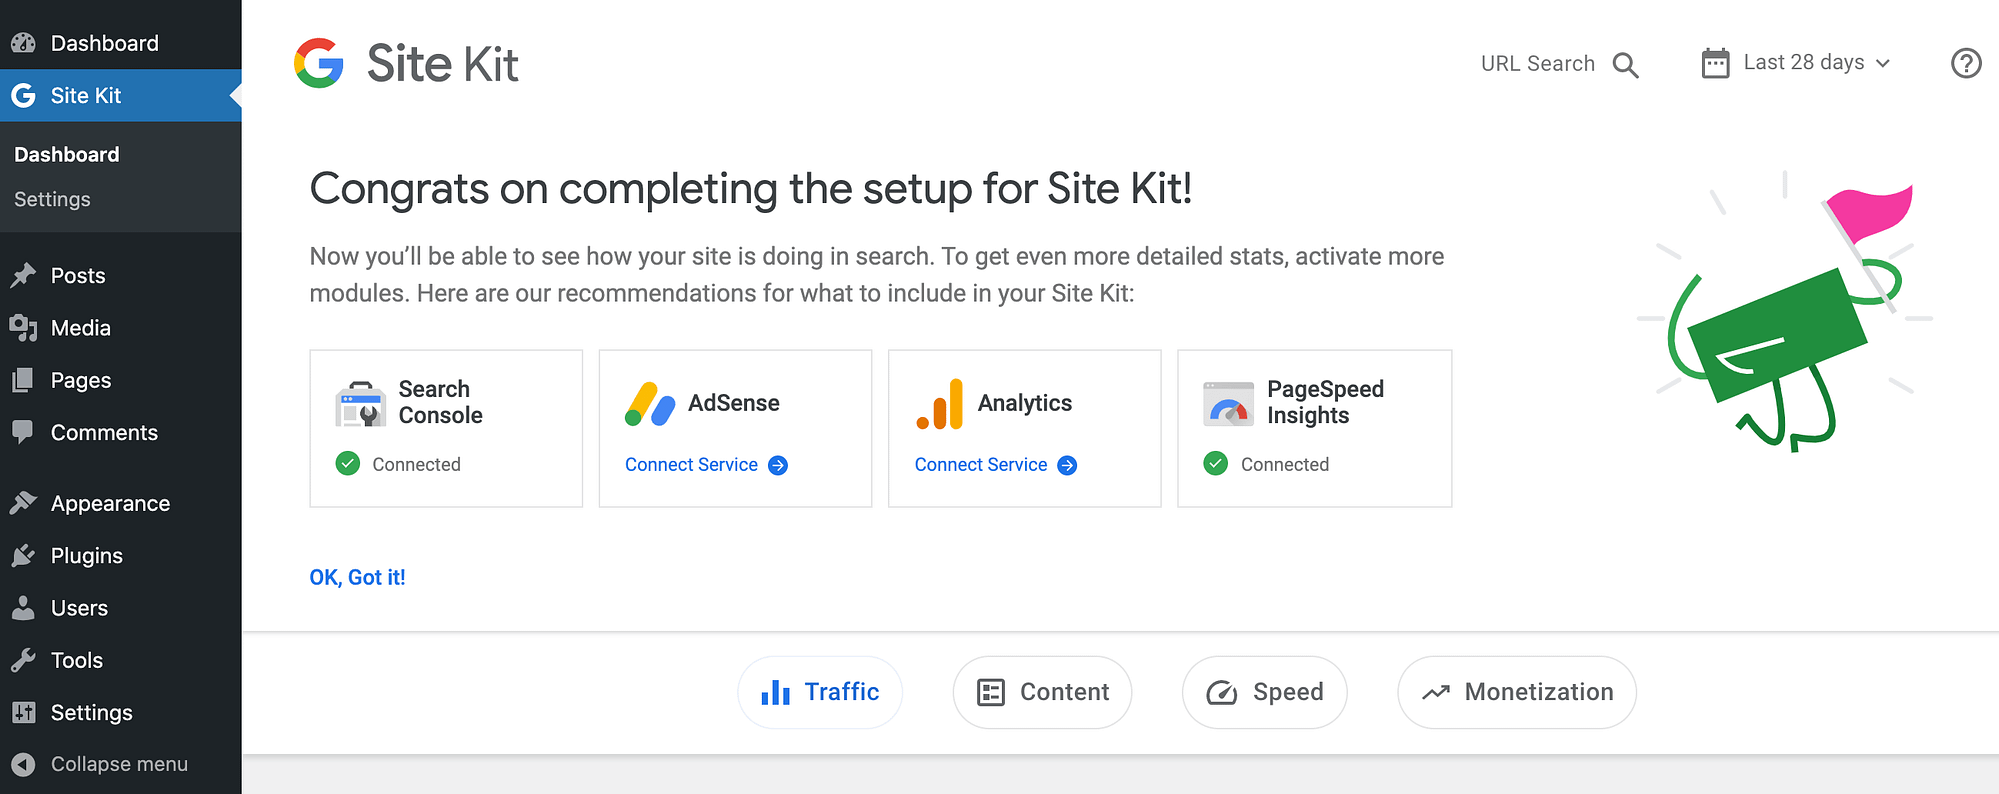
When prompted, log into your Google account. Sit Kit will now request access to your AdSense data. If you’re happy to proceed, click on Continue.
Site Kit can add the necessary AdSense code to your site automatically. This enables Google to place advertisements across your WordPress website. Since it’s the easiest way to integrate AdSense and WordPress, just push the Let Site Kit place… slider into the On position.
Then click on Continue. The Site Kit plugin will now add the required code to every page of your website.
Step 4: Optimize your Google ads
Google’s auto-ads feature can scan your site and automatically place ads where they’re likely to perform the best. Its decisions are based on different elements such as each page’s layout, the amount of content on offer, and any existing Google ads.
In this way, auto-ads can maximize your profits without requiring any manual input. For this reason, we recommend enabling them. To get started, click on Enabled auto ads for your site:
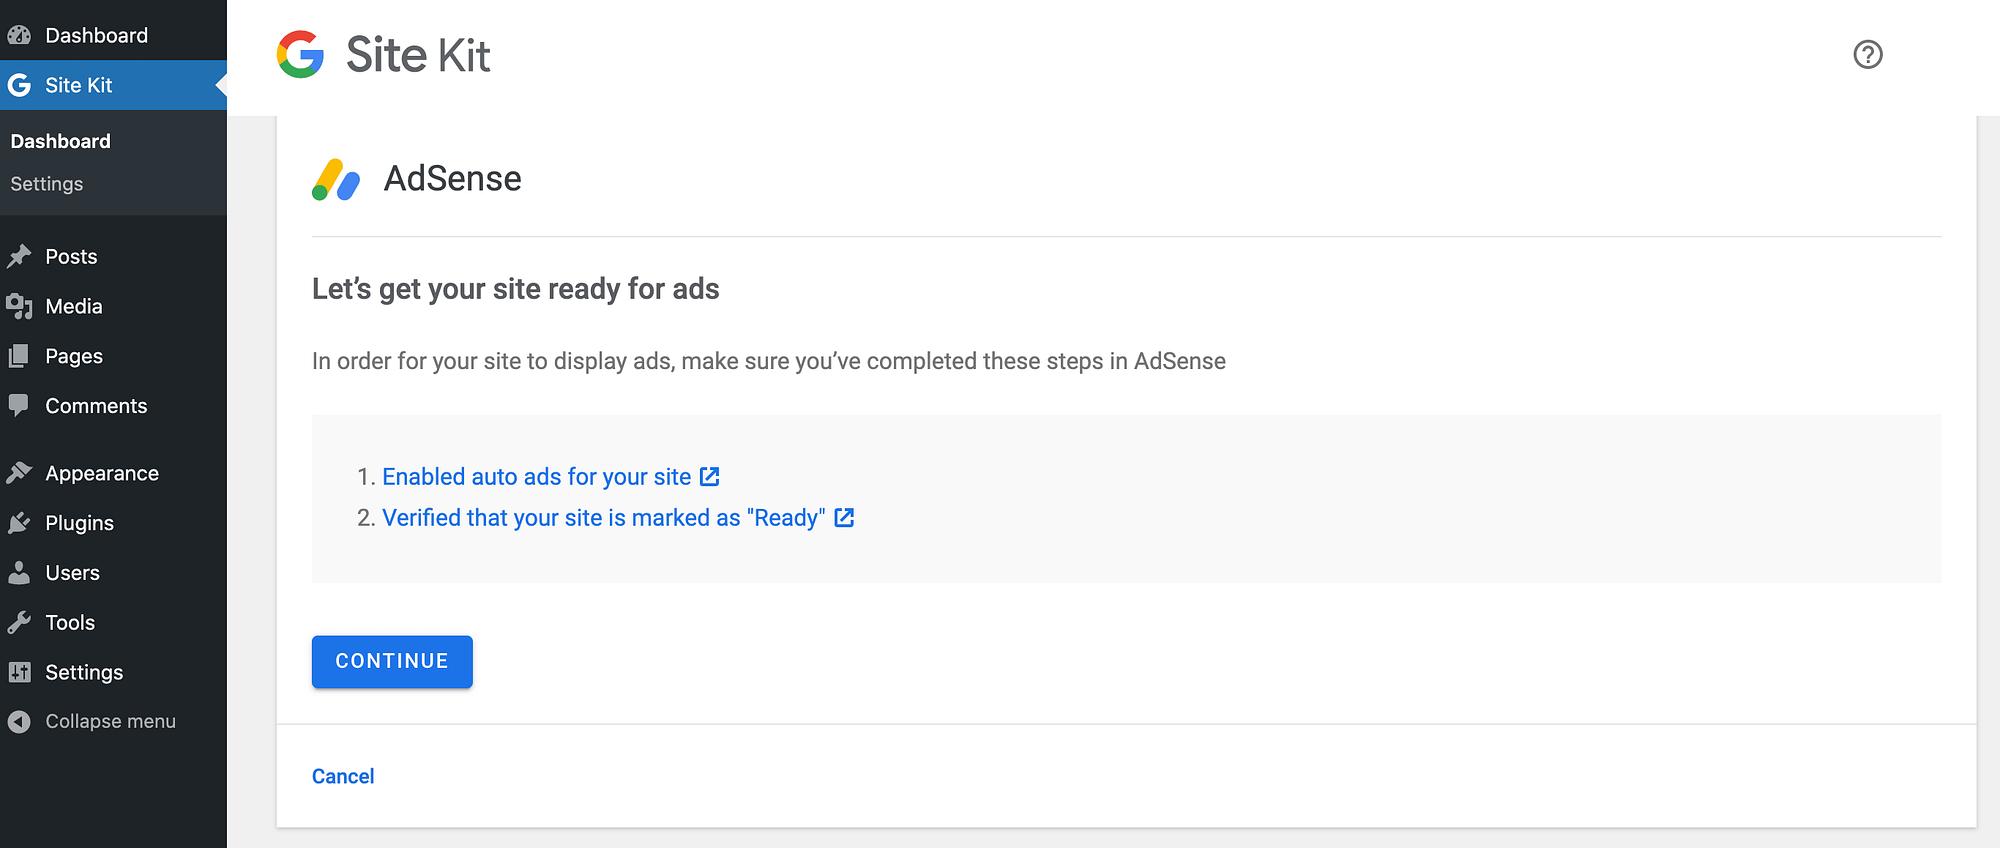
This will launch a new tab. Here, push the Auto ads slider into the On position:
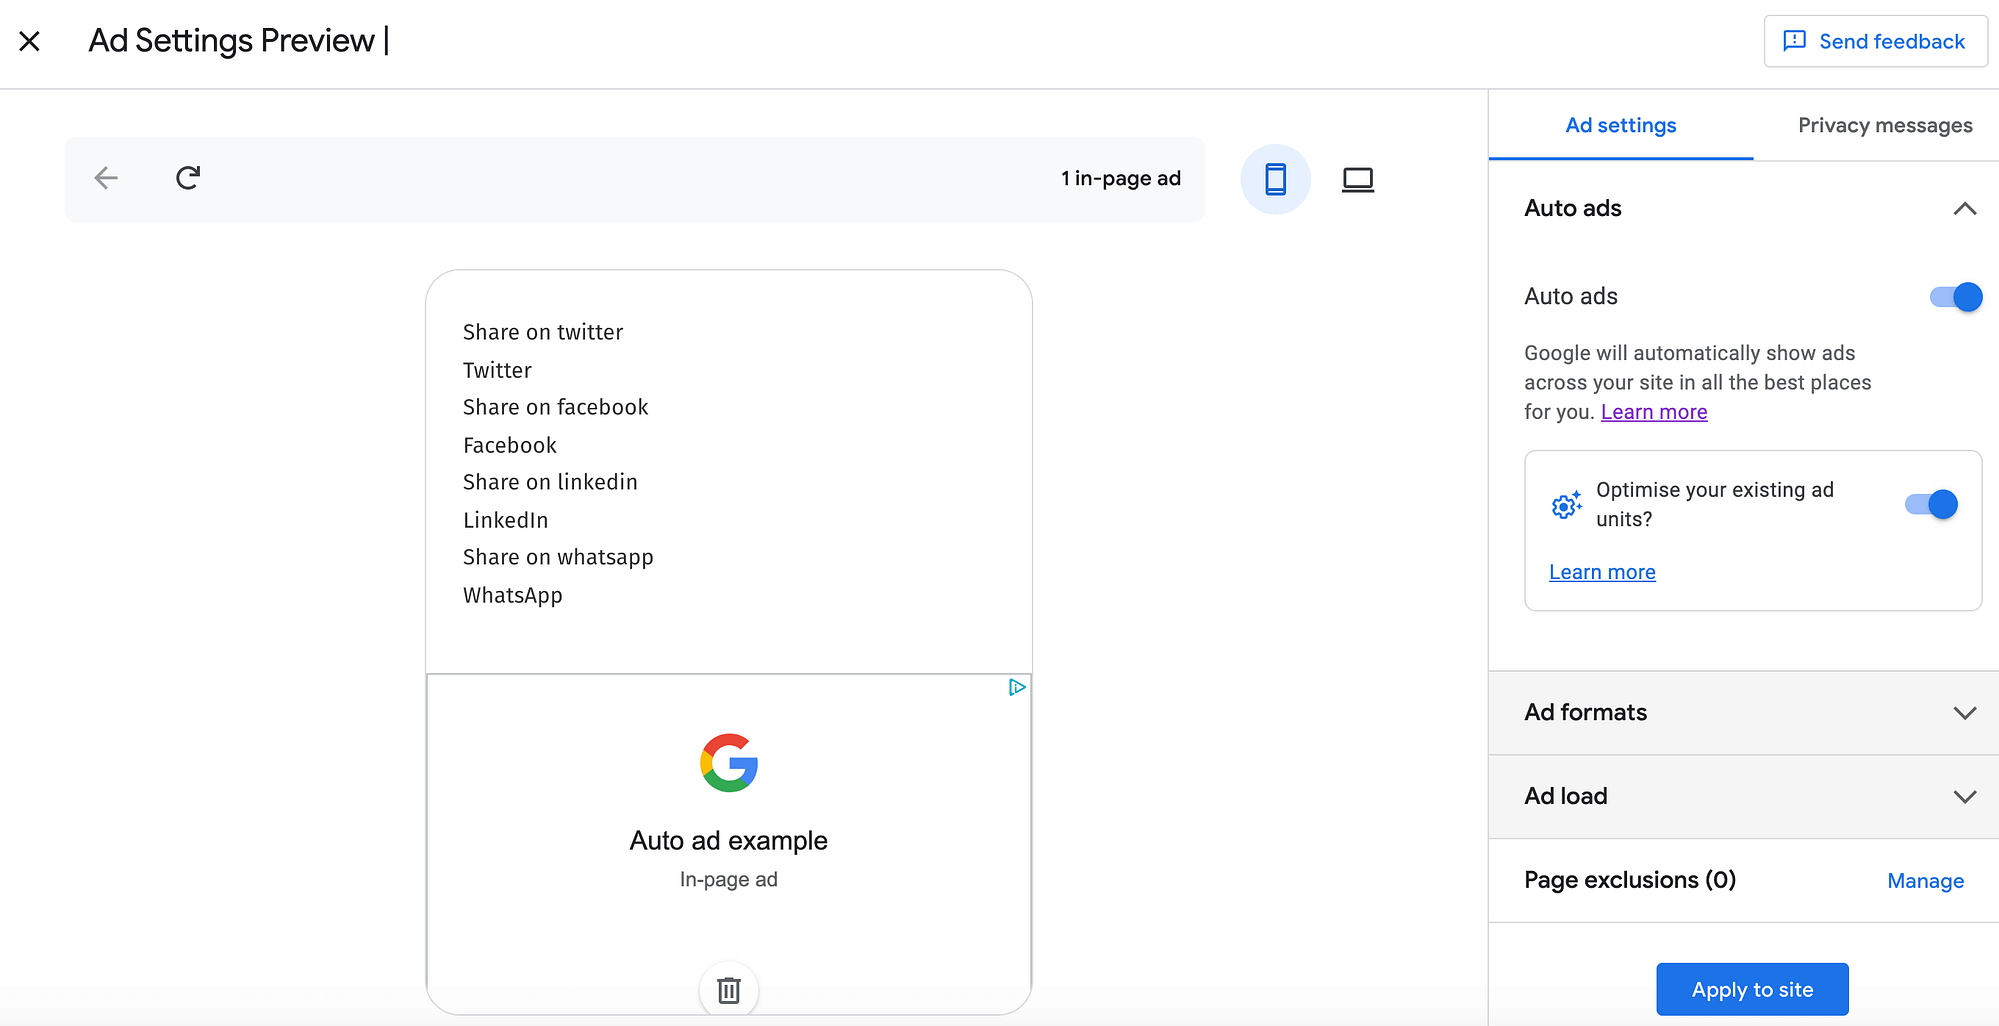
By default, Google will also optimize any existing ad units that are already on your website. This can boost your revenue, so you’ll typically want to leave that setting enabled. However, it is possible to disable it, using the Optimize your existing ad units slider.
Step 5: Choose your Google ad formats
Next, click to expand the Ad formats section. You can now choose which ad formats Google can use on your website:

In-page advertisements appear as a rectangle inside the page or post. If you enable this format, you’ll also get the option to use ‘matched content’. This is a form of advertisement that displays recommended content from your website.
By suggesting relevant content, you can encourage visitors to spend more time on your site. Just be aware that in order to use matched content, your site must meet minimum requirements for traffic volume and number of unique pages.
Meanwhile, anchor ads typically stick to the top of the user’s screen. However, Google may occasionally display these ads at the bottom of the screen, if the original position would negatively impact the user experience:

When they’re displayed at the top of the screen, anchor ads only appear after the visitor has begun to scroll. This helps ensure that these ads don’t obscure your site’s branding or menus. Users can collapse an anchor ad at any time simply by clicking on the accompanying arrow.
Anchor ads are primarily used on mobile devices, but Google may occasionally display them on desktops too. If you don’t want to display anchor ads on screens wider than 1,000px, you can disable the Wide Screen slider.
Vignettes are full-screen advertisements that Google displays in between page loads. Unlike most ads, vignettes appear when a visitor leaves a page, rather than when they arrive at a new one.
To help protect the user experience, Google limits the number of vignettes that it displays to each user. Visitors can also skip these ads at any time. Again, you have the option to disable these ads for wider screens, which essentially makes them mobile-only.
Step 6: Control where your ads appear
Ads are a great way to monetize your content or create an additional revenue stream. However, too many advertisements can damage the user experience. In the worst case scenario, they may even prevent people from returning to your website.
Fortunately, you can set a maximum number of ads that Google can place on your website. To achieve this, click to expand the Ad load section. You can now use the slider to reduce or increase the maximum number of ads that will appear on your content:
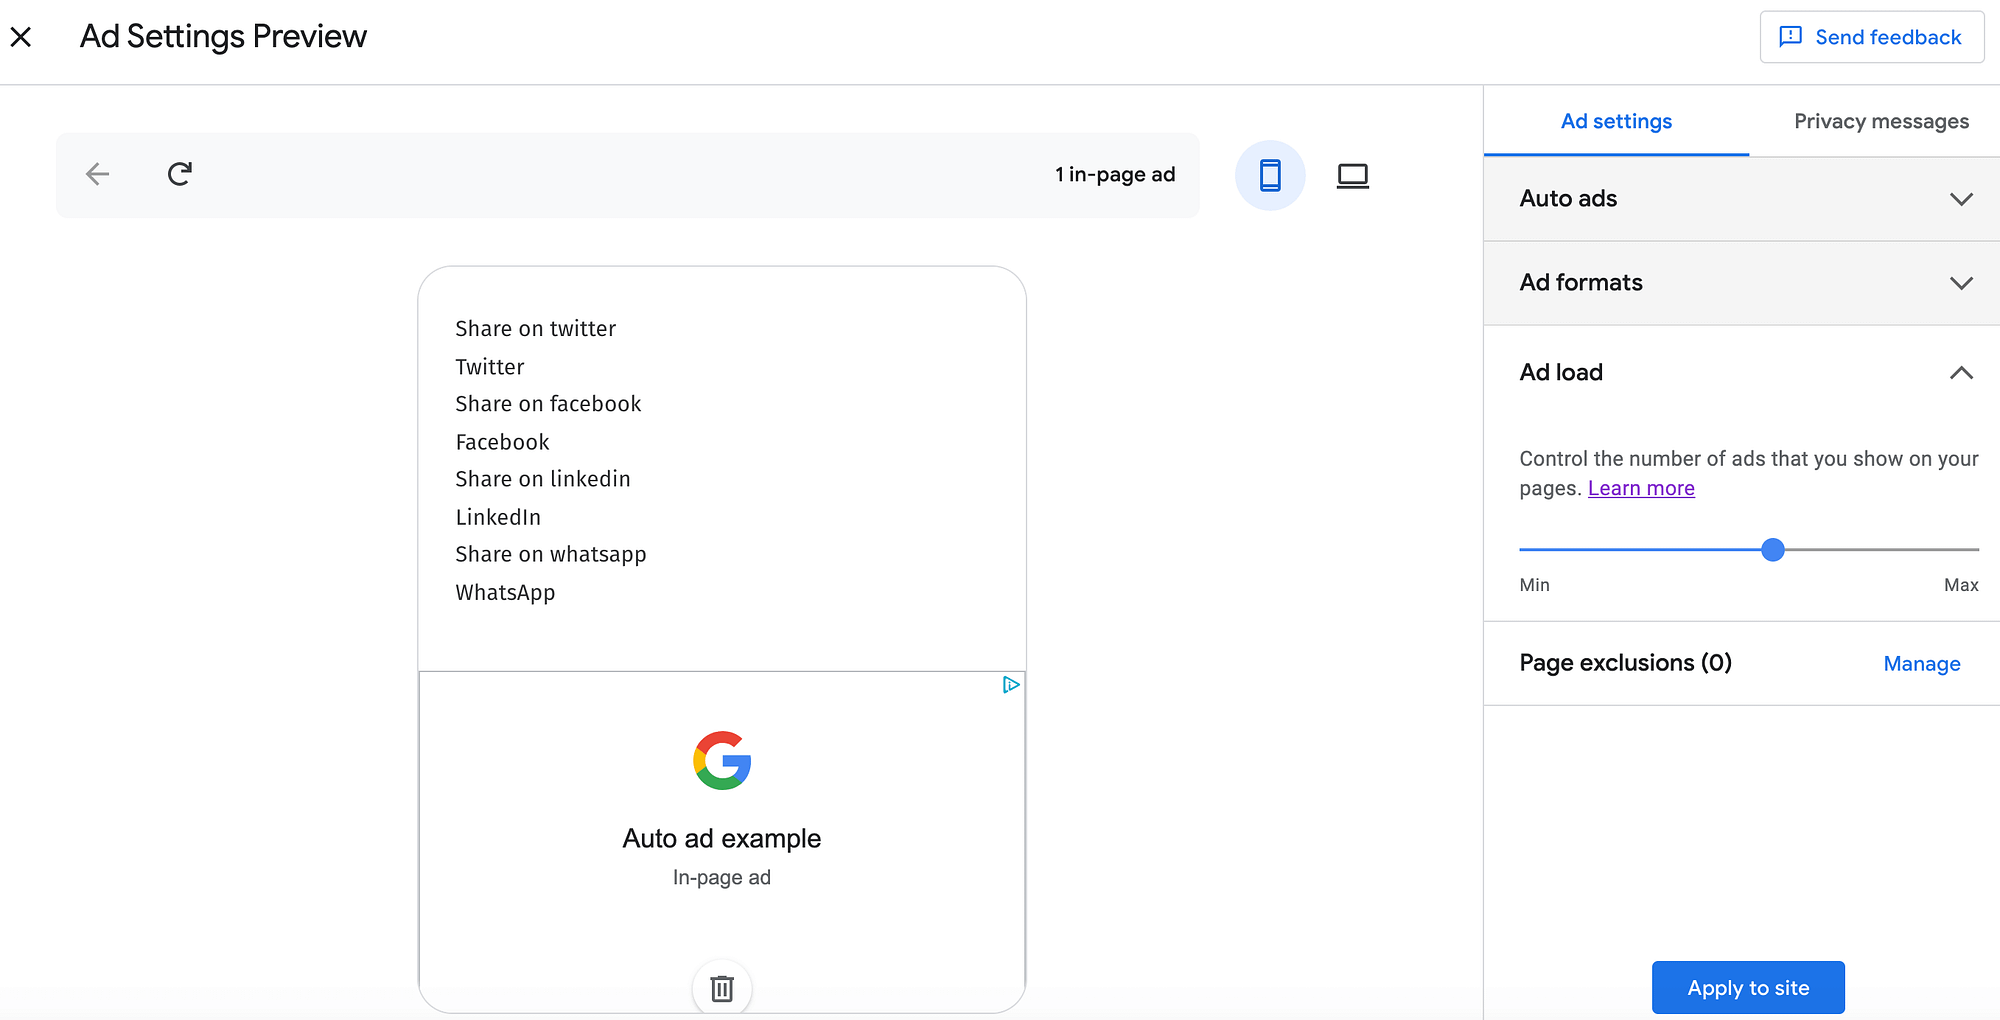
You might not want to display ads on every single page of your site. For example, third-party advertisements may distract from your own offerings. With this in mind, you might want to prevent advertisements from ever appearing on your product pages.
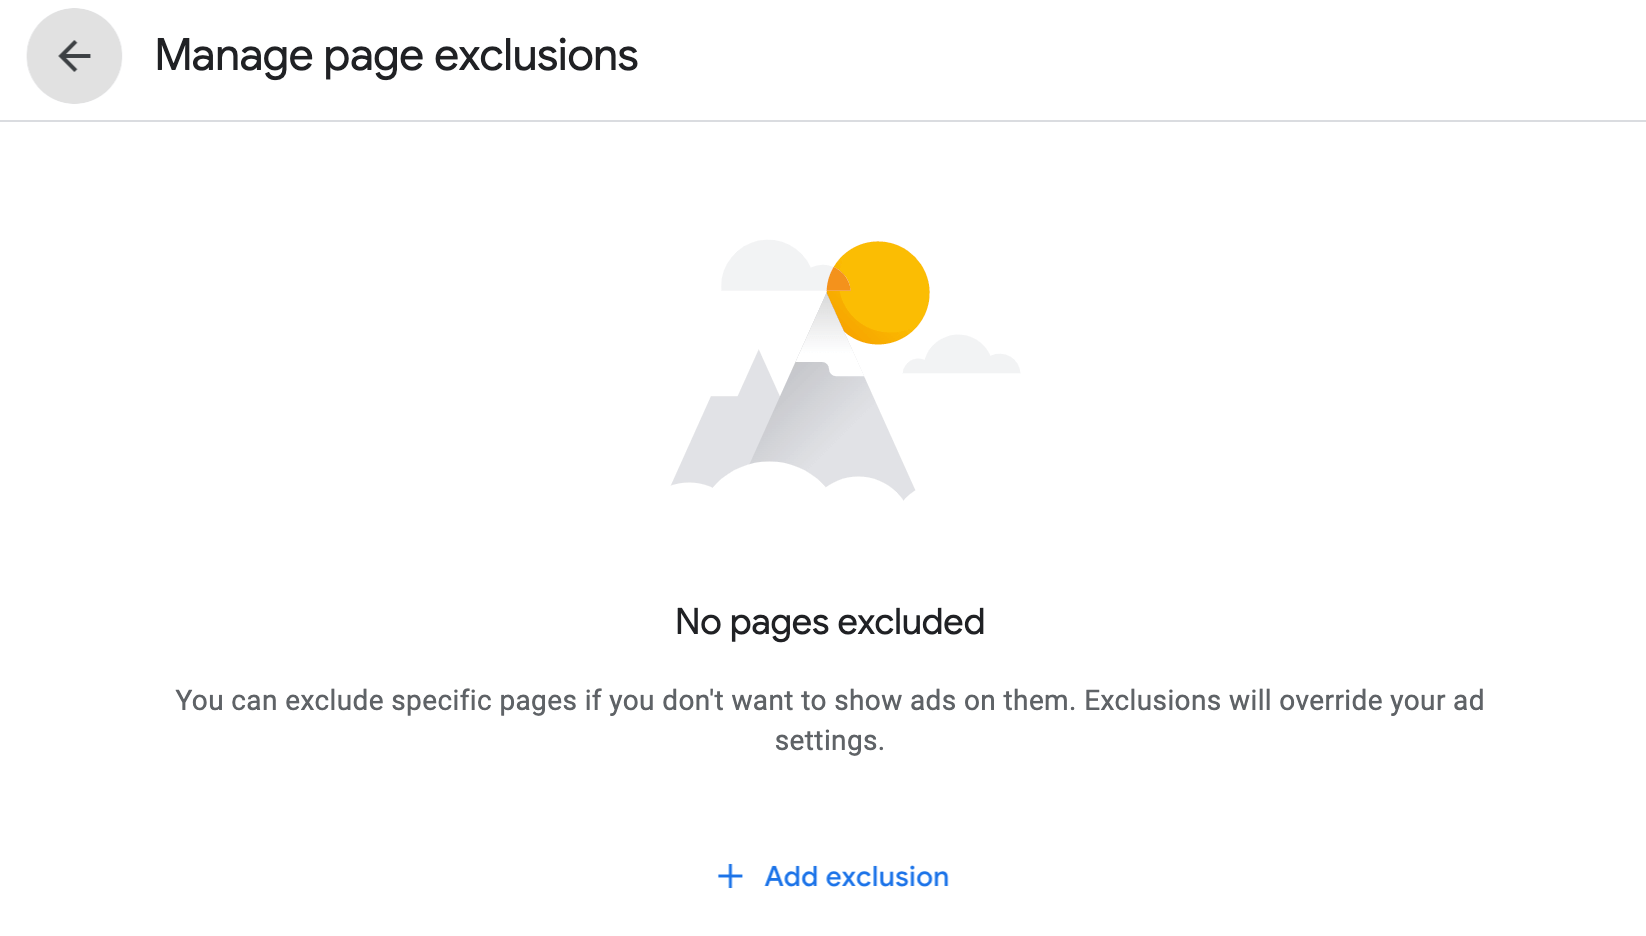
To achieve this, scroll down to the Page Exclusions section. Then select its accompanying Manage link. In the subsequent panel, click on Add exclusion:
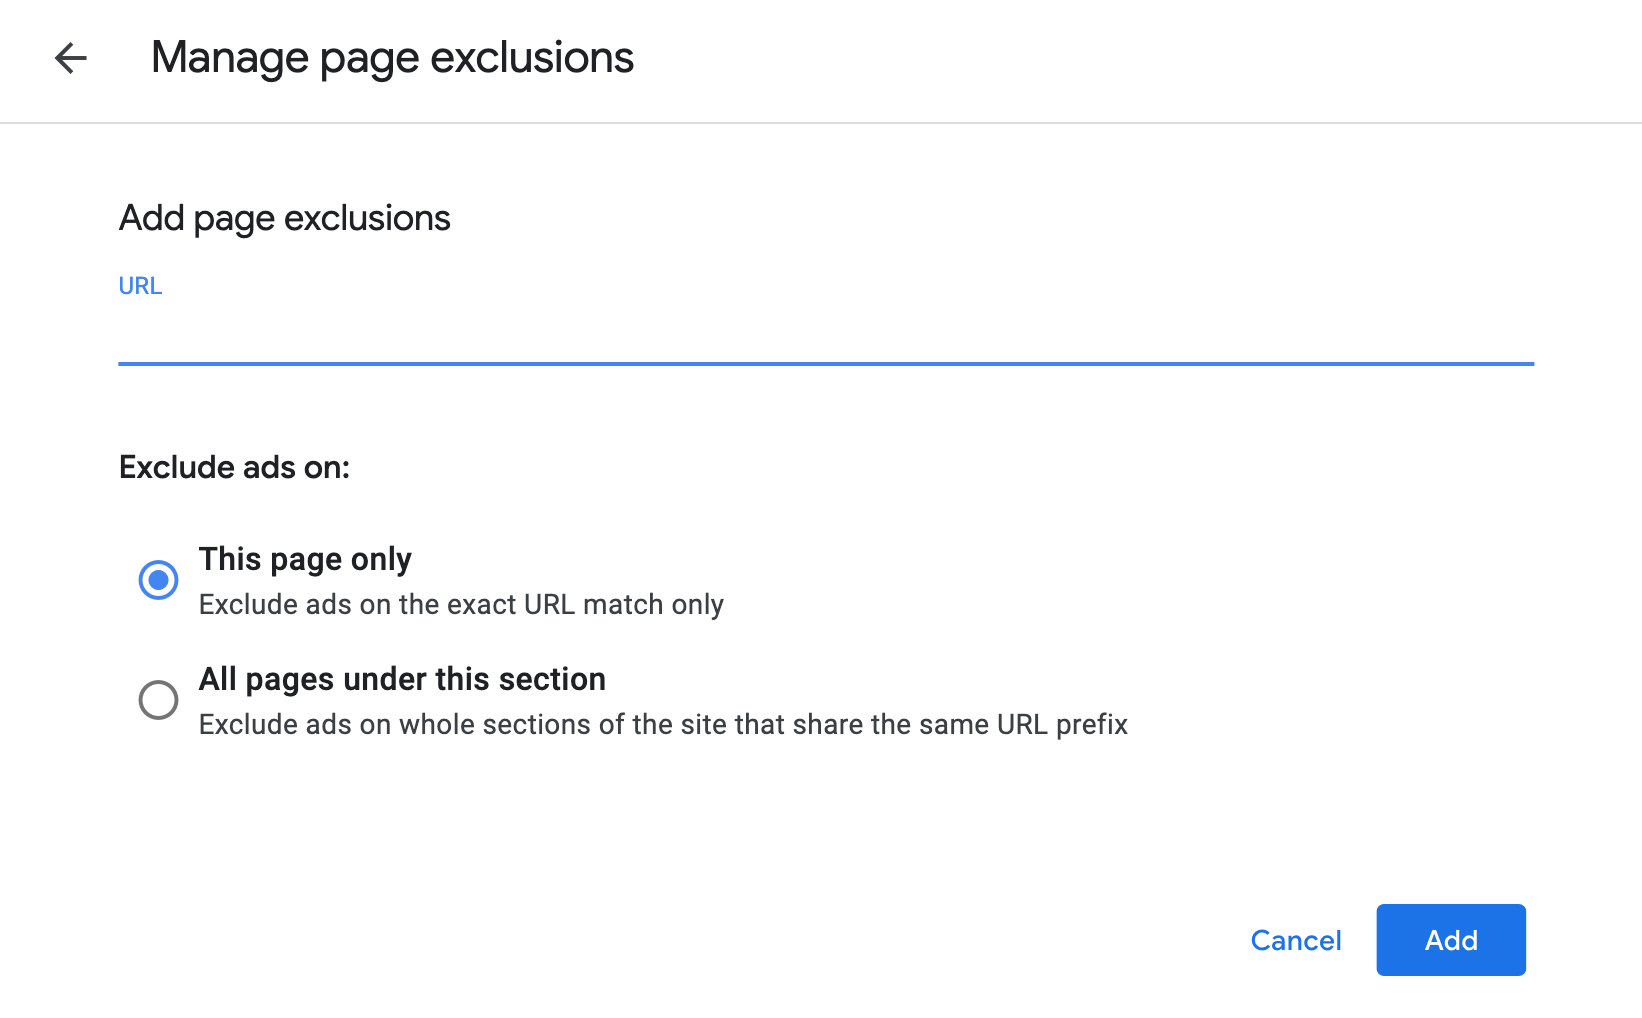
You can now select the pages where Google should never display ads. If required, you can even exclude entire sections of your site that share the same prefix. When you’ve selected all of your exclusions, click on Add:
Once you’re happy with your ad settings, choose Apply to Site. You can now decide whether to apply these changes immediately, or test them first:
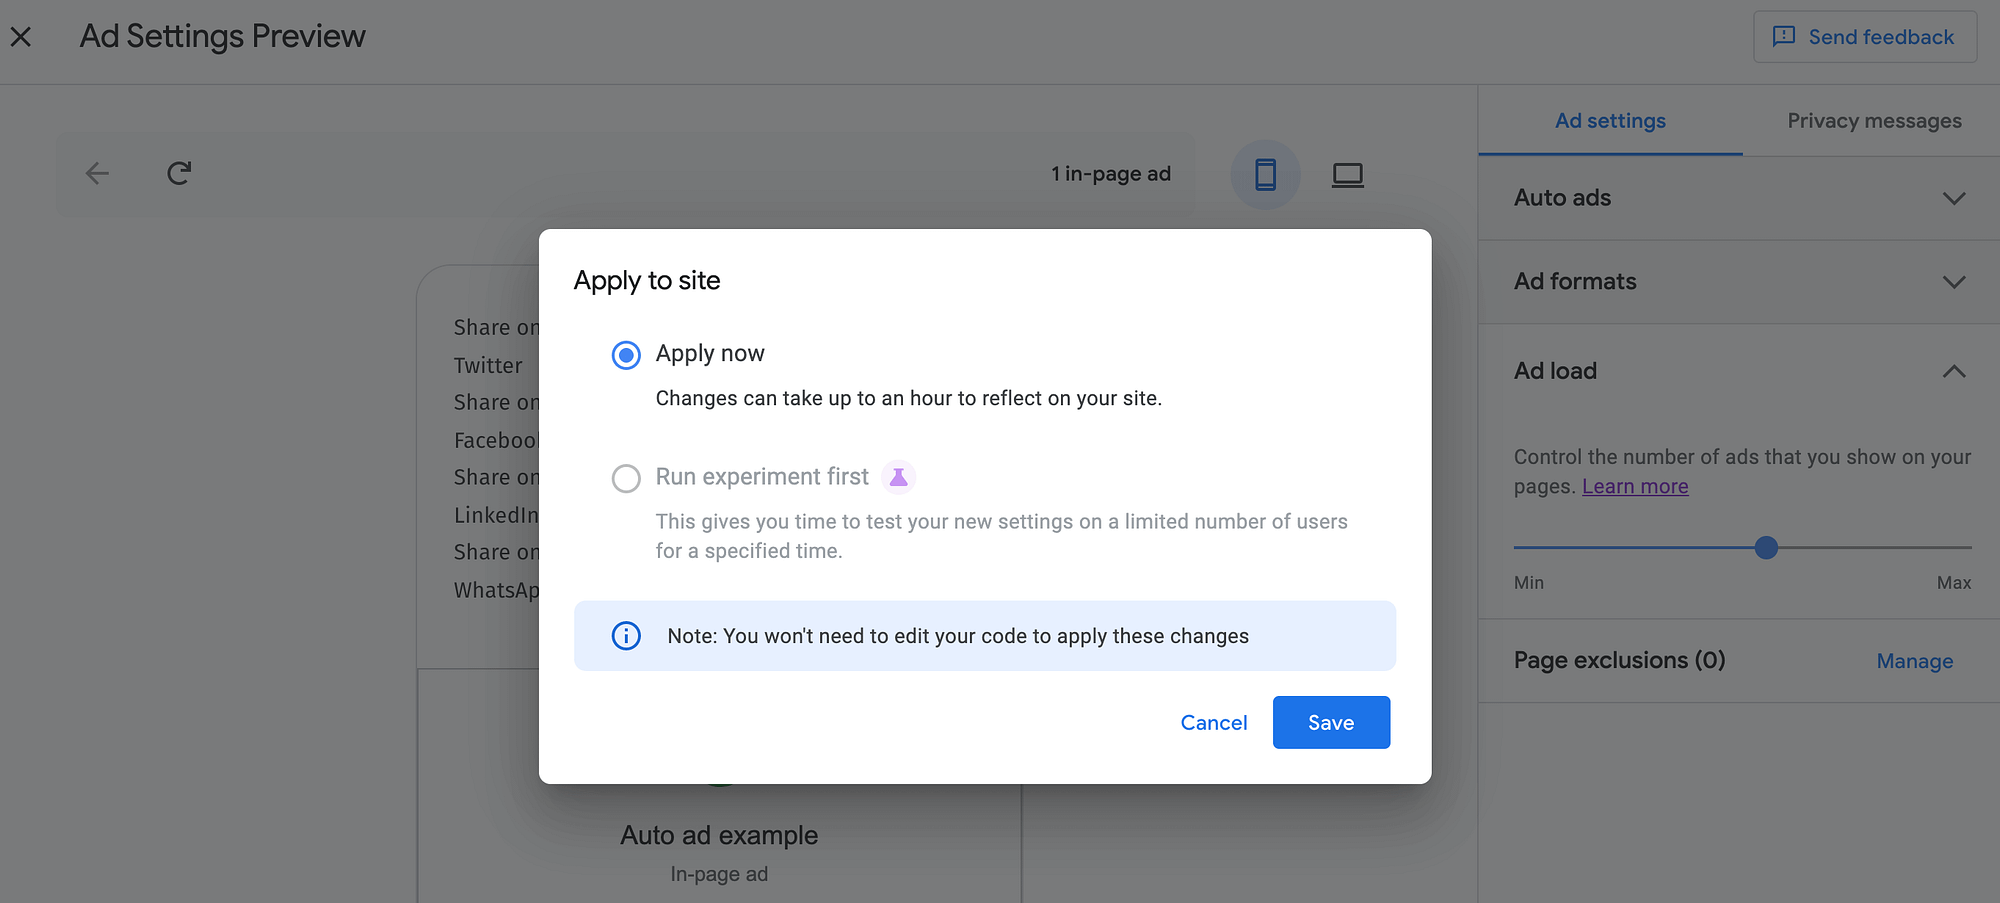
Running an experiment can help improve your ads’ performance, by letting you compare one collection of ad settings against variations. If you do opt to run an experiment, Google will split your traffic between the two version of the ad, so you can track which one performs better.
Step 7: Request a review from Google
Next, you’ll need to confirm that your site is ready for Google to review. In your AdSense dashboard, select Sites from the left-hand menu. Then, find the site in question and click to expand it:

Finally, click on the accompanying Request review link. Google will now review your AdSense application.
This process usually takes a few days, but Google warns that it may take up to two weeks. Just be aware that if you remove your site and resubmit it, this can delay the review process. Once this check is complete, your site will be ready to display ads.
That’s all you need to do to integrate AdSense with WordPress. However, for the best results, there are a few extra steps you might want to take.
For one, you can apply some best practices to optimize your ads and earn more revenue. Beyond that, if you want more control over where your ads appear, you might want to consider using a dedicated WordPress AdSense plugin. 🔌
Optional: Optimize your ads using plugins
Google’s Site Kit plugin and console make integrating WordPress and AdSense feel almost effortless. However, these tools don’t give you a lot of control. Fortunately, you can find a plugin that will enable you to customize your AdSense ads further.
👉 One popular option is Ad Inserter:
This plugin lets you customize where your ads will be placed – such as above or below the header, before or after specific content, and so on. While it’s not the most beginner-friendly option, you can use this tool to produce nearly any result you’d like.
👉 For a simpler approach, there’s WP QUADS:
This is a more beginner-friendly solution that requires less technical know-how, but is still very flexible. You can assign ad positions dynamically, insert ads within posts, and display up to ten ads on one page.
Either of these plugins is a strong choice. The more time and care you put into how your ads are placed and displayed, the better your chances will be of increasing your income. Therefore, it’s worth spending a little extra time to get them just right.
Conclusion 🧐
Most sites need to monetize to sustain themselves, and yours is likely no different. However, figuring out how to create a decent income stream can be challenging, to say the least.
🔥 Google AdSense is a great option – a simple tool that enables you to create ads, place them on your site, and make a little cash (or possibly a lot) with almost no effort required.
What’s more, it’s surprisingly easy to integrate AdSense with WordPress. Using the Google Site Kit plugin, you can automatically add the AdSense code to every page of your website. You can then use the AdSense console to control how these advertisements appear on your site, and even exclude specific pages if required.
Do you have any questions about how to integrate AdSense with WordPress effectively? Ask away in the comments section below!


















After pasting the ad code i receive the error – tag not allowed
Or start the conversation in our Facebook group for WordPress professionals. Find answers, share tips, and get help from other WordPress experts. Join now (it’s free)!