
Getting new visitors to trust you enough to spend money on your services is one of the toughest parts of running a website. Therefore, it’s crucial to find easy yet effective ways to prove your reliability. Fortunately, you can make strides in this area by simply adding a WordPress testimonials section to your site.
Testimonials are an excellent way to encourage trust (as long as they’re positive!), since they show potential clients that you have a track record for doing good work. Plus, securing a testimonial won’t cost you anything.
In this article, we’re going to talk a bit more about what online testimonials entail and why you should consider using them. Then we’ll show you how to add a neat feature called rotating testimonials. WordPress actually has a plugin that makes this super easy – it will only take you a few steps.
What testimonials are (and why you should consider displaying them)

A glowing testimonial is one of the best ways to convince new visitors to try your services.
Securing customer testimonials is a relatively straightforward task. All you need to do is ask past clients for their thoughts on your service, and make sure they’re okay with you quoting them publicly.
The idea behind using testimonials is simple – they offer you a way to market products and services to your audience for free. However, that isn’t their only benefit. Let’s talk about what else they can do for you:
- Increase trust among your customer base. Trust is essential if you want your visitors to convert into clients. After all, people don’t want to listen to or buy products from someone they don’t trust.
- Re-engage past clients. Reaching out to past customers to ask for their feedback is an elegant way to re-open communications. Even if they prefer not to be quoted publicly, you can still use the opportunity to inform them about new deals.
The main reason testimonials work so well is that they provide users with external insight into your services. If you want to make yours even more useful, remember to ask your past clients if you can display their photograph. This can help your testimonials appear even more trustworthy. Linking back to your clients’ own sites (or social media pages) is also a nice touch.
It’s clear that there really is no significant downside to including WordPress testimonials on your website. Therefore, let’s switch gears and talk about how to get the job done!
How to add a rotating WordPress testimonials section (in three steps)
If we can all agree on something, it’s that the more testimonials you have, the better. The problem is that they can take up a lot of space, so it often makes sense to display them in a single section using a sliding feature so that visitors can still easily navigate your site.
To do this, we’re going to use the Testimonials Widget plugin. Before moving on to the first step, you’ll need to install and activate it.
Step #1: Configure the Testimonials Widget plugin
Testimonials Widget packs quite a few settings for a plugin with such straightforward functionality. To access them, you’ll need to click on the new Testimonials tab from your WordPress dashboard:
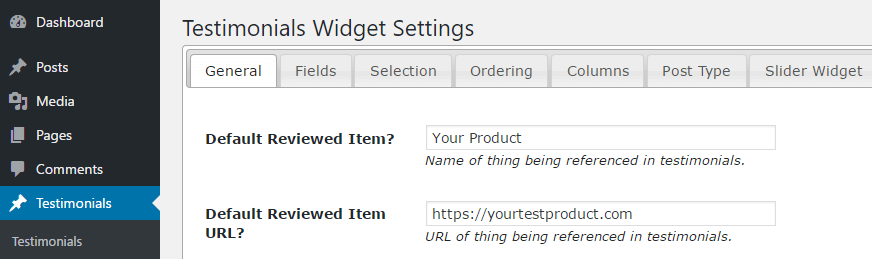
Instead of going over every single option, we’re going to focus on those you’ll find most useful. For starters, head over to the General tab and erase the contents of the Default Reviewed Item and Default Reviewed Item URL fields. Since you’re going to place your testimonials manually, that information won’t be necessary.
Then, move on to the Fields section and choose the elements you don’t want your WordPress testimonials to include. Each box you tick here will hide a particular item:
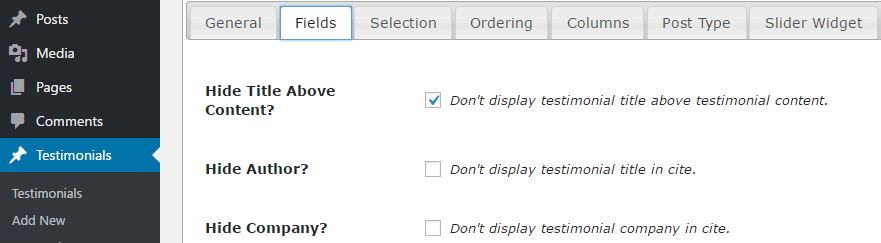
Deciding which options to keep enabled is up to you, but we recommend you retain either the author or avatar fields. After all, if people can put a face to the testimonial, they’ll be more likely to trust it.
Once you’ve made your choices, remember to save the changes. Then you can move on to the next step.
Step #2: Create your testimonials
Now that you’re ready to add your first testimonial, go to Testimonials → Add New on your dashboard. This will open up the editor and enable you to enter a title and the contents of your client’s testimonial:
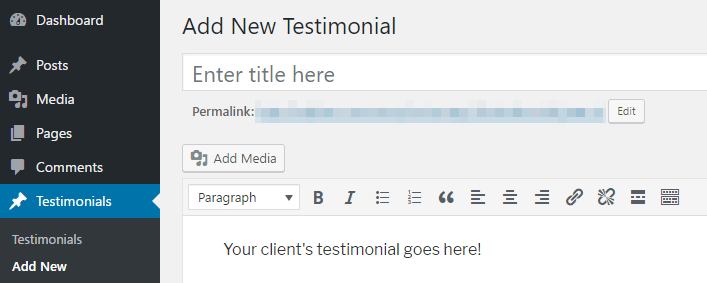
Keep in mind that by default, Testimonials Widget doesn’t display this title on the front end. With that in mind, we recommend choosing one that will help you identify each testimonial later on.
After typing in or copying over your client’s testimonial, scroll down to the Testimonial Data section. Here you can add identifying information about the client:
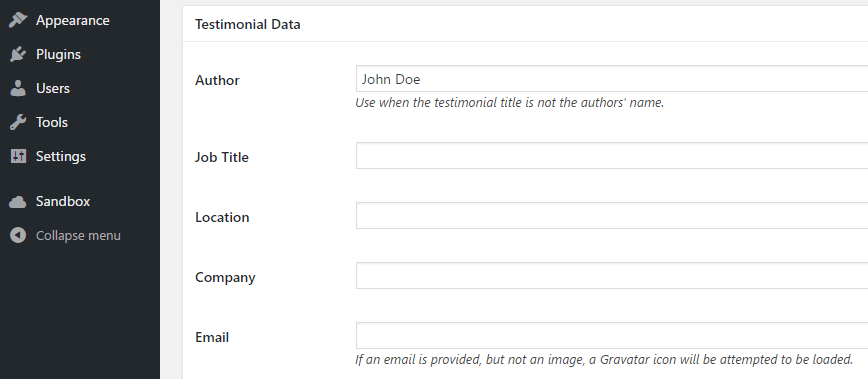
Don’t forget that during the first step, you may have disabled some of these fields from displaying on the front end. You can leave those sections blank, and simply fill in the rest. When you’re done, remember to add a featured image for your testimonial, which will display right next to the text. Let’s see how the final product looks on the front end:

By default, your testimonial will appear without any customizations, such as the border we’ve added here. If you want to tinker with your testimonial’s style, check out how to customize it using Cascading Stylesheets (CSS). Then you can simply repeat this process to create additional WordPress testimonials.
Step #3: Place a rotating testimonials section on your website
Once all the testimonials you want to use are ready, you’ll need to add a slider section somewhere on your site. There are two ways to do this. The first is by using the Testimonials Slider widget, available under Appearance | Widgets:
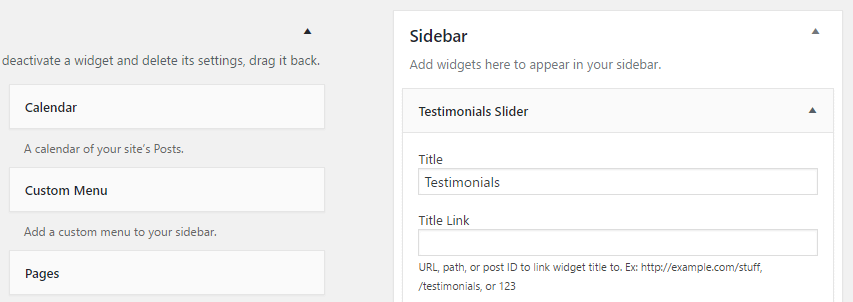
This method enables you to place your slider either in your sidebar or footer. However, if you want more control over your WordPress testimonials, you’re probably better off using shortcodes. Pasting the following code into your WordPress editor will display your slider wherever you place it:
[testimonials_slider show_controls=true]
Let’s check out how this will look on the front end of your site:

By default, your testimonials slider will transition from slide to slide automatically. Adding the show_controls configuration enables your visitors to switch between slides manually instead. If you’d rather use the default settings, all you have to do is remove that section of the code from our example above.
Conclusion
Testimonials are a great way to drum up new business for your site. As long as you do a great job for your clients, chances are some of them will be happy to leave you a testimonial. Even a few lines of positive feedback can have an impact on new users and encourage them to convert, so you have nothing to lose by trying.
Here’s how to add a WordPress testimonials section to your website after installing the Testimonials Widget plugin:
- Configure the plugin’s main settings.
- Create your testimonials.
- Add a rotating testimonials section to your site.
Do you have any questions about how to use WordPress testimonials effectively? Ask away in the comments section below!


That’s great that free versions of testimonial plugins have plenty of premium features already. I am looking for a plugin that will make my testimonials trustworthy and strong. But I prefer using a premium plugin with extend support ad I am a complete non-techie.
Or start the conversation in our Facebook group for WordPress professionals. Find answers, share tips, and get help from other WordPress experts. Join now (it’s free)!