
The WordPress block editor (AKA Gutenberg) was released at the end of 2018. It’s WordPress’s built-in drag-and-drop editor, and it makes it a lot easier to create styled layouts. With WordPress reusable blocks, you can save yourself a lot of time while working in the editor.
Essentially, WordPress reusable blocks offer the ability to reuse what you’ve created over and over again. It’s somewhat of a hidden feature that not everyone learns about, but in this tutorial we’ll walk you through it.
First, we’ll briefly review ⏩ what reusable blocks are. Then we’ll discuss ⏩ some of their benefits before moving on to showing you ⏩ how to make them and use them.
Let’s get started!
What are WordPress reusable blocks? 🤔
⚠️ Important Notice: As of WordPress 6.3, Reusable blocks are being renamed as Synced patterns. Any previously made Reusable blocks will continue to function as they do now, just under the new Synced pattern name [1].
A reusable WordPress block is a collection/arrangement of one or more editor blocks that you can save in your library for later use.
A reusable block could be simple, such as an image that you’d like to reuse again and again. On the other hand, a reusable block could include a complicated collection of elements for duplicating more advanced web designs. Technically, you could save an entire page design as a reusable block and transfer it to other pages or websites.
Another neat thing is that if you edit the design of the reusable block, those changes will automatically apply to every instance of the reusable block – there’s no need to manually edit each post where you used the reusable block.
The idea behind a reusable block is to minimize the need to reinvent the wheel. It’s the same reason people use WordPress themes. What’s the point of starting from scratch if the foundation is already made for you?
Since many bloggers and web designers repeat content in blog posts and pages, it makes sense to give them a way to eliminate repeating the same tedious tasks.
The benefits of making and implementing reusable blocks 👍
If you’re having trouble seeing the overall value in reusable blocks, here are some benefits and situations where they shine:
- There’s no more need to copy a content template into a text editor and paste it into a new post or page.
- You can design a unique webpage, then duplicate it on other websites or on that same site.
- The blocks are great for adding content at the end or beginning of articles, like with social media buttons, author biographies, email opt-ins, and more.
- Many webpages require call-to-action text and buttons. This is particularly useful if you make lots of landing pages.
- Tables are somewhat complicated to make, so reusable blocks allow you to quickly duplicate them.
- Many bloggers and marketers have ads or affiliate banners on all pages and posts. Blocks cut down on manually adding these every time.
- You can save elements like surveys, forms, and quizzes as reusable blocks, then change the content for the occasion.
Once you start thinking about it, the benefits of reusable blocks seem endless. The moral of the story is that they remove unnecessary work and save you time.
But how do you make these blocks?
How to make WordPress reusable blocks 🧱
To begin the process, create a new post or page in your WordPress dashboard. For this demonstration, we’ll be making a new blog post. I’m pretending like I have a video course to offer my readers.
Therefore, I’d like to put a noticeable call-to-action and signup button at the bottom of each blog post.
Keep in mind that you can make reusable blocks for other needs as well.
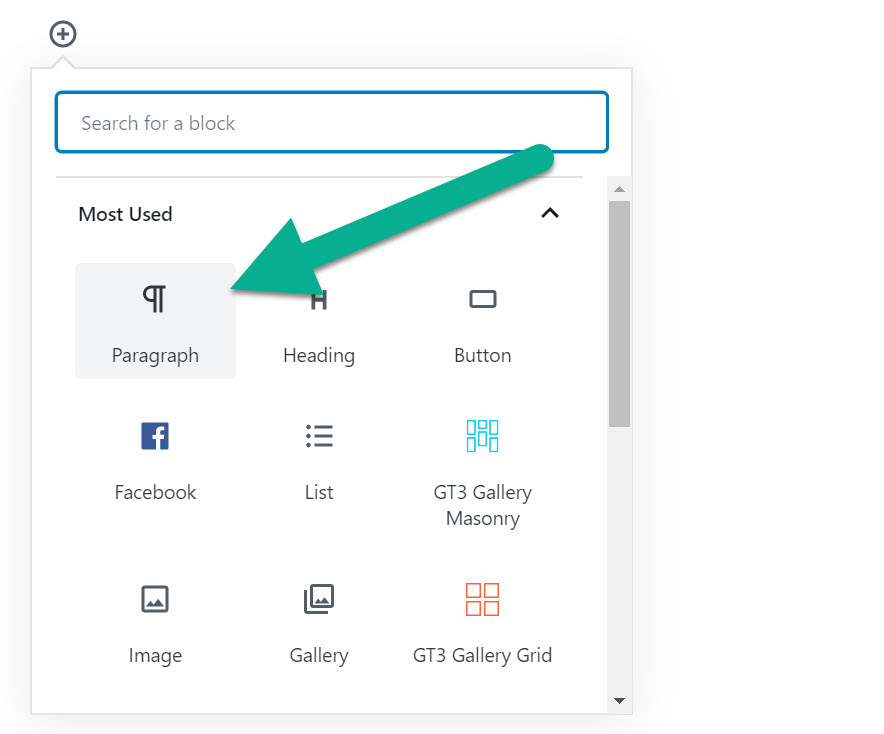
Once you create a new post, find the Add block button in the text editor. Click on that.

Scroll down the list or search for “Paragraph,” or whatever type of block you want to make reusable.
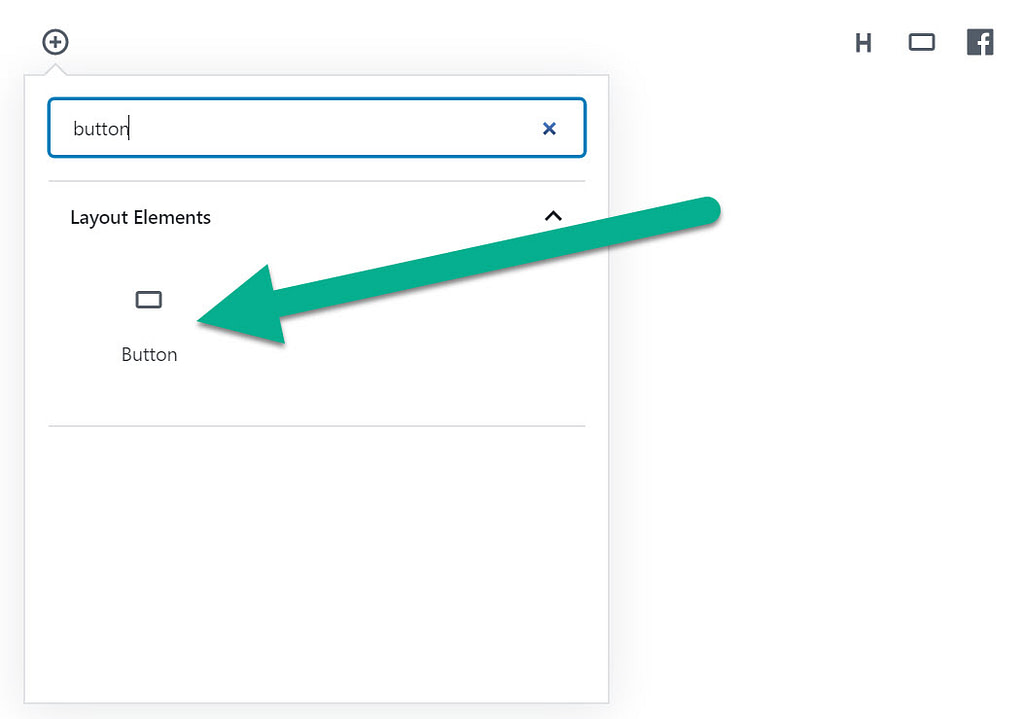
I’d also like to add a button to this call-to-action.
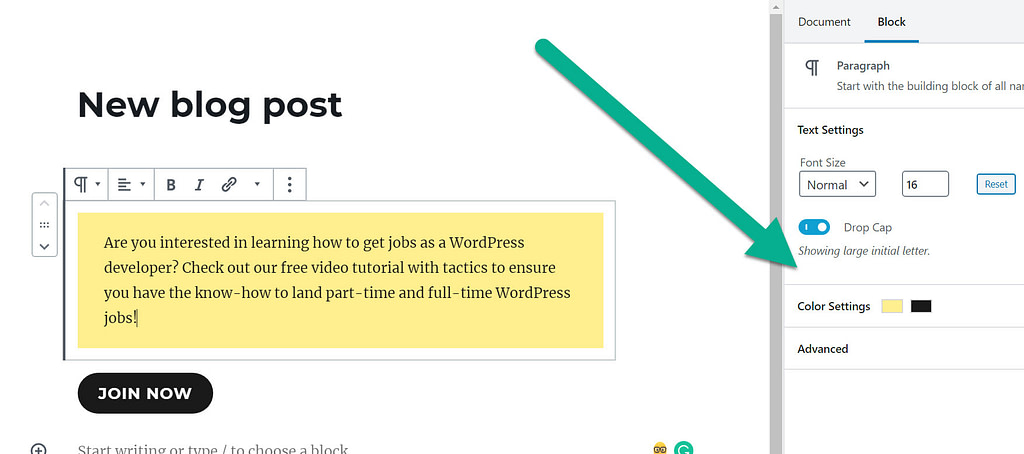
Design the block however you desire. Many of the design tools are located on the right side of the editor. For instance, I changed the background for my call-to-action text.
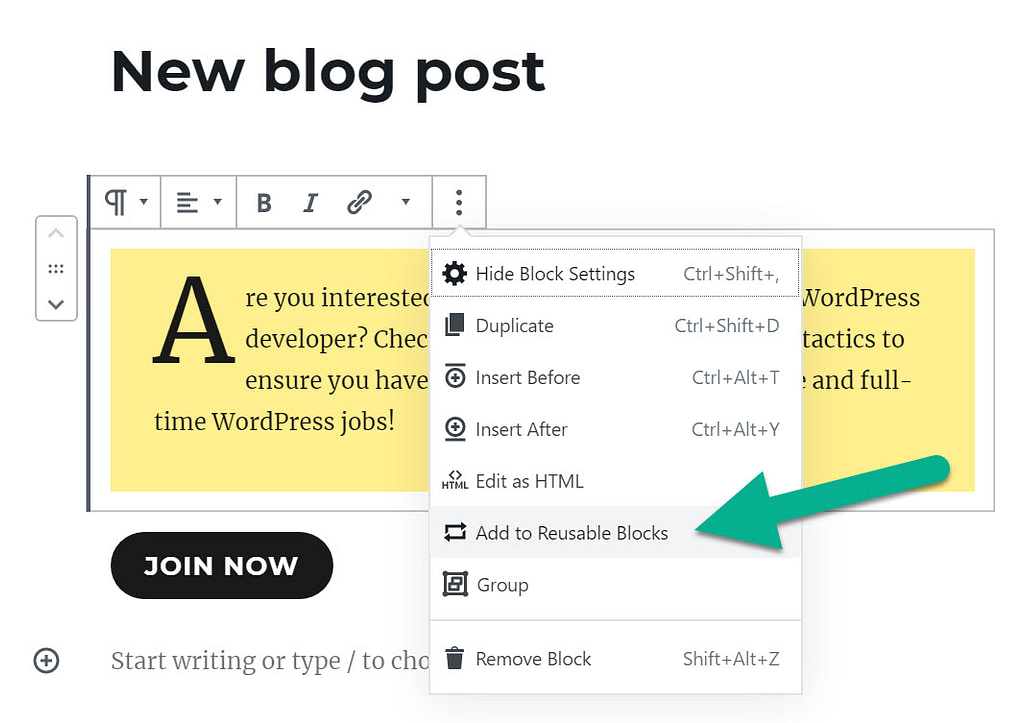
There are two ways to make reusable blocks. The first is to save the blocks individually. To do so, scroll over the block and find the three vertical dots button.
In the dropdown menu, click on Add To Reusable Blocks.
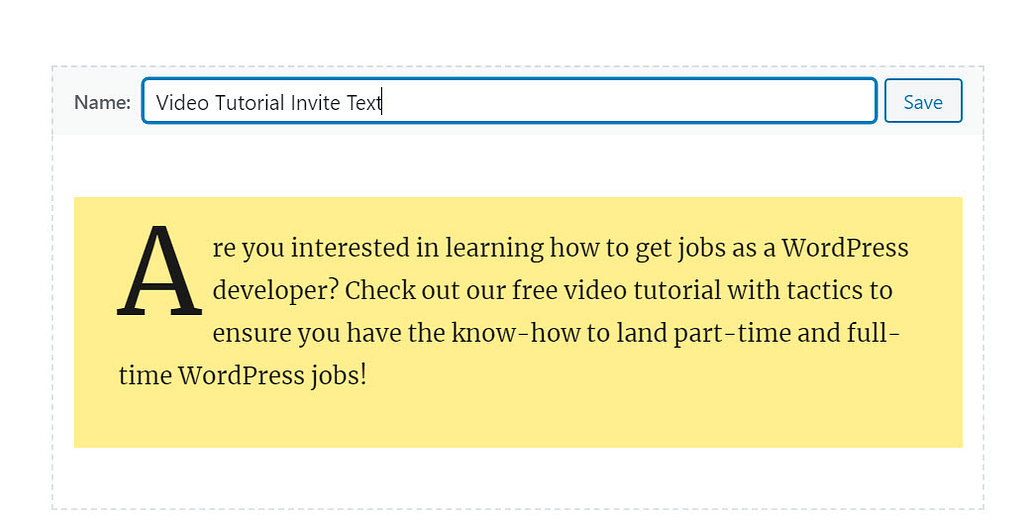
It now asks you to name your reusable block. No one sees this. It’s for you to find the template later. Click on the Save button.
But what if you need to save multiple blocks together? This would be useful for duplicating more complicated designs or for adding a button to my call-to-action.
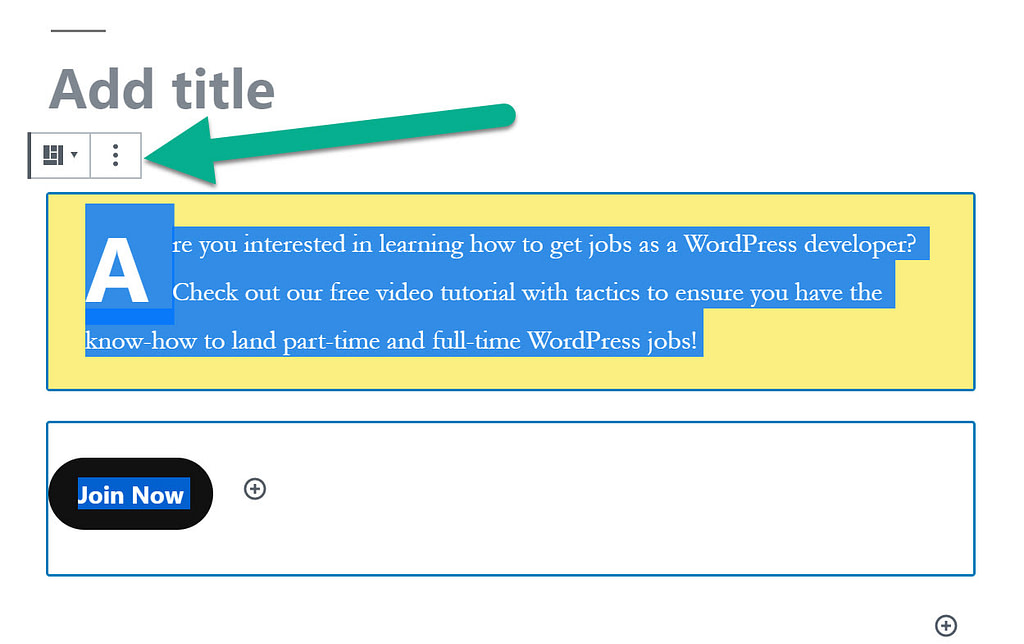
For this, all you have to do is select all blocks you’d like to save. There are two ways to select multiple blocks:
- You can click-and-drag the mouse while holding the mouse button down (just like you’d do to select multiple paragraphs of text).
- You can select one block, then hold down the Shift key as you click on the other blocks you want to include in the group.
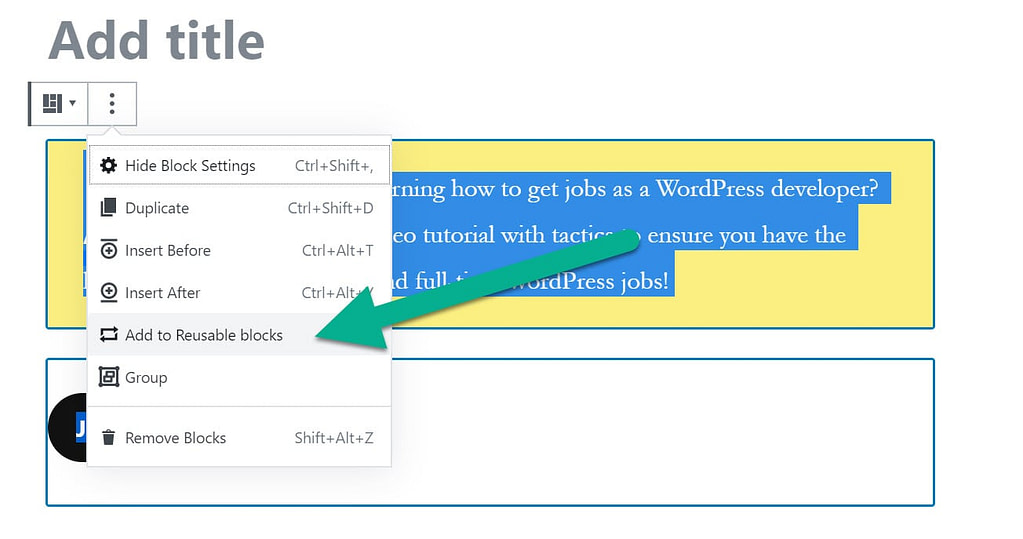
With all blocks selected, click on the three dots button.
Choose the Add To Reusable Blocks option.
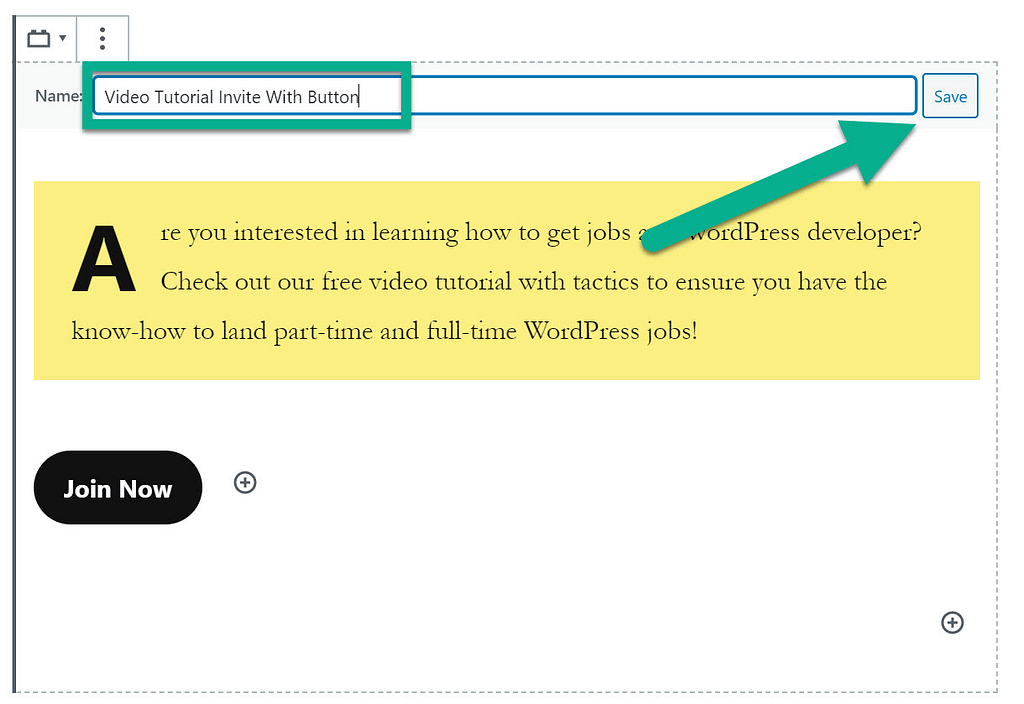
Name the reusable block and click on the Save button. For this example, I’ve named my reusable block “Video Tutorial Invite With Button.”
Add the reusable block to a new post or page on your website
Now it’s time to insert your reusable blocks elsewhere on your website!
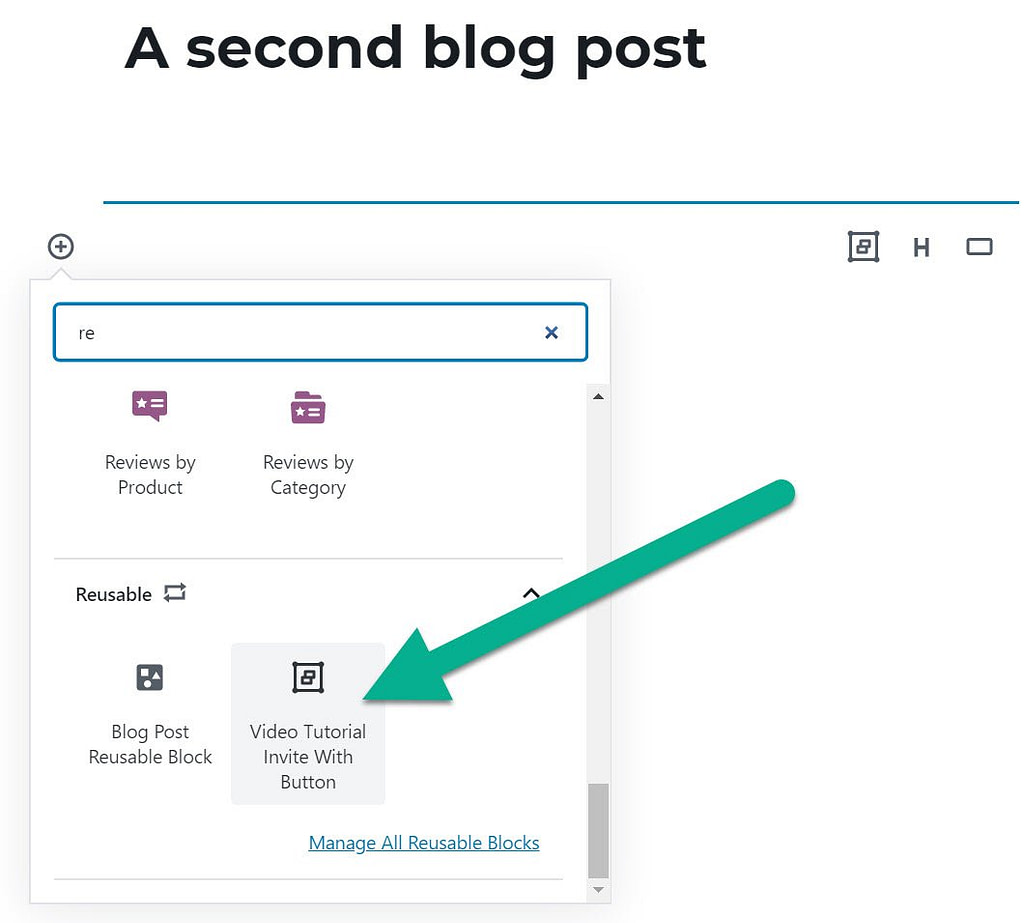
To do that, open the regular block inserter interface and then scroll down.
At the very bottom of the list, you’ll find the Reusable section. Click on the one you want to insert.
If you remember the name of the reusable block, you can also search for it by name. Or, you can use “/” to quick-insert reusable blocks without using the full interface. For example:
/[name-of-reusable-block]
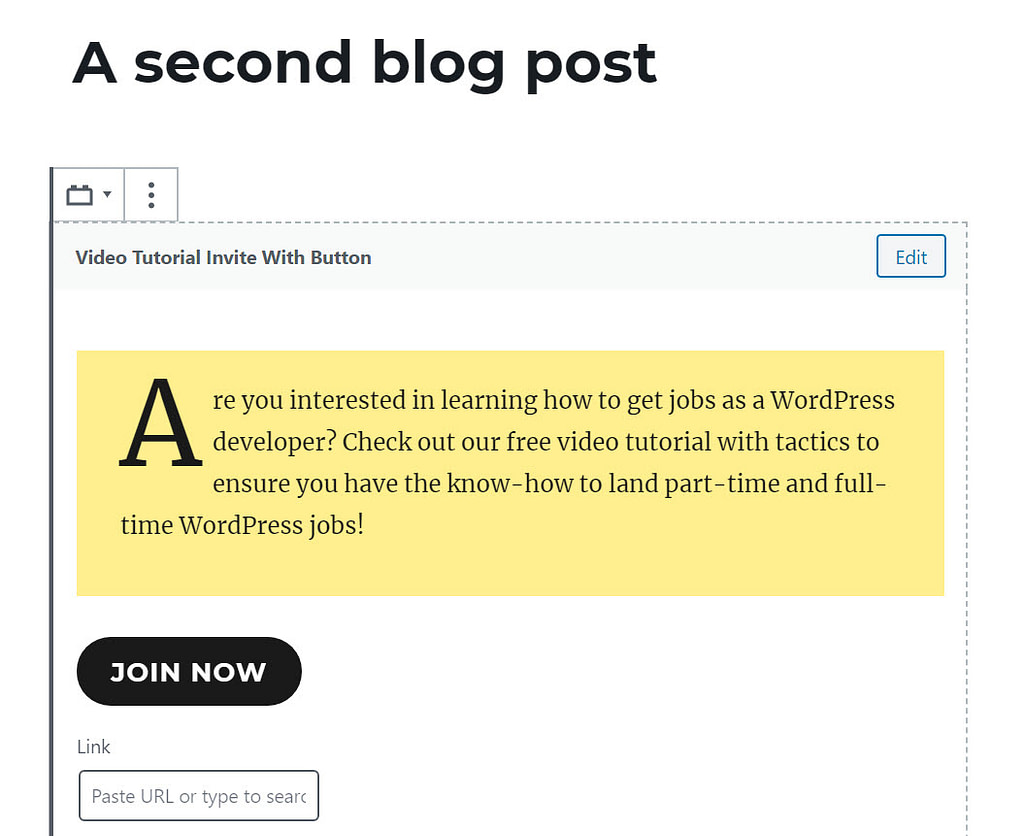
With this selection, the block editor inserts an exact replica of your previous design, removing the need to write and design the call-to-action (or any design) for every single blog post.
How to edit content from a reusable block in a specific post
You cannot directly edit a reusable block from the WordPress editor once you insert it. To edit the reusable block content, you need to use the block management interface, which we’ll cover next.
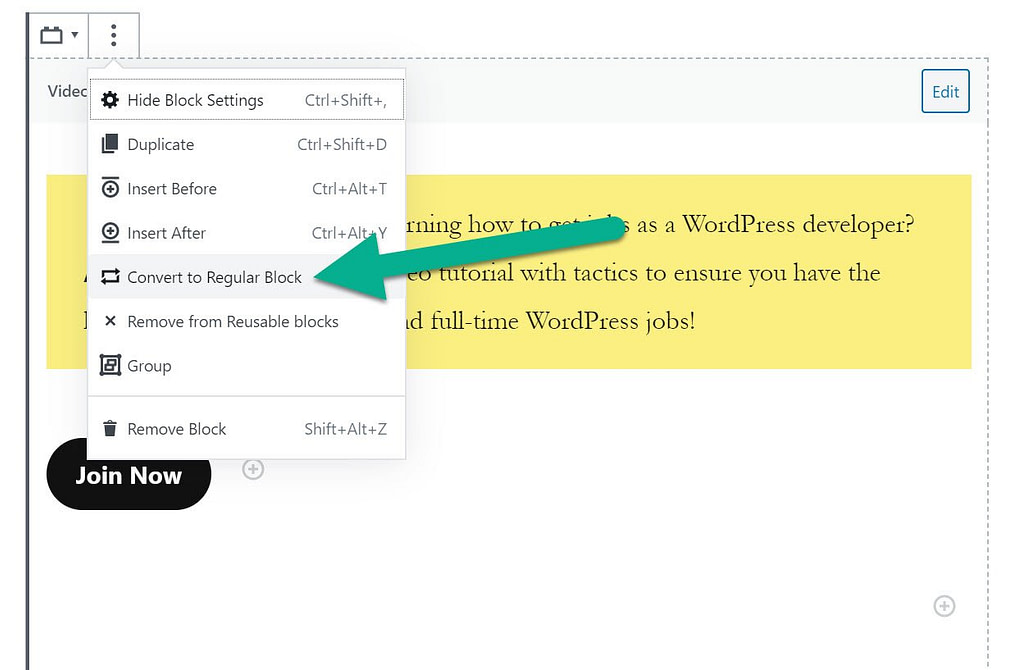
However, you can make changes by converting your reusable block into regular blocks.
This will not affect other instances of your reusable block – it only affects the specific post that you’re editing. Also, once you convert a reusable block back to regular blocks, you won’t be able to automatically update it in the future if you change the reusable block.
To convert a reusable block back to regular blocks, open the menu for your reusable block and select Convert to Regular Block:
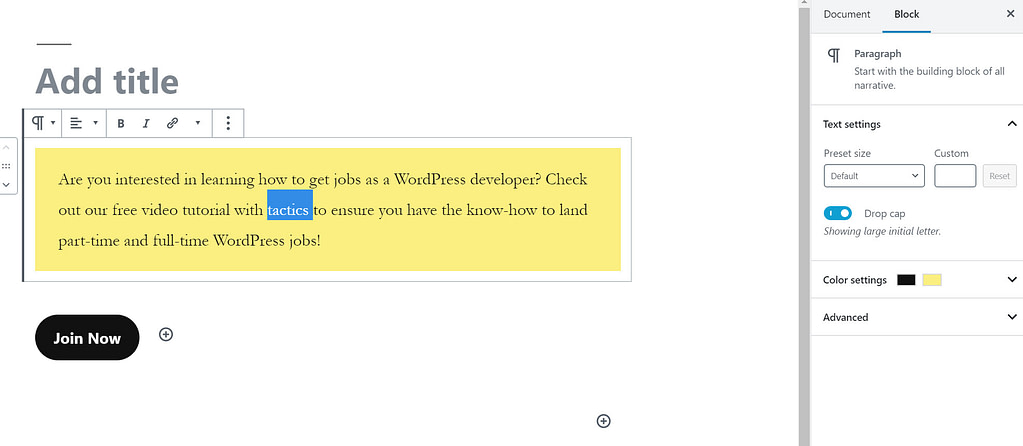
This removes all editing restrictions, so you can now make changes to those two blocks (the text and button blocks) as if they were created directly in the new post.
How to export and import WordPress reusable blocks
An advantage of reusable blocks is that you’re not only limited to using them on the same website.
You can also export the reusable blocks to insert them on some of your other websites. This is useful for web designers or anyone who manages multiple sites.
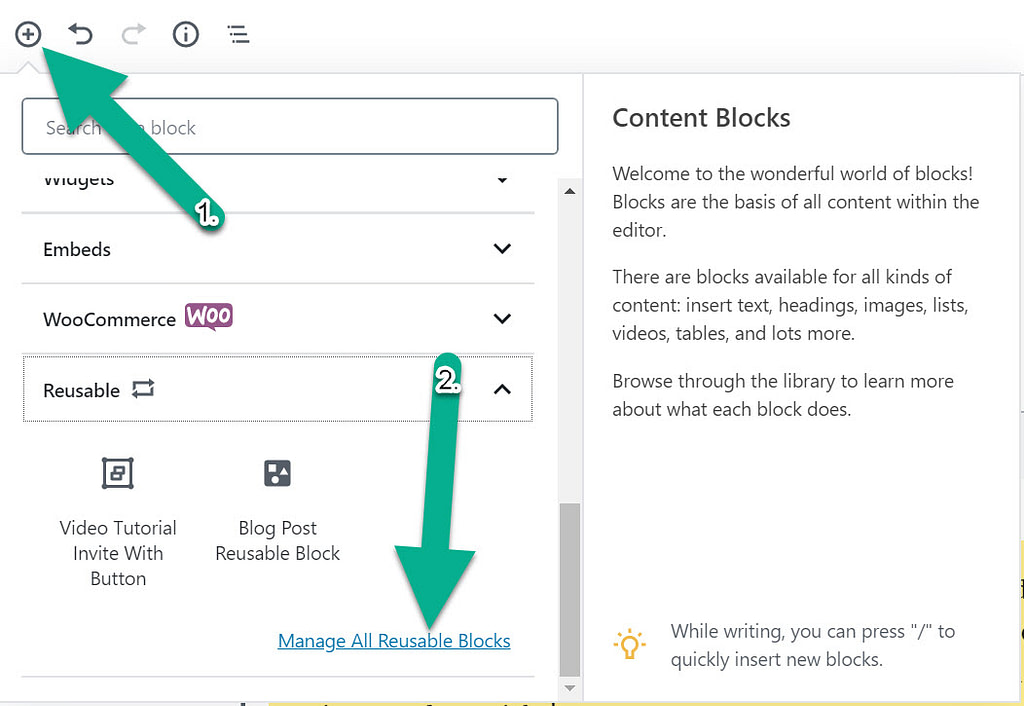
In the editor, locate the “+” button towards the upper right side of the editor.
Click on that to show the list of blocks. Scroll to the bottom and select the Reusable section. Locate and click on the Manage All Reusable Blocks link to move forward.
This area helps with editing reusable blocks, deleting them, and making new ones.
Tip: If you want to edit all instances of a reusable block, you can click the Edit link. Any changes that you make will automatically apply to every post that uses the reusable block (unless you converted it back to regular blocks following the method that we showed in the previous section).
But for now, click on the Export as JSON link under the reusable block you’d like to export. This saves a JSON file to your computer. Don’t worry, there’s no need to learn about how a JSON file actually functions.

Now you must log in to your other WordPress dashboard. Again, go to the Blocks page using the same steps from before.
There’s a button that reads, Import from JSON. Click on that to find the JSON file on your computer and upload it to the new website. You’ve now transferred the reusable block to a completely different site!

Have you utilized WordPress reusable blocks yet? 🏗️
WordPress reusable blocks are a useful tool to speed up your content creation process and standardize content across your site. Once you create a reusable block, you can easily insert it anywhere else on your site.
Plus, if you ever need to change that content in the future (like updating a CTA), you can simply edit that block once and those changes will push out to every instance of that reusable block.
Or, you can also convert a reusable block back to regular blocks to be able to edit its content on a post-by-post basis.
For some more help on using the block editor, check out our tutorial here. You can also install some of the best WordPress block plugins or block themes for even more flexibility.
Do you still have any questions about working with reusable blocks in WordPress? Ask us in the comments!


Or start the conversation in our Facebook group for WordPress professionals. Find answers, share tips, and get help from other WordPress experts. Join now (it’s free)!