
If you’re running a business, setting up a custom email address is key. A professional email can boost your credibility and make you look more legitimate. It can also strengthen your brand and improve efficiency among your team members, especially if you use tools such as Microsoft Office 365. However, the setup process can seem like a daunting task.
Fortunately, configuring your email settings and linking your custom domain doesn’t have to be difficult. Microsoft Office 365 has an intuitive setup wizard to guide you through each step. Also, some domain registrars offer Microsoft integrations, which makes the process easier as many steps are automated.
In this article, we’ll show you how to set up Microsoft Office 365 with a custom email address in three steps.
Let’s dive right in!
How to set up Microsoft 365 with a custom email address 📧
⚠️ Note: Before we begin the tutorial, we just want to mention quickly that the names Microsoft 365 and Office 365 have long been used interchangeably. Officially, the tool was called “Office 365” for a long time, but Microsoft made a branding decision to drop the Office 365 name [1] and so nowadays the official name is just Microsoft 365. That is what we will refer to it as for the remainder of this tutorial.
For this post, the only things that we’ll assume are, that you already have a Microsoft 365 business account and a domain name.
If you don’t, you’ll want to:
- Register for your Microsoft 365 account. In the first step of this tutorial, you’ll use this account to purchase the Microsoft 365 subscription that you need for your custom email address.
- Choose and register your domain name.
Once you have those two things, here’s how to set up your custom email address.
1. Add and verify your domain name
First, log in to the Microsoft 365 admin center and follow the setup wizard for Microsoft 365, which is what you need to set up your email. Note that to create a custom-branded email, you will need to have the Microsoft 365 Business Basic plan (or higher). This plan costs $6 per user, per month when paying annually. You can also choose to pay month-to-month, which costs $7.20 per user, per month.
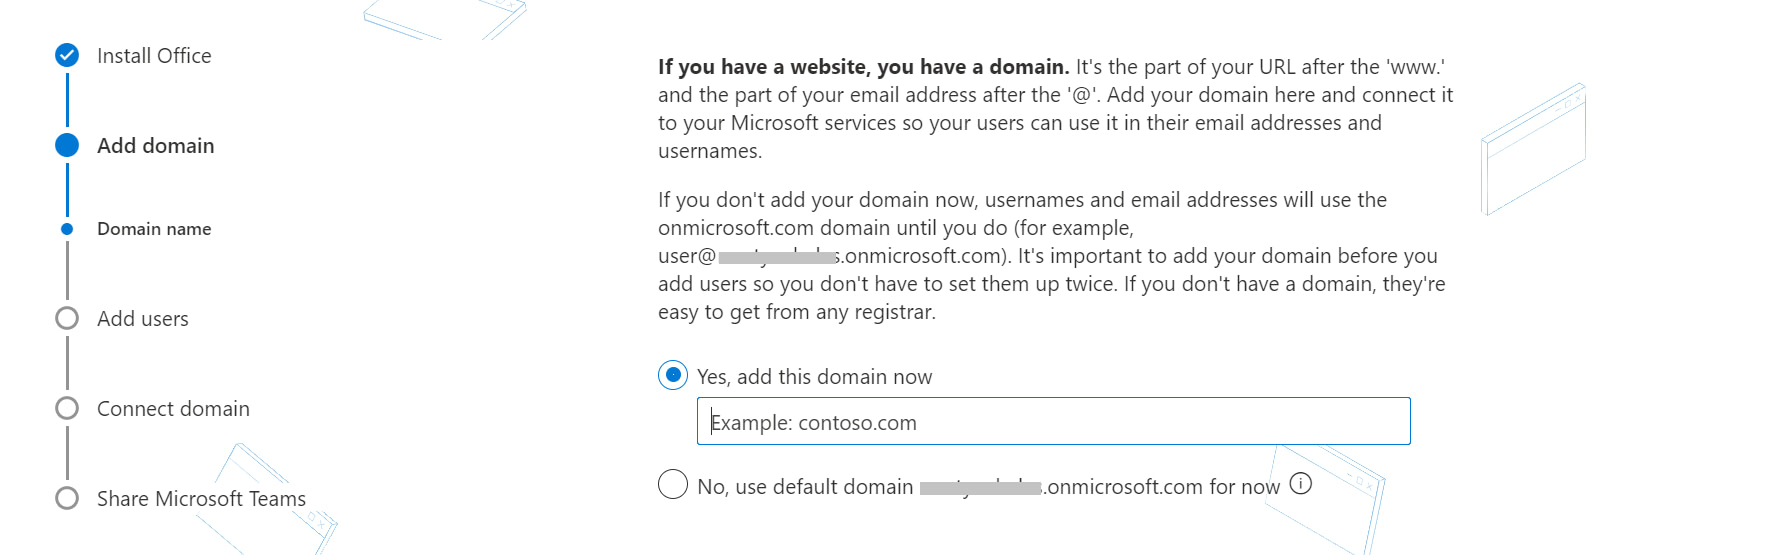
Go to the Add Domain section, check Yes, add this domain now, and enter your domain (such as example.com). Then click on Use This Domain:
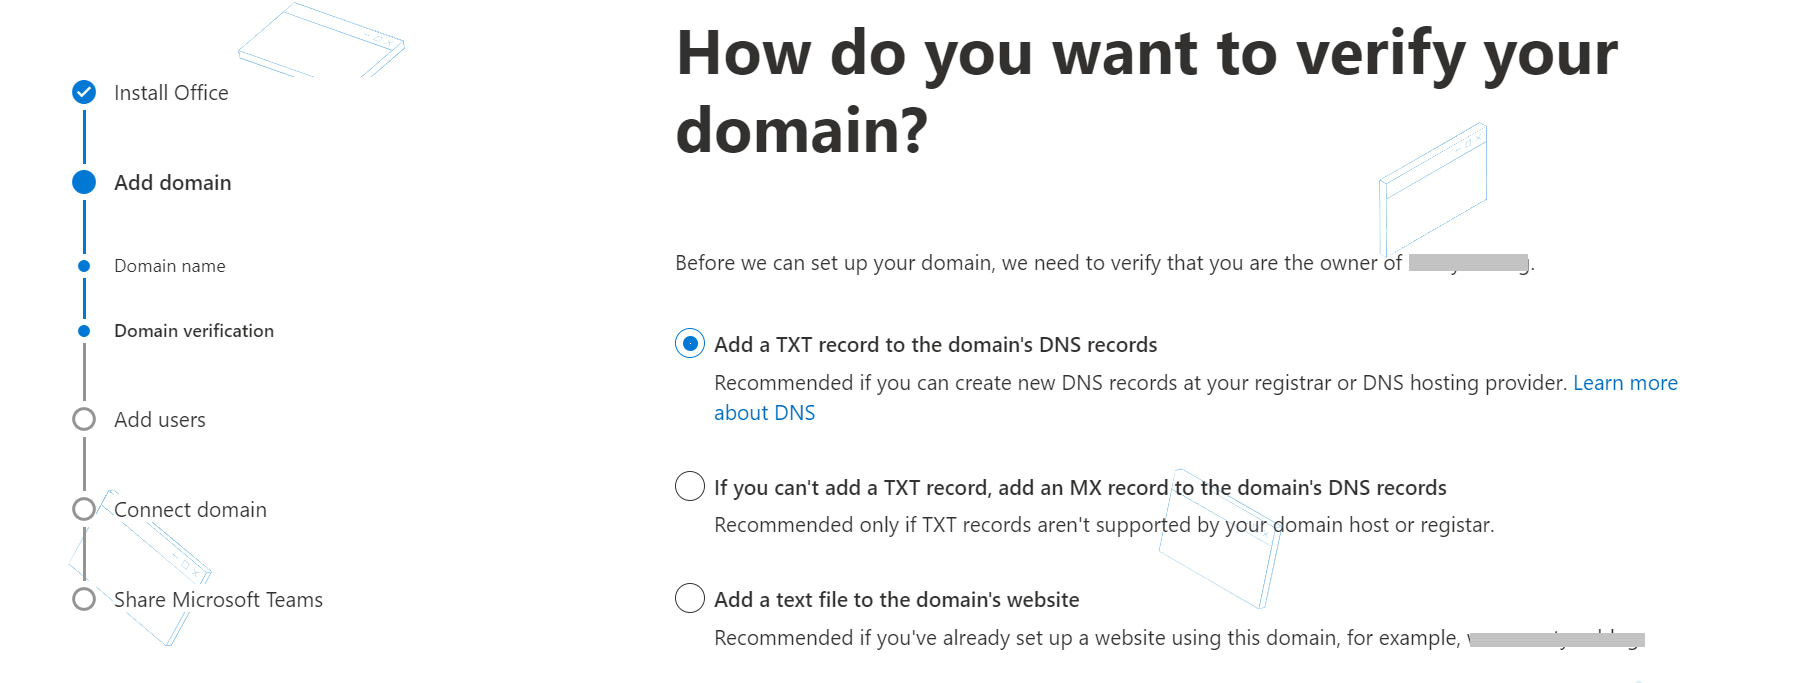
Next, you’ll see the Domain Verification screen which offers you three ways to verify your domain. It’s best to pick Add a TXT record to the domain’s records.
If you already have a website set up under the domain you’re using, you can also opt for the third option, which is to add a text file to your website:
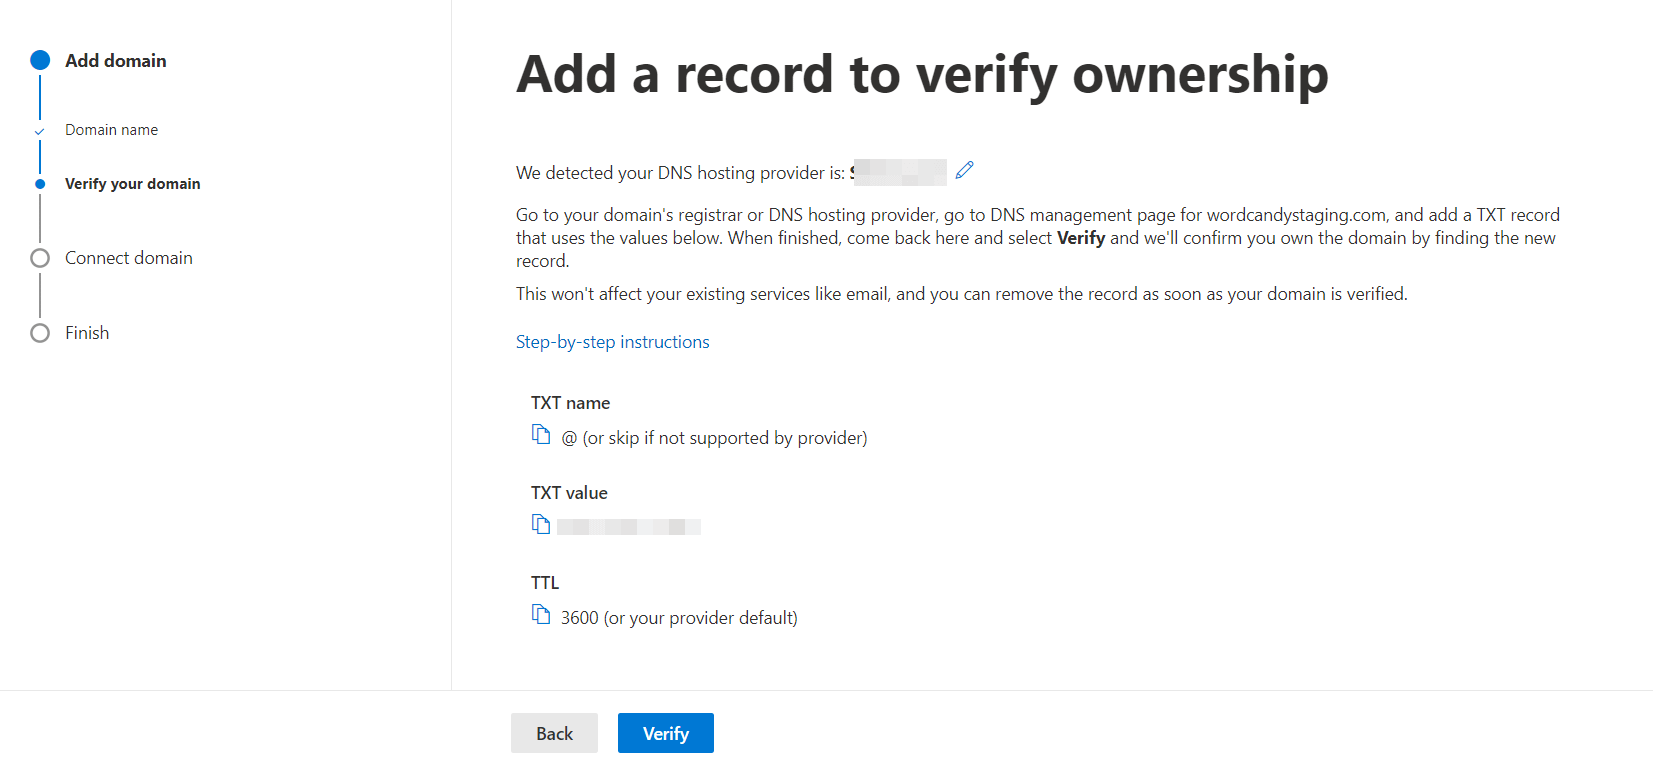
On the next screen, you’ll find further instructions and TXT values that you will need to use for verification. Make sure you keep these handy for the upcoming steps.
Now, head to your domain’s registrar, log into your control panel, and go to your Domain Name System (DNS) management settings. If you’re using your web host’s nameservers, you’ll need to manage your DNS settings via your hosting dashboard.
Once you’re there, navigate to Add a Custom DNS Record (or something similar), and set the type to TXT:
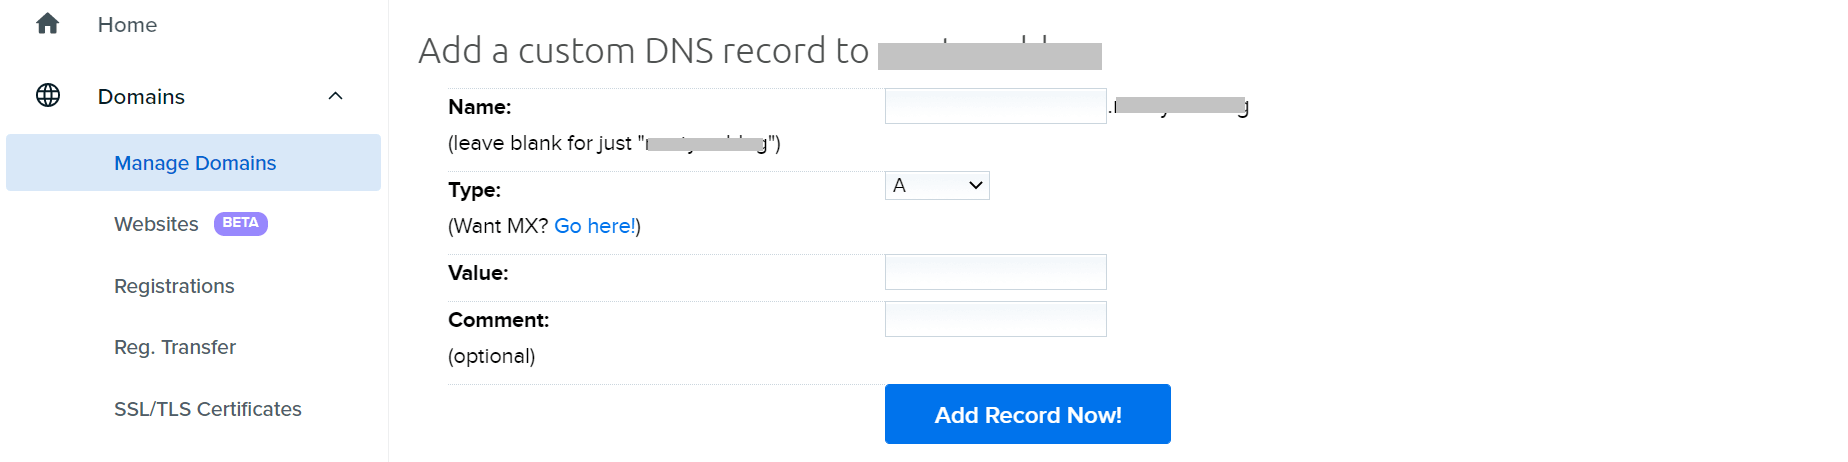
Then, enter the TXT values from your Microsoft 365 setup screen, and add the new record. This will be used for verification only, so you can delete it later if you like. Note that it might take a few minutes for your changes to take effect.
Next, go back to your Microsoft admin center (or go to Settings > Domains if you closed the setup wizard), and click on Verify:
Once verified, you’ll be able to add users (such as user@example.com):
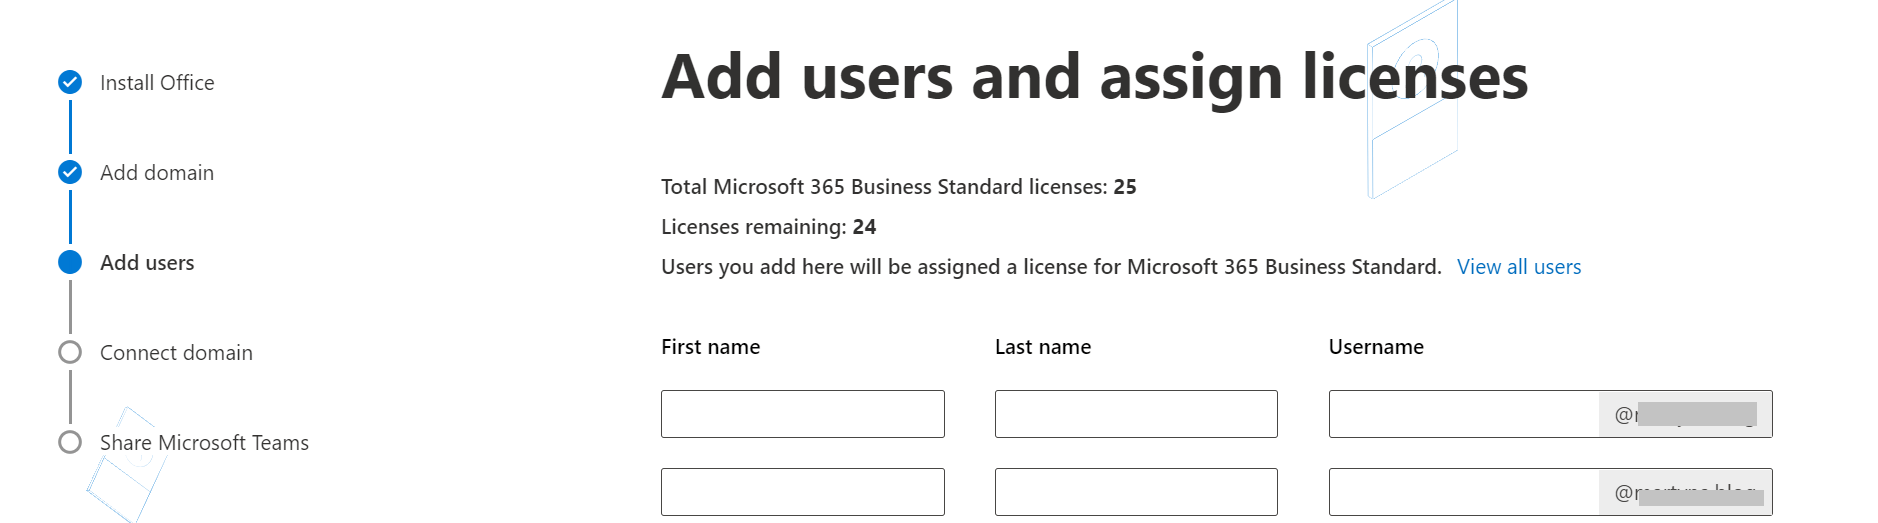
You can also come back to this step later if you prefer.
2. Set up your DNS records and online services
In this step, you’ll need to configure your online services and link your domain with Microsoft’s servers. You can choose to set up your DNS records manually, or Microsoft can add them on your behalf if you purchased your domain name from the following registrars:
- 1&1 IONOS
- EuroDNS
- Cloudflare
- GoDaddy
- WordPress.com
- Plesk
- MediaTemple
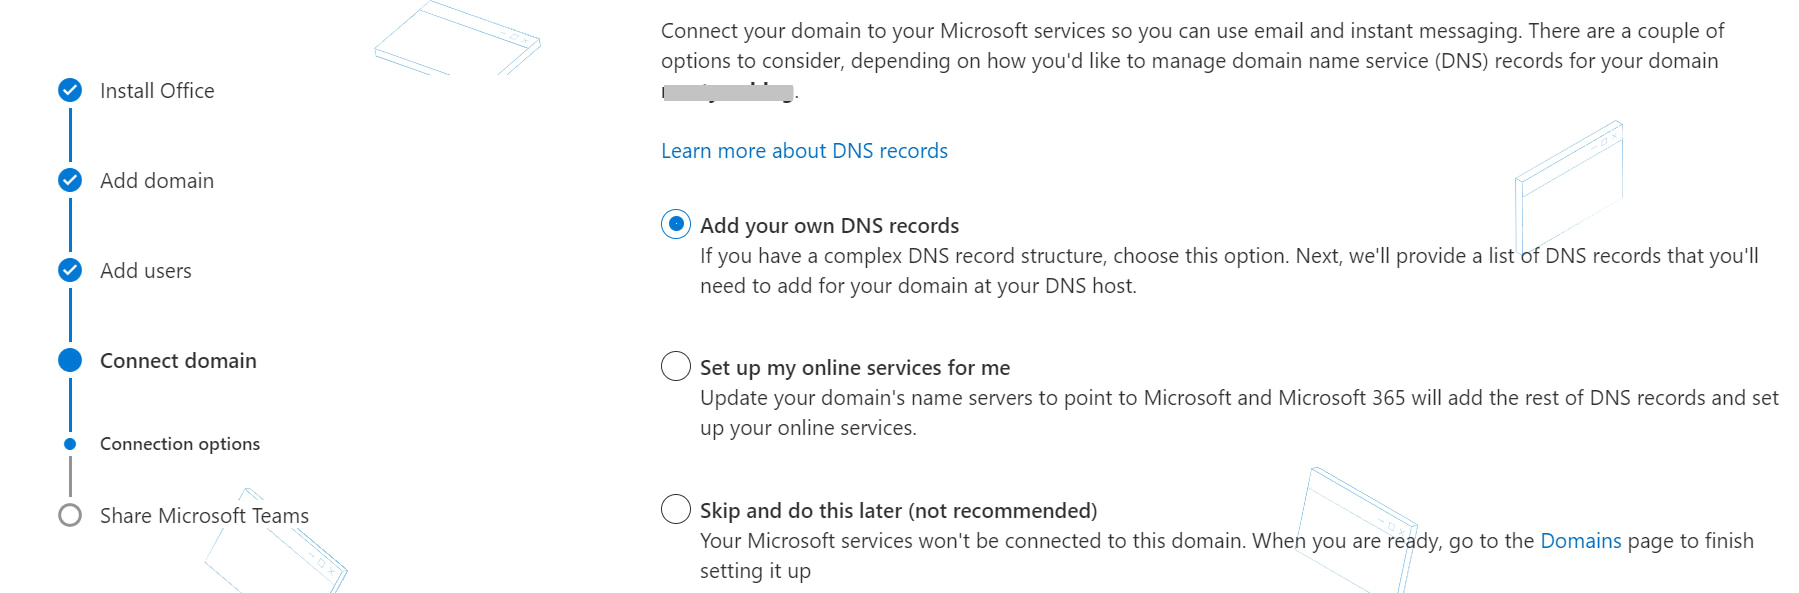
Unless you have a complex DNS structure, you can choose Set up my online services for me and the details will be automatically populated for you. Then click on Continue:
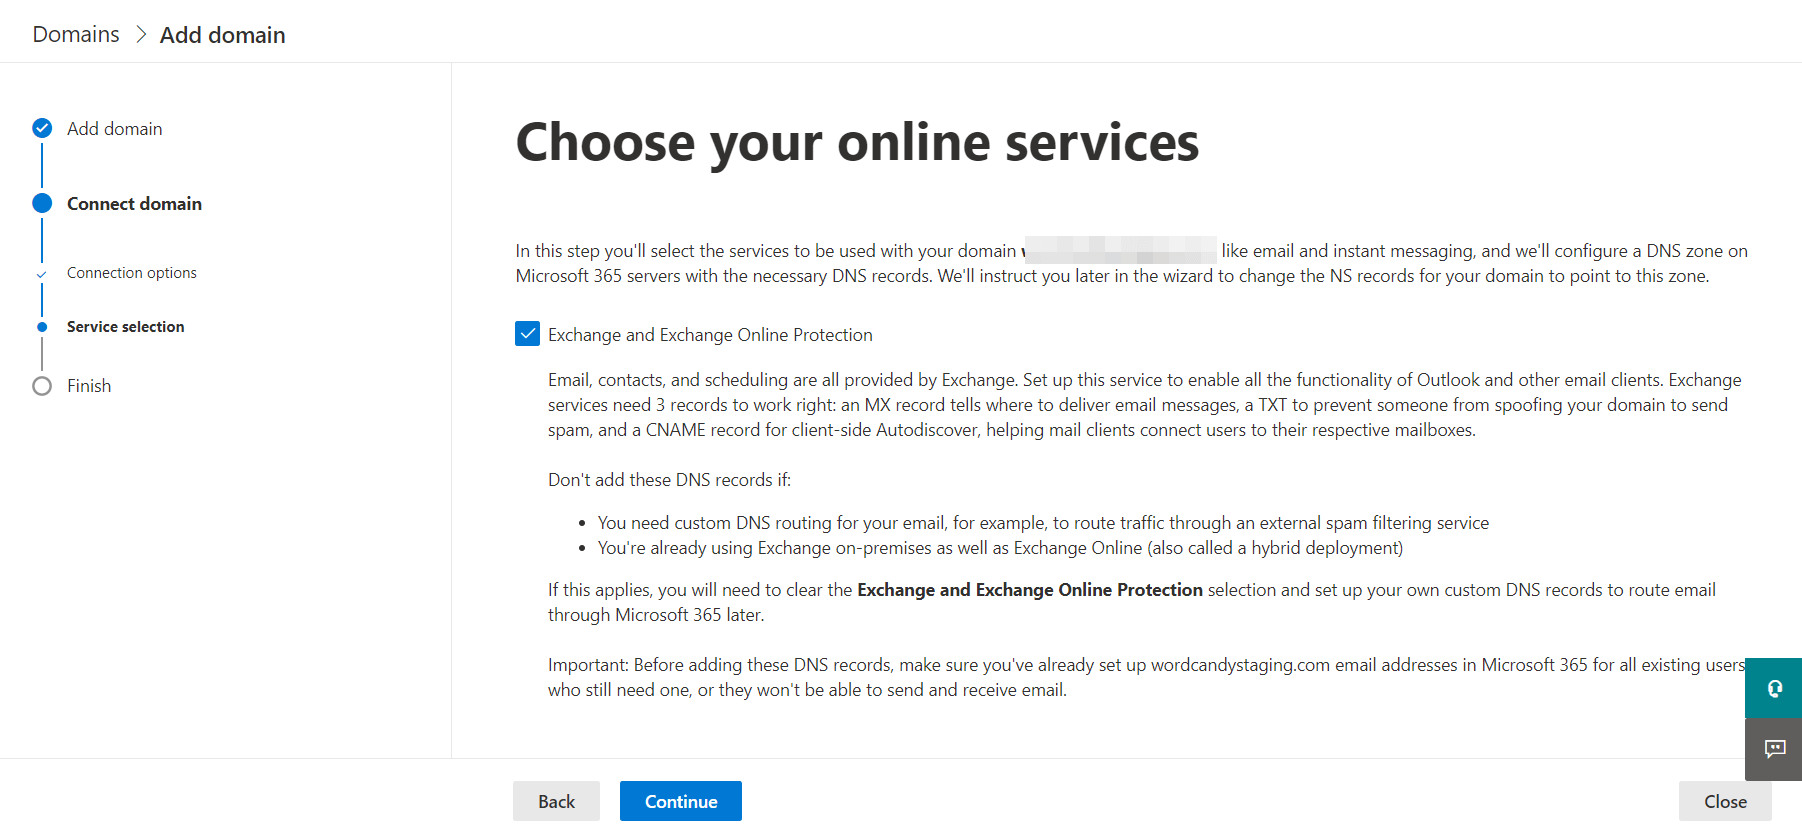
Next, you’ll need to select your preferred services such as Microsoft Exchange or Microsoft Teams. If you opted for the automatic setup in the previous section, Microsoft will configure them for you. When you’re done, click on Continue:
Now, you’ll need to link your domain’s DNS records with Microsoft’s servers. Click on Import DNS Records or Add Record if you prefer to do it manually:
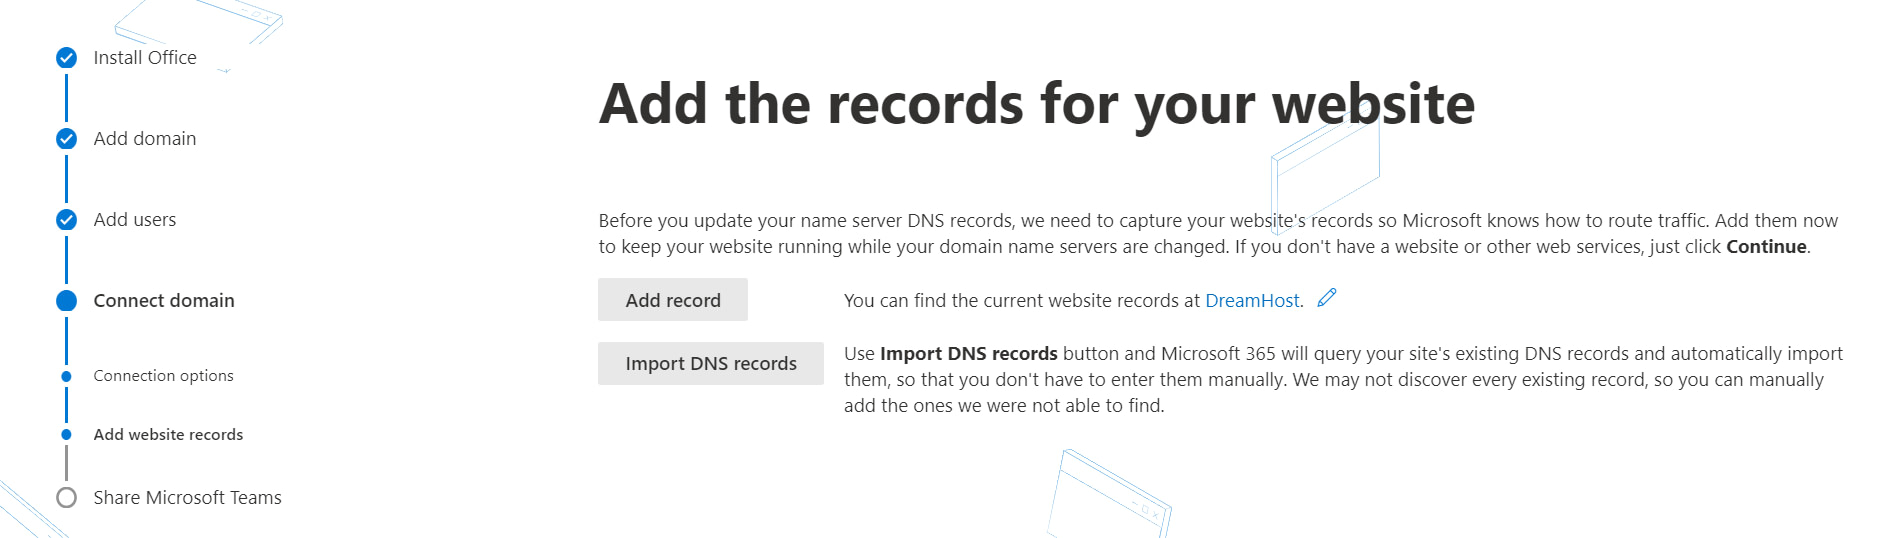
Your DNS details are available in your registrar’s control panel, typically under Domains.
How to manually add DNS records if your registrar doesn’t support Domain Connect
If you’re using a registrar that’s not on the list above, you’ll need to manually add the DNS records via your domain registrar. Or, if you’re using your host’s nameservers, you’ll need to add them via your hosting account.
In your domain registrar account dashboard, find the setting for creating custom MX records (usually Mail > Custom MX). It should look similar to this:
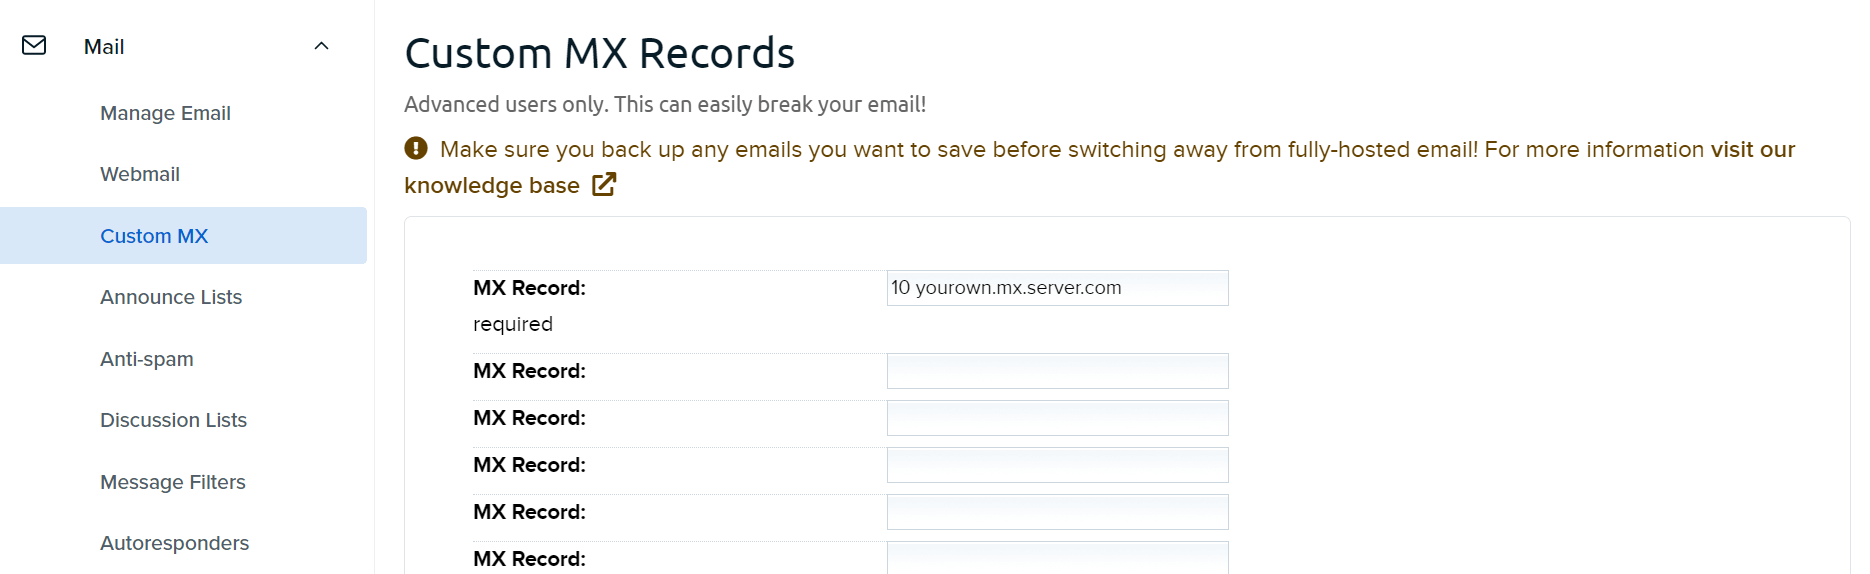
Then, fill in the fields with the values that are specific to your domain registrar. You can also use generic instructions if you don’t find your provider on the list.
Delete any other existing MX records, then save your changes. By doing this, your email will be delivered to Microsoft rather than your domain’s hosting provider.
Next, you will need to add CNAME and SRV records. Navigate to Domains, then select DNS for the domain that you want to use. This step should look similar to what you did at the verification stage when you added a temporary TXT record.
Go to Add a Custom DNS Record (or similar) and select CNAME as the type. Then, add values as per Microsoft’s host-specific instructions.
Repeat this step to add SRV records. You can also add a TXT record with SPF value to help prevent spam.
3. Update your nameservers
Finally, you are ready to update your nameservers. This step will make Microsoft 365 the DNS host for your domain so that you can start sending and receiving emails.
In your registrar’s control panel, go to Domains, and find the section where you can add or edit nameserver records. Then, update your records with at least two Microsoft nameservers, which will be provided to you in the setup wizard:

Note that it might take up to 30 minutes before your changes take effect. Once you’re done, return to the Microsoft admin center, and click on Continue.
That’s it – your Microsoft 365 custom email address setup is now complete. Any other users you added should receive emails with their username and password details so they can log in and start managing business communications.
Conclusion 🏁
Using a generic email address will not do your business any favors. If you want to look like a legitimate company, you’ll need to learn how to set up a custom-branded email address. Connecting your website’s domain with an email tool such as Microsoft 365 can seem overwhelming. Still, it’s worth the effort if you want to take your business to the next level.
In this article, we’ve shown you how to set up a custom email address with Microsoft 365 for Business in just three steps:
- Add and verify your domain name.
- Set up your DNS records and online services.
- Update your nameservers.
If you’re interested in other options, we also have a post on other ways to create a business email address, including setting up your email with Google Workspace (formerly G Suite).
Do you have any questions about creating a custom-branded email address with Microsoft 365? Let us know in the comments section below!


Or start the conversation in our Facebook group for WordPress professionals. Find answers, share tips, and get help from other WordPress experts. Join now (it’s free)!