Looking for a Squarespace tutorial to help you make your website?
It’s a great choice. I love Squarespace. It doesn’t matter what you want to build right now – whether it’s an eCommerce store or a website for your band – what’s important is that once you know how to use Squarespace, you know how to make a website for practically anything.
On the flipside, Squarespace can throw the odd curveball in your direction. It has so many different options that learning how to use Squarespace can get a bit confusing. With this step-by-step guide, we’ll show you how to make the most of Squarespace to get your website online faster.
📚 Table of contents:
- Personalizing your Squarespace experience
- How to pick a Squarespace design for your website
- Signing up with Squarespace
- Getting to know your Squarespace dashboard and editor
- Editing your website content
- Making design changes
- Adding an eCommerce store
- Previewing your site on mobile
- Publishing your site and pricing
Squarespace tutorial: How to use Squarespace to build a website
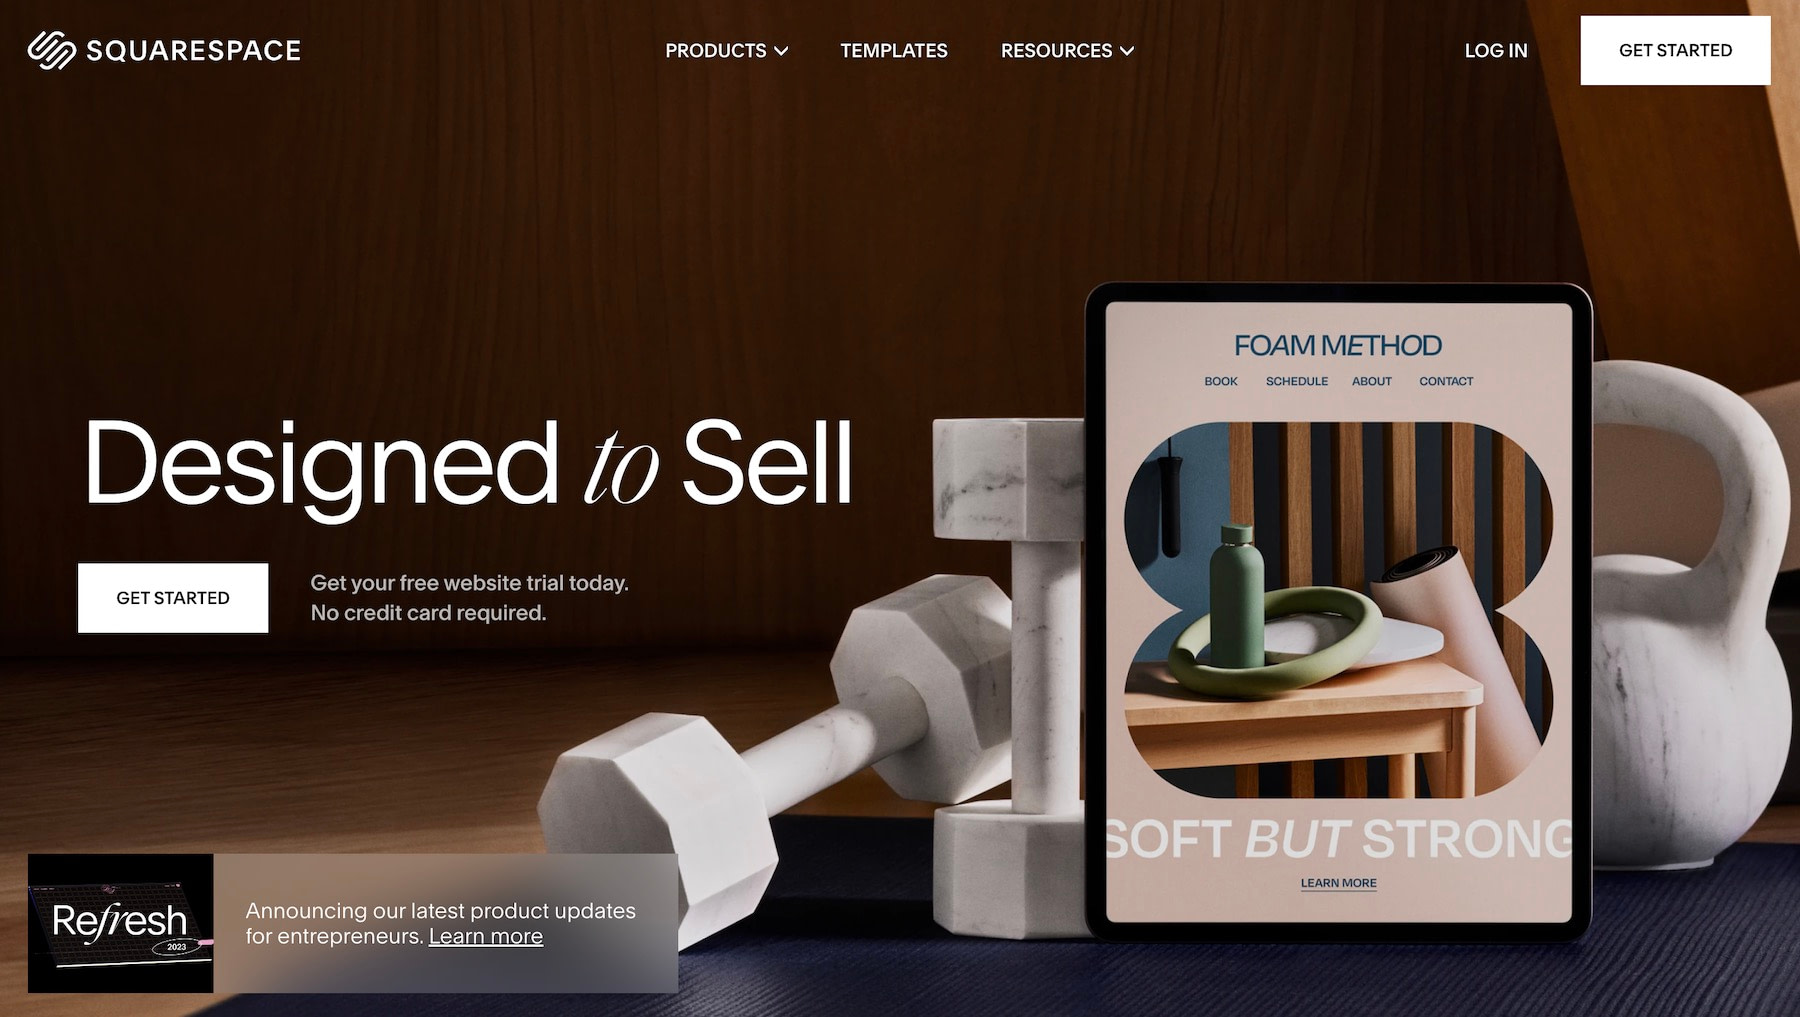
For now, let’s head over to the Squarespace website and click either one of the two Get Started buttons:
Personalizing your Squarespace experience
Once you’ve started, you’ll have the option to answer a few questions about your business and website. You can skip them at any time, but your answers help Squarespace find website themes that match your needs and objectives.
For example, if you want to make a food blog, Squarespace will show you the best website themes for blogging and food. You can enter your own topics but get it broad. For example, real estate will generate better results than selling to first home buyers.
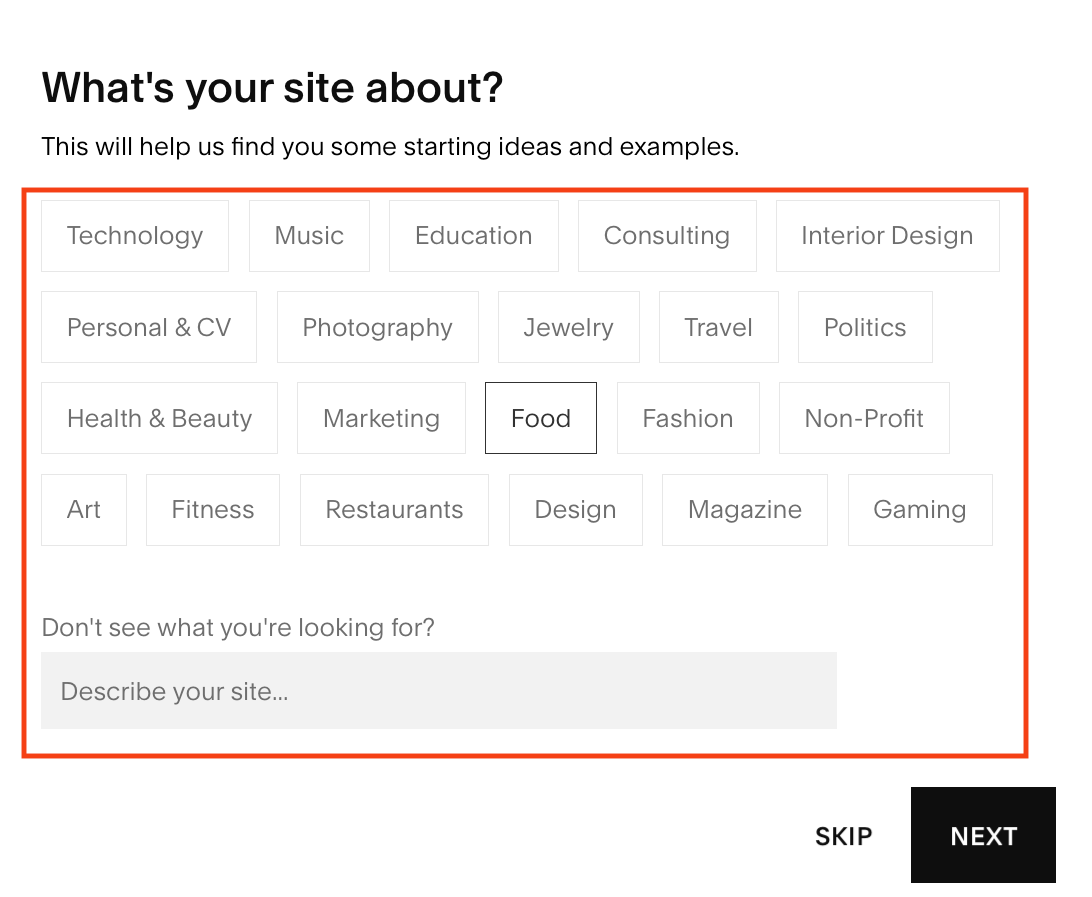
When you’re happy with your selection, click Next to move on.
If you have specific objectives, like creating a membership site or creating an eCommerce site, select them from the goals menu.
But don’t select goals you plan to pursue “one day.” Just pick the ones that pushed you to get started today. These are going to determine how Squarespace ranks the designs you’ll see later on.
For example, if real estate was your topic, but you picked sell products and services as a top goal, you’ll see many eCommerce themes before you see a single real estate theme.
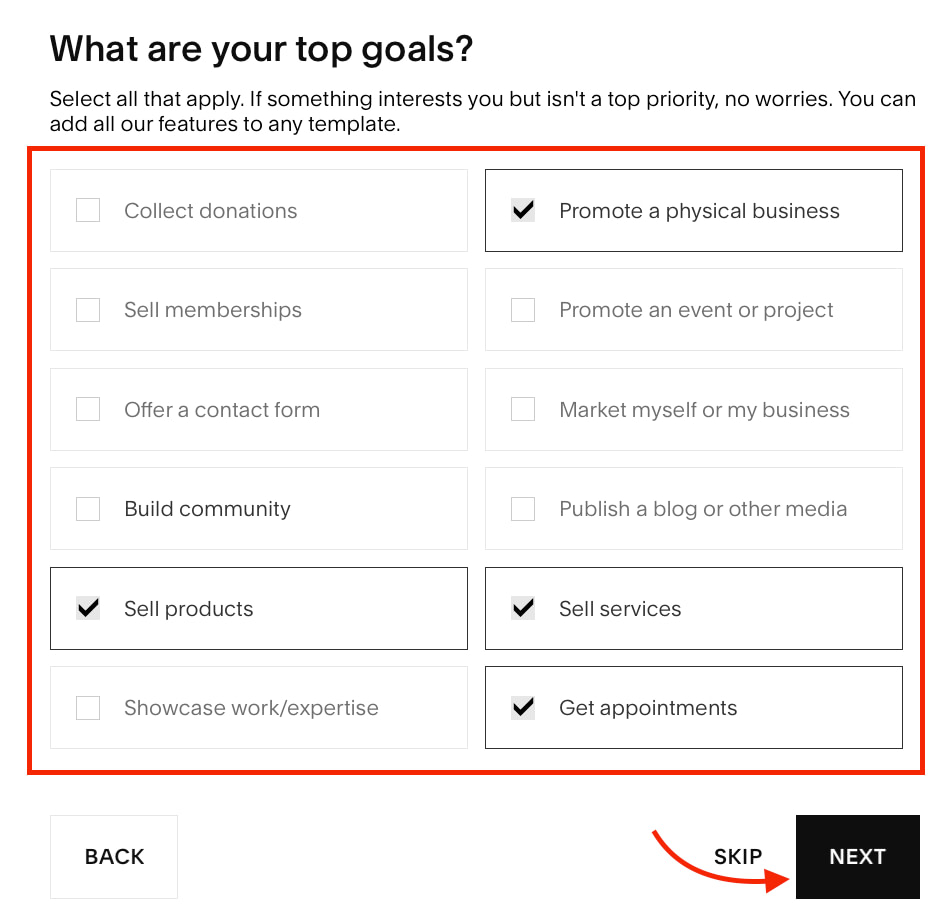
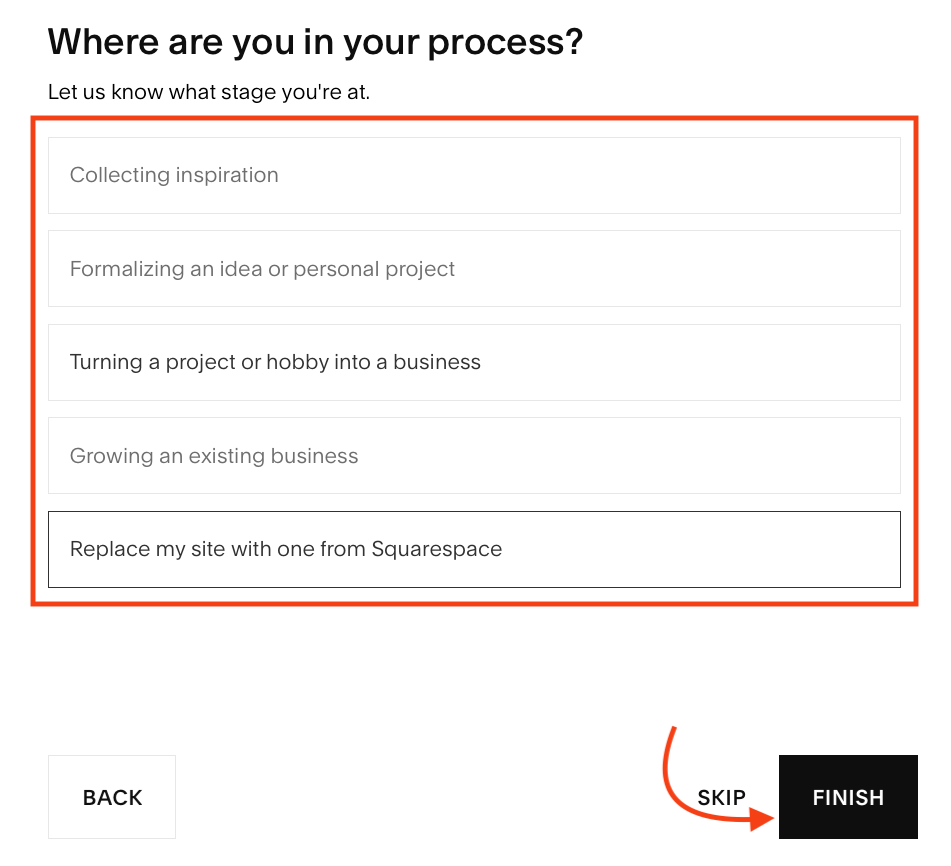
With the goals handled, let’s tackle the final question. Whether you’re exploring an idea or transferring a website, click on the best answer and then Finish to move on to the exciting part of any Squarespace tutorial: template selection.
How to pick a Squarespace design for your website
When the designs appear, you’ll probably notice a slight buzz. Don’t worry, that’s totally normal. Squarespace is famous for brilliant template designs. But to make the most of Squarespace, keep the following in mind:
- The templates that are the best match for you will appear first.
- Below them, you’ll find a few templates that are good starting points for your website.
- Finally, you will find the most popular designs.
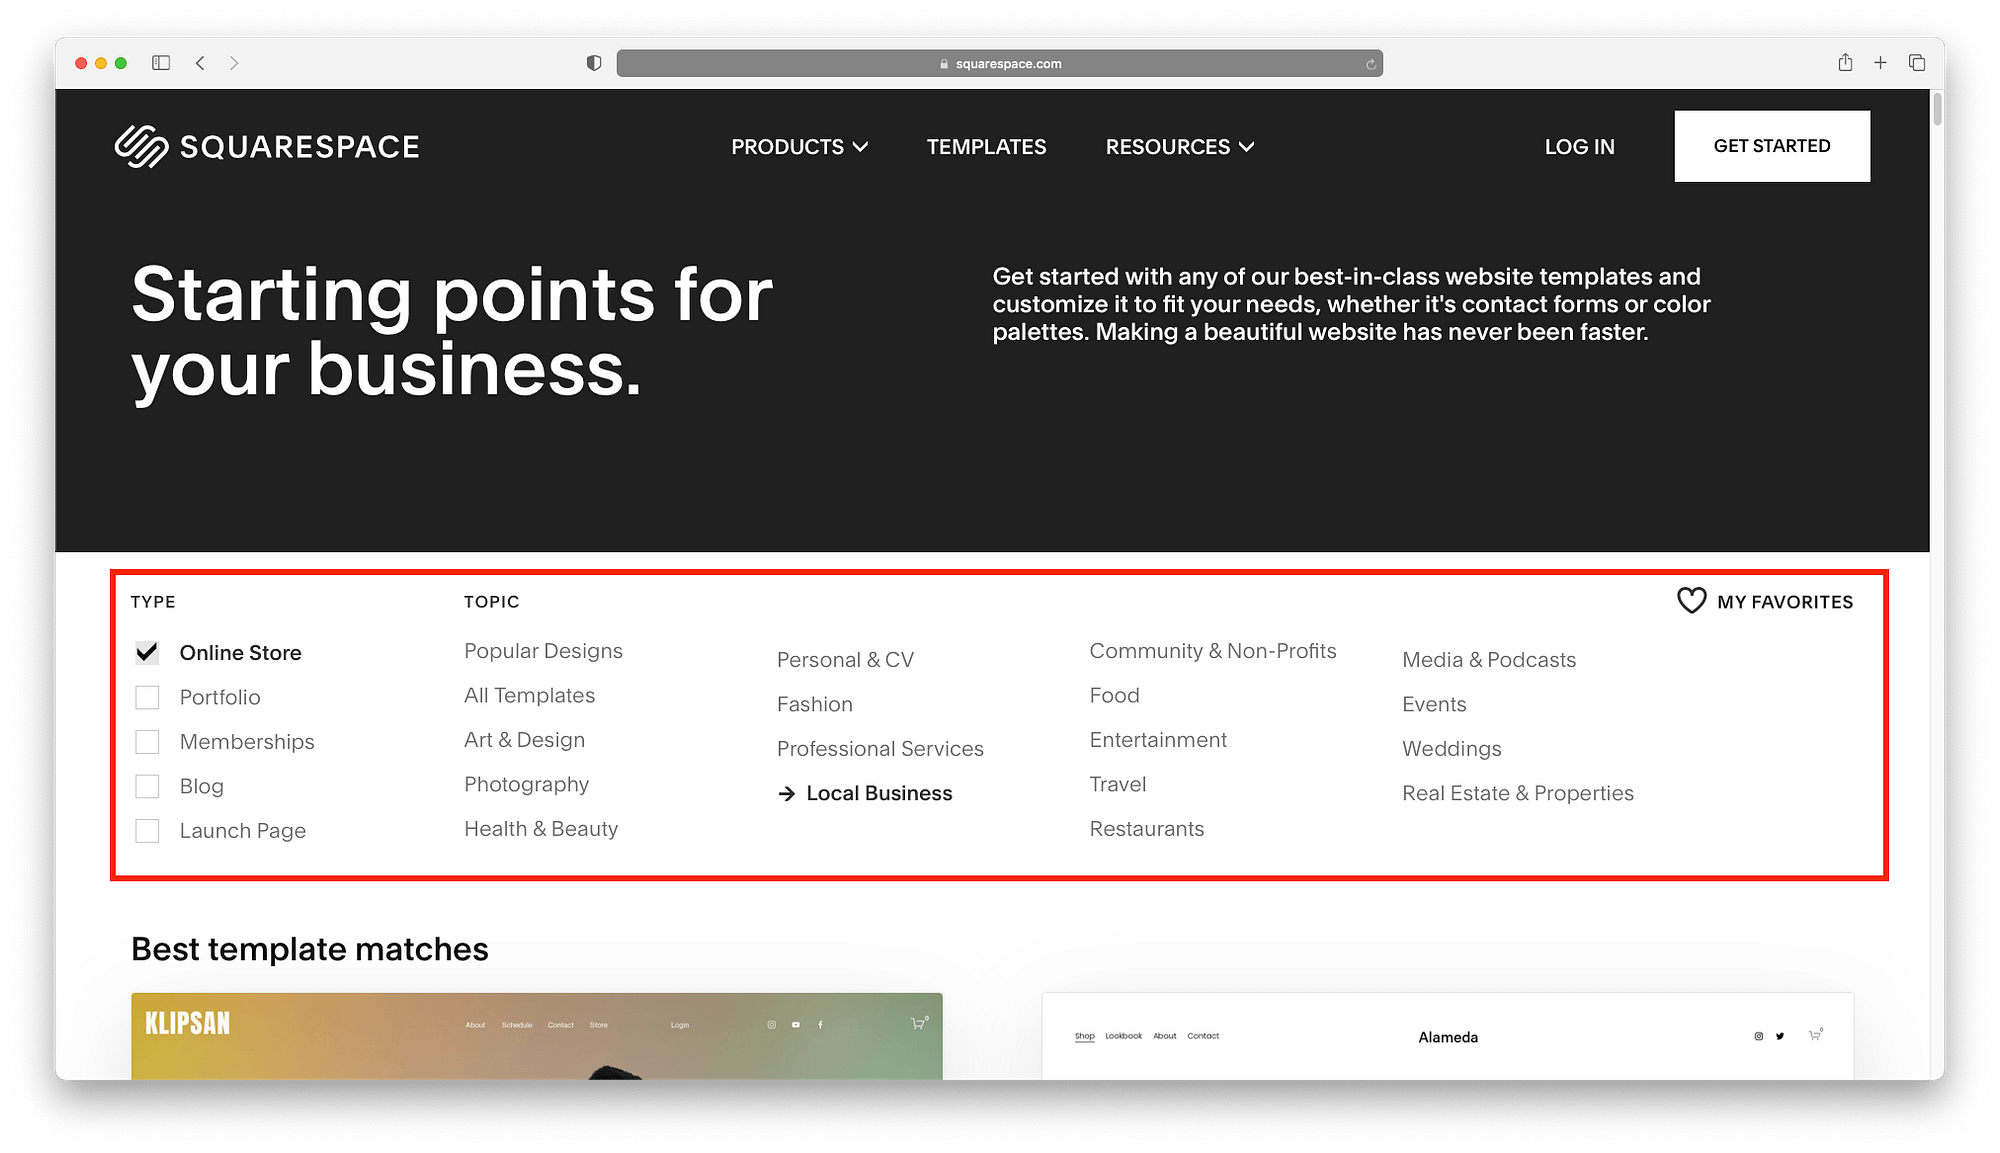
If you preview a few templates but nothing grabs you, search through the complete list of 110+ templates or filter the results using the website types and topics lists.
But, don’t rule out themes based on the demo content. The trick to learning how to use Squarespace like a pro is to hunt for the designs with colors, fonts, and layouts that you like.
With Squarespace, it is easier to pick a theme with the “wrong” features and add them rather than to overhaul the color scheme of a theme with the “right” features.
Be sure to take a good look through the themes and preview any that you like. When you find your favorite, click on it to get started with a Squarespace account.
Signing up with Squarespace
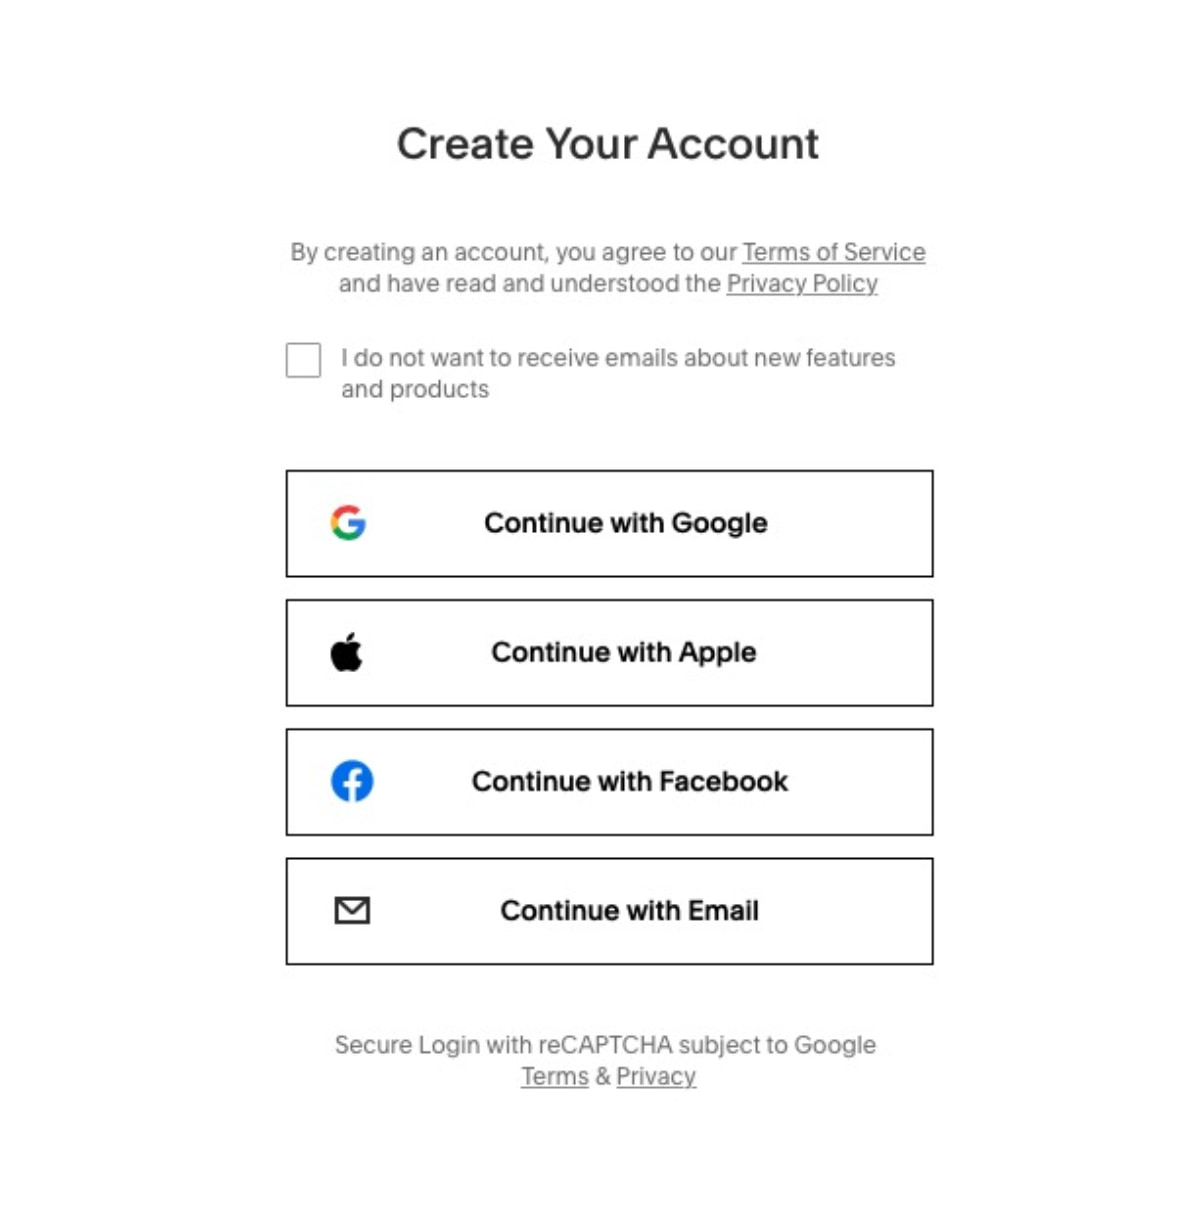
At this point, you will need to sign in or create a Squarespace account. You can use one Squarespace account for multiple 14-day trials, so don’t create a new account if you’ve ever used Squarespace before.
Once you’ve signed up, give your website a name. You can change it later, so feel free to enter a placeholder and update it when you’re ready. However, if you want the perfect name now, a business name generator will help you find it.
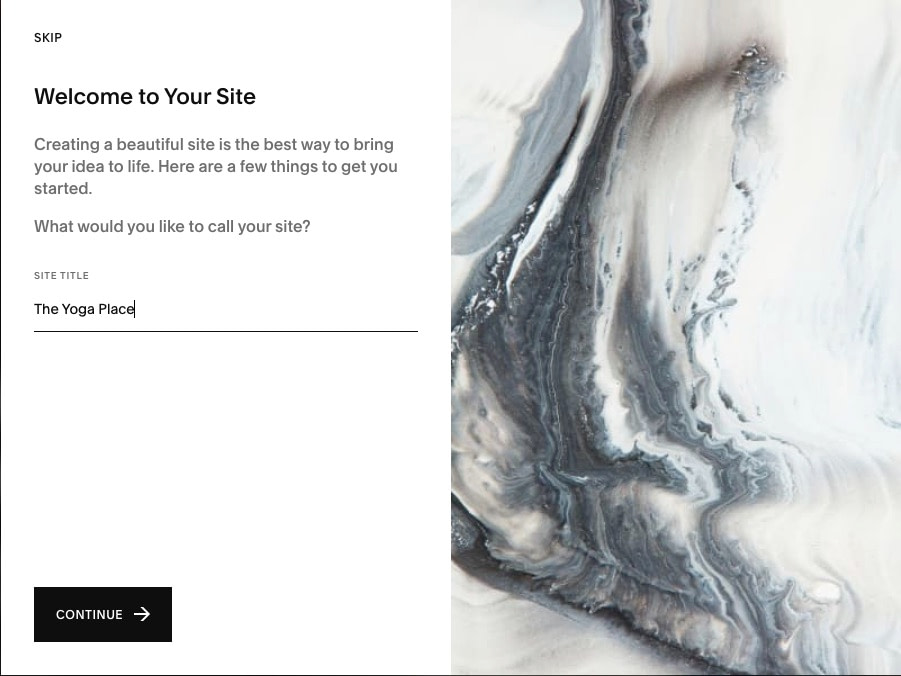
Once you’ve signed up and added a name, you can enjoy the platform’s own quick Squarespace tutorial before arriving at the website dashboard.
Getting to know your Squarespace dashboard and editor
Managing your Squarespace account plus your overall website management are handled through the dashboard or the visual editor.
The dashboard is for things like password changes or domain transfers.
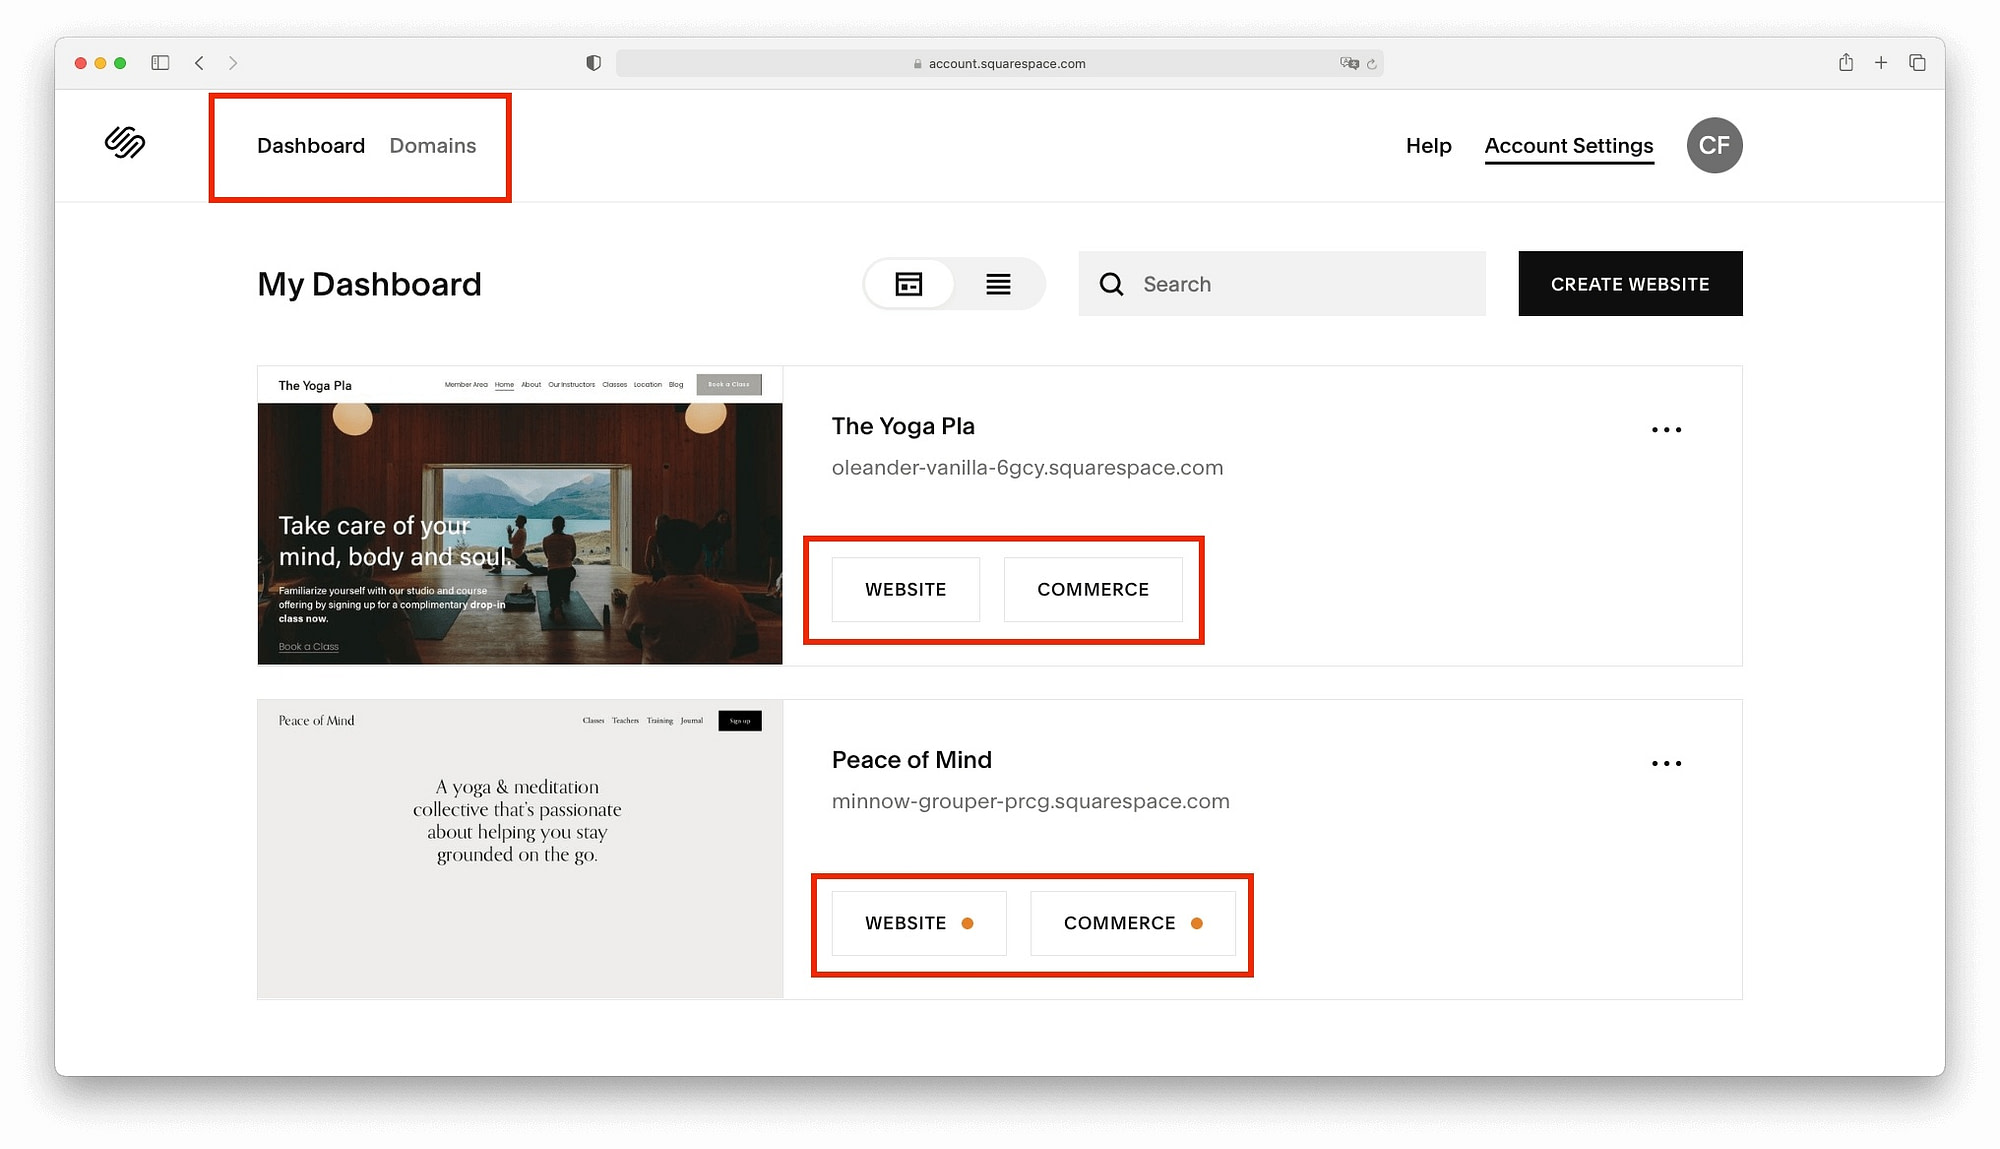
If you run a few websites, you can switch between them from the dashboard. To view one of your websites, click on the Website button to open the full suite of website management tools (including the visual editor).
Website management is a joy with Squarespace. While other website building platforms have multiple competing tools for things like SEO, Squarespace does things differently. You can skip the lists of tools that need to be paid for. Instead, everything you need to succeed is on one page.
You’ll find your website management tools on the left side of the screen. On the right, you will have a preview of your website.
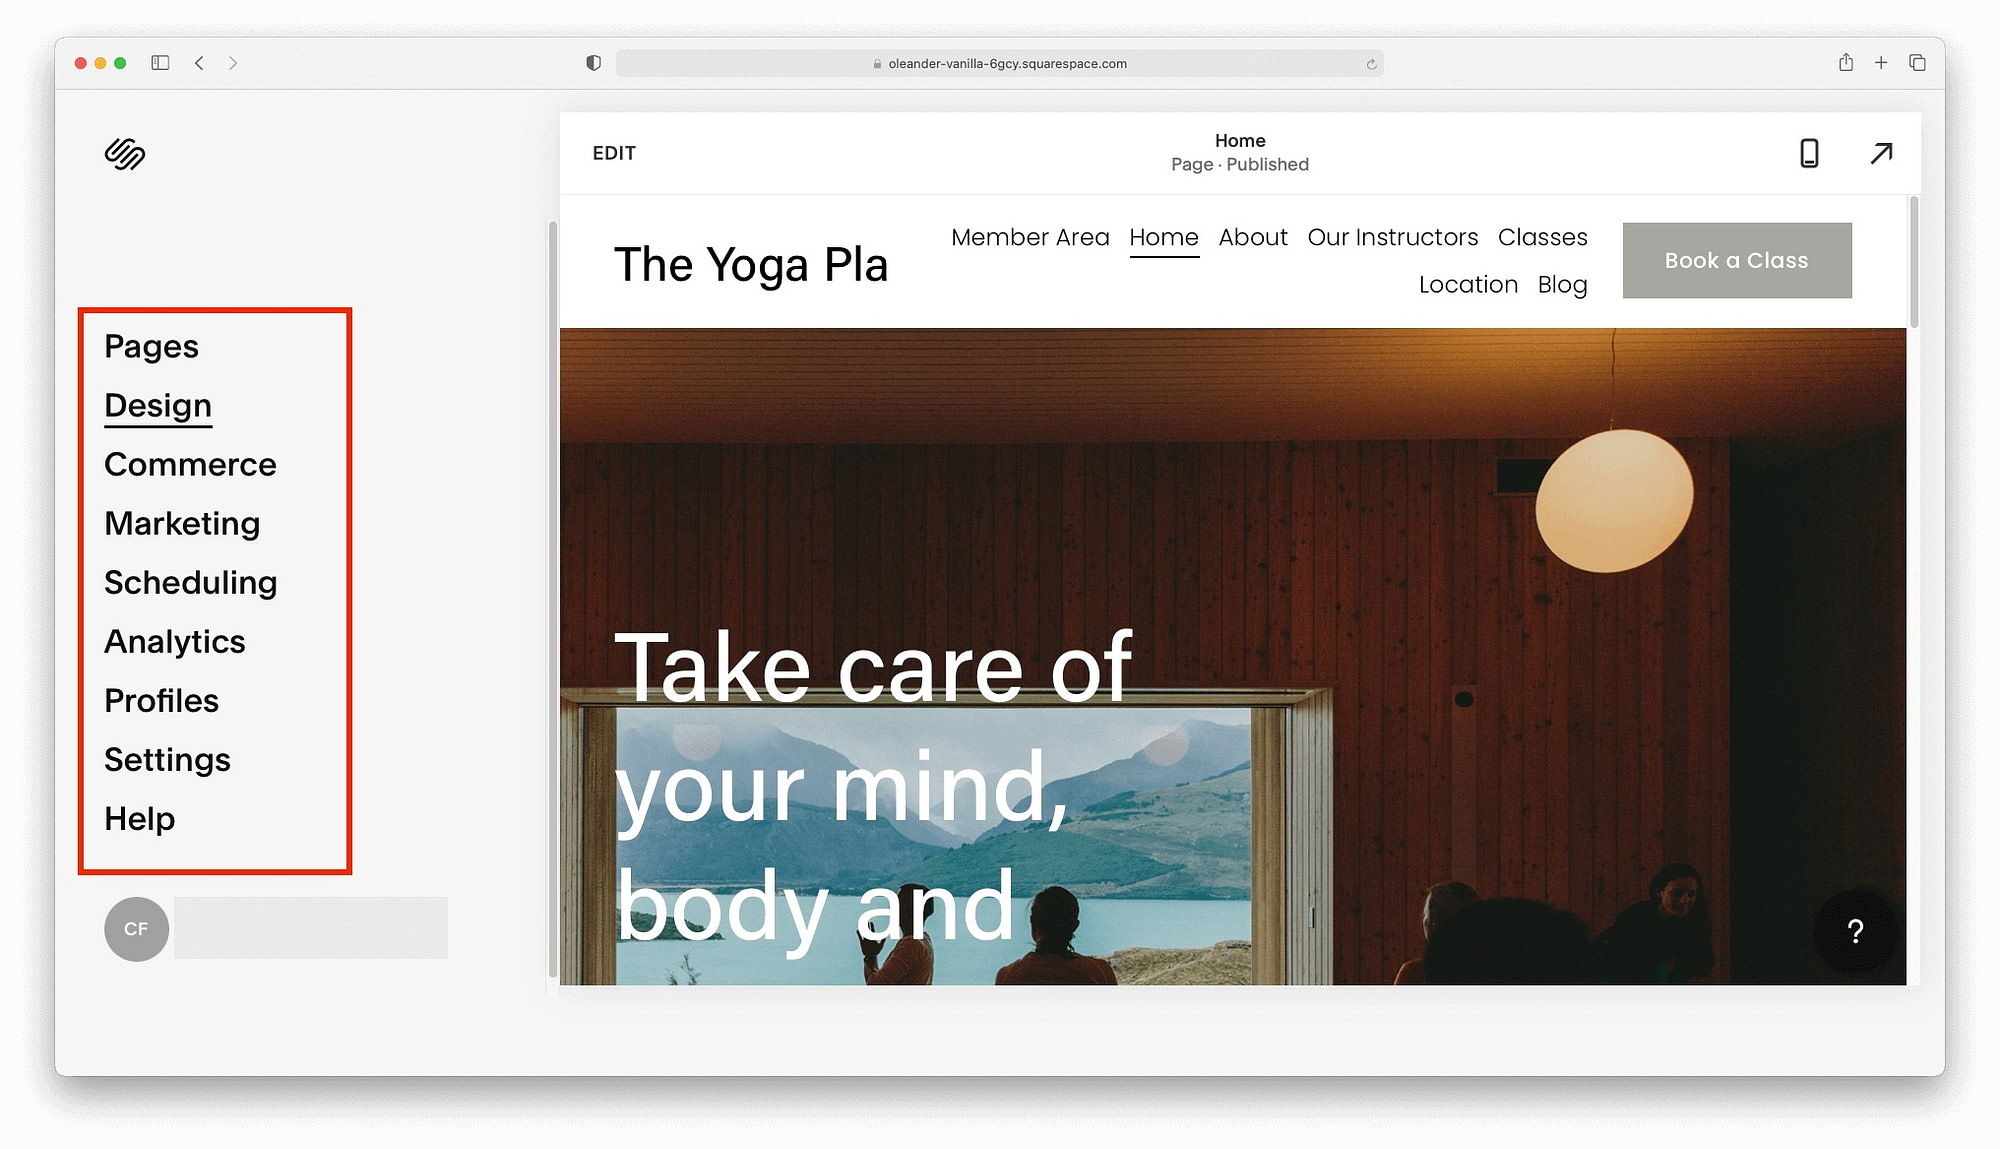
- Use pages to change your website’s content.
- Change design aspects, like site styles, additional CSS, and error pages.
- Take control of commerce functions, like products, shipping, and billing.
- Dig into analytics with traffic reports, conversions, and SEO performance.
- Initiate multiple marketing options, like pop-ups and email campaigns.
- Allow self-scheduling options for your customers.
- Plus much more.
Editing your website content
Every time I open the visual editor, I’m impressed with how complete Squarespace sites look from the start. Let’s take a look at what we have:
- A functioning menu that links to essential pages.
- Professional layouts that are well proportioned with attention-grabbing buttons.
- Well-matched fonts and a professional color scheme.
Not only does it look great but also, if you’re lucky, the selected template will match your topic and the only thing that you might need before the launch is light editing.
Let’s start editing Pages since they’re at the top of the menu.
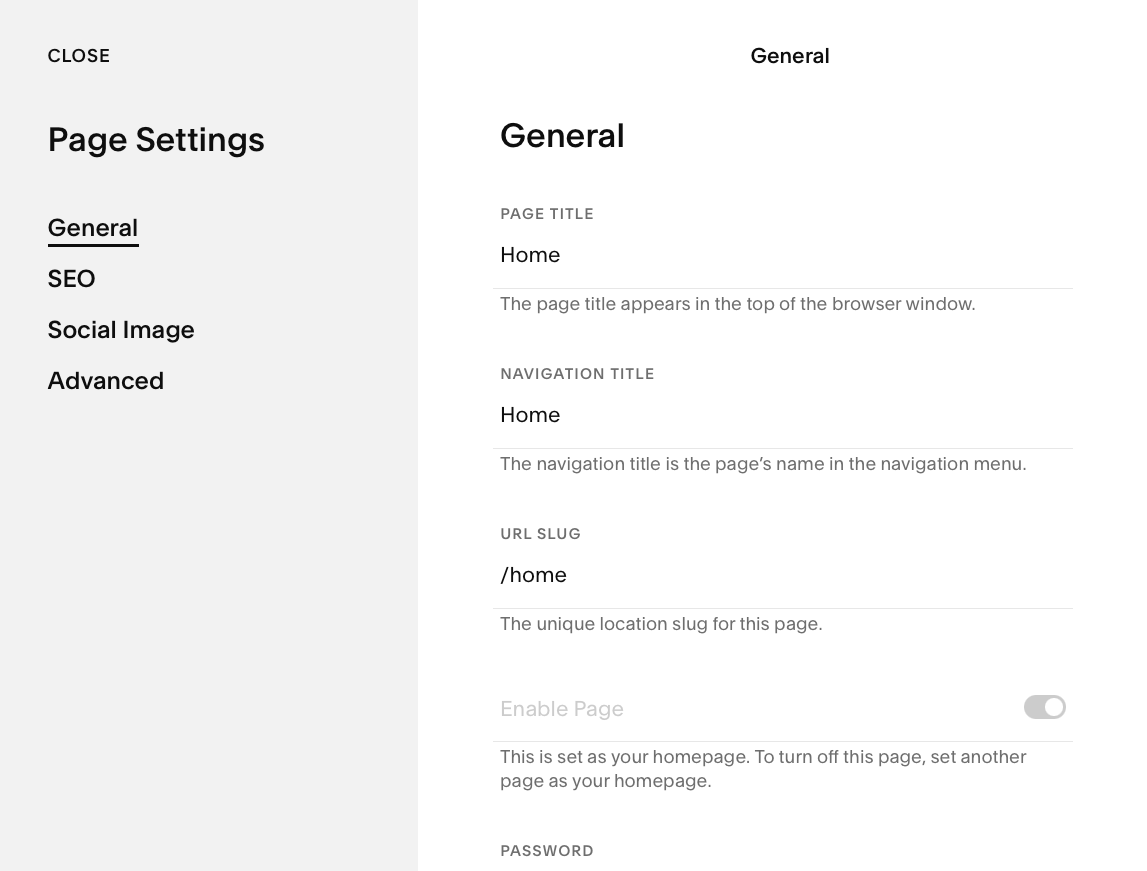
As you can see, every page on your website is listed here. To edit the Page Settings, roll over the name to find the small gear icon and click it.
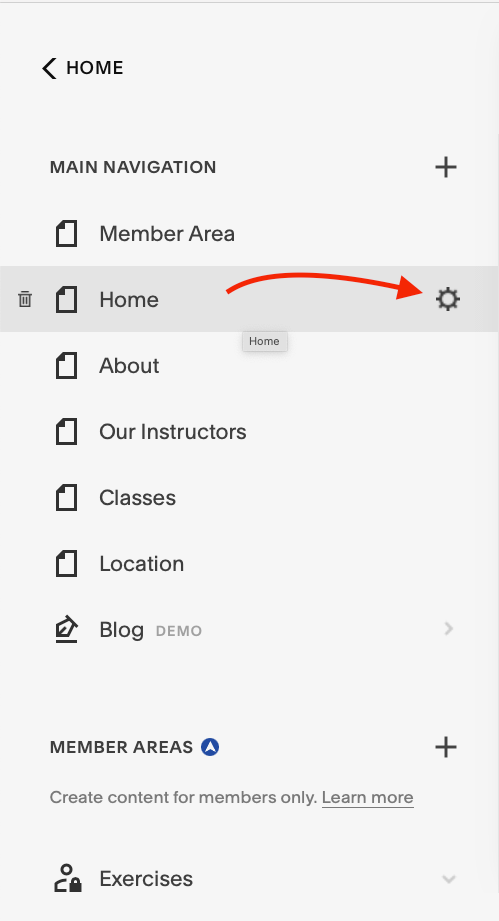
In Page Settings, you can tweak your site’s identity and appearance. Most importantly, for us, the general settings control your page titles and the URL slug.
Page Settings are useful if you want to know how to duplicate a Squarespace page. Go to Page Settings → General and scroll down to find the Duplicate Page link. Simply click on it to duplicate any Squarespace page.
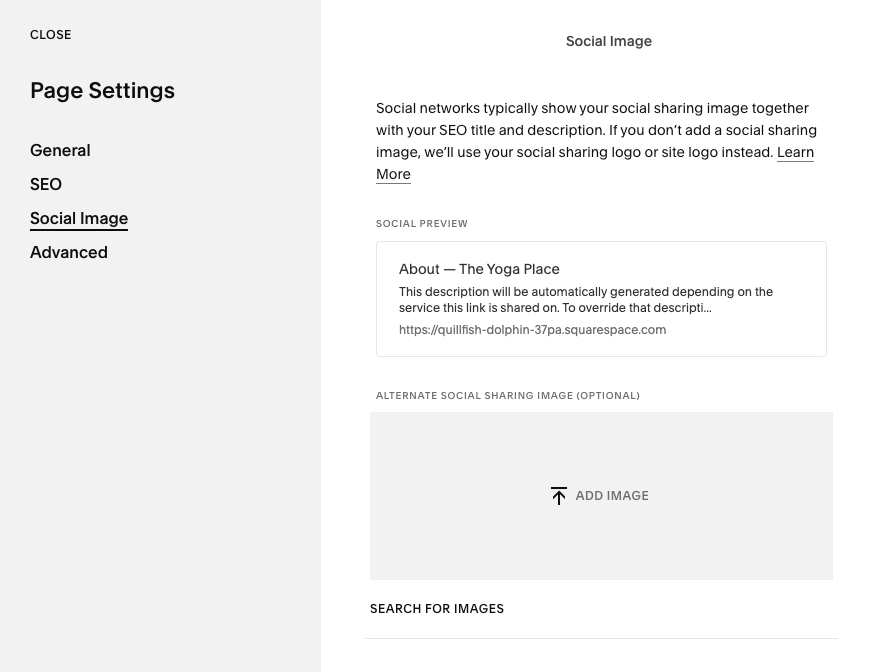
While you’re here, consider updating the social image to something you’d like to share on social media platforms (just go to Social Image and drag and drop your favorite image into the box).
Once you’ve set up your site’s identity, we’ll move on to the next step of the Squarespace tutorial: page content.
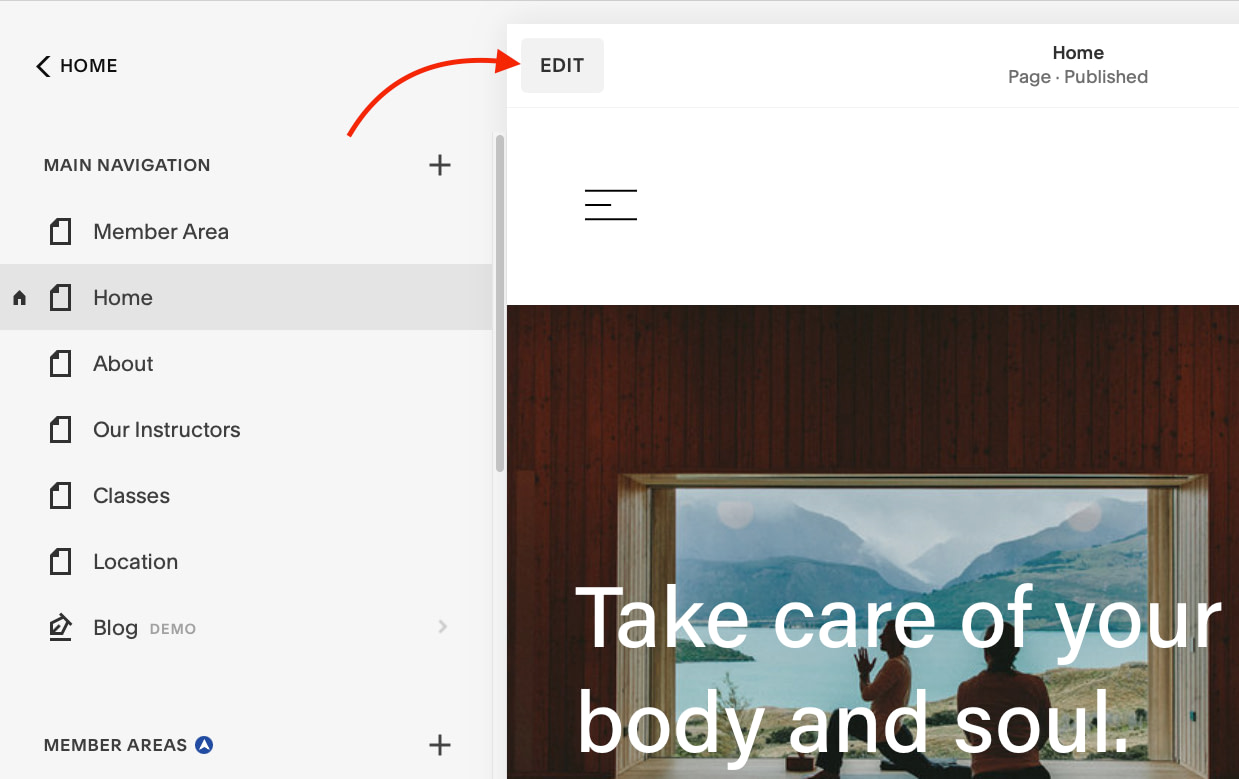
Clicking on the Edit button opens up the editing options for your pages.
Editing the site header
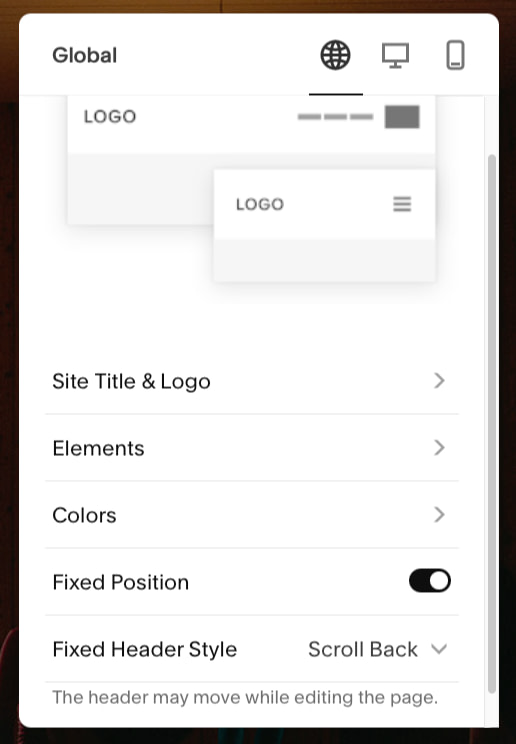
Different editing options appear when you roll over different parts of the page. Why not start at the top with the Site Header? Click the edit button when it appears.

Here, you will find the desktop and mobile editing options for the following:
- Site title and logo.
- A variety of elements like social links and buttons.
- Colors and transparency.
- Header postion.
If you’ve been waiting to add your site name, you can do it now while adding any social media profiles you have set up. With the essential identification elements in place, let’s dig into the mobile options.
Any changes you make in the mobile or desktop menus will only be visible on those devices. For mobile, you can change the header layout and menu options.
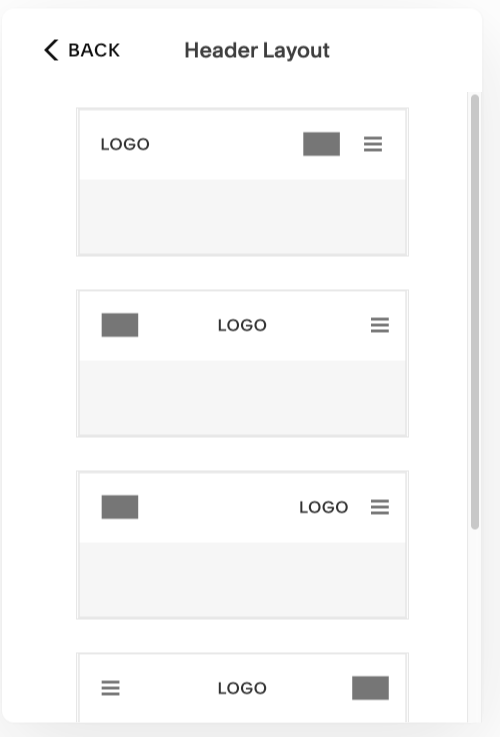
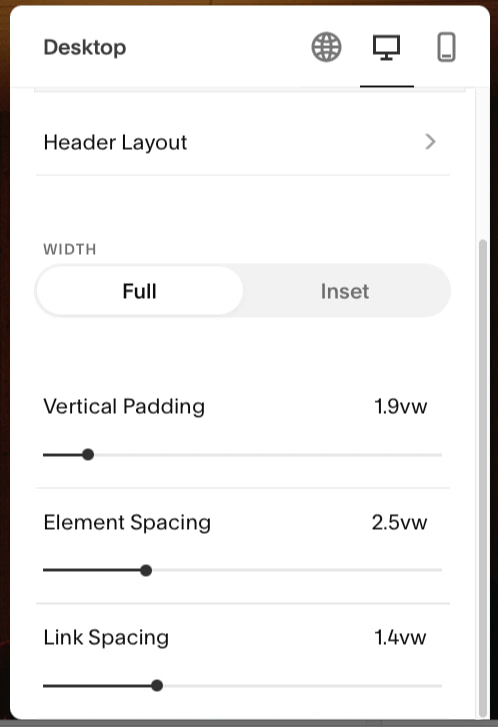
For desktop, you can change the layout but also the appearance of the elements and the size of the header itself. Squarespace does a fairly good job of spacing elements, so you can probably leave the padding and spacing as is.
Regardless of what you are changing, each change will appear immediately in the preview window. For example, changing the site title will happen in real-time.

Editing page content
Enter the Edit mode from any page when you’re ready to change its text or update images. Most of the content areas can be edited, including blocks of text, buttons, and photos.
For example, to edit sentences and headings click on the text to open the text editor. Here, you can add lists and links, bold text, and more. Simply type in your new text and add any formatting.

⚠️ One important point, Squarespace doesn’t have an auto-save feature. Generally, it’s hard to navigate away from a page without hitting Done and Save changes. But a lost connection or closed window could cause some trouble.
Editing the section layout
To make changes to sections backgrounds and layouts, roll over any section to find a small menu with your editing options:
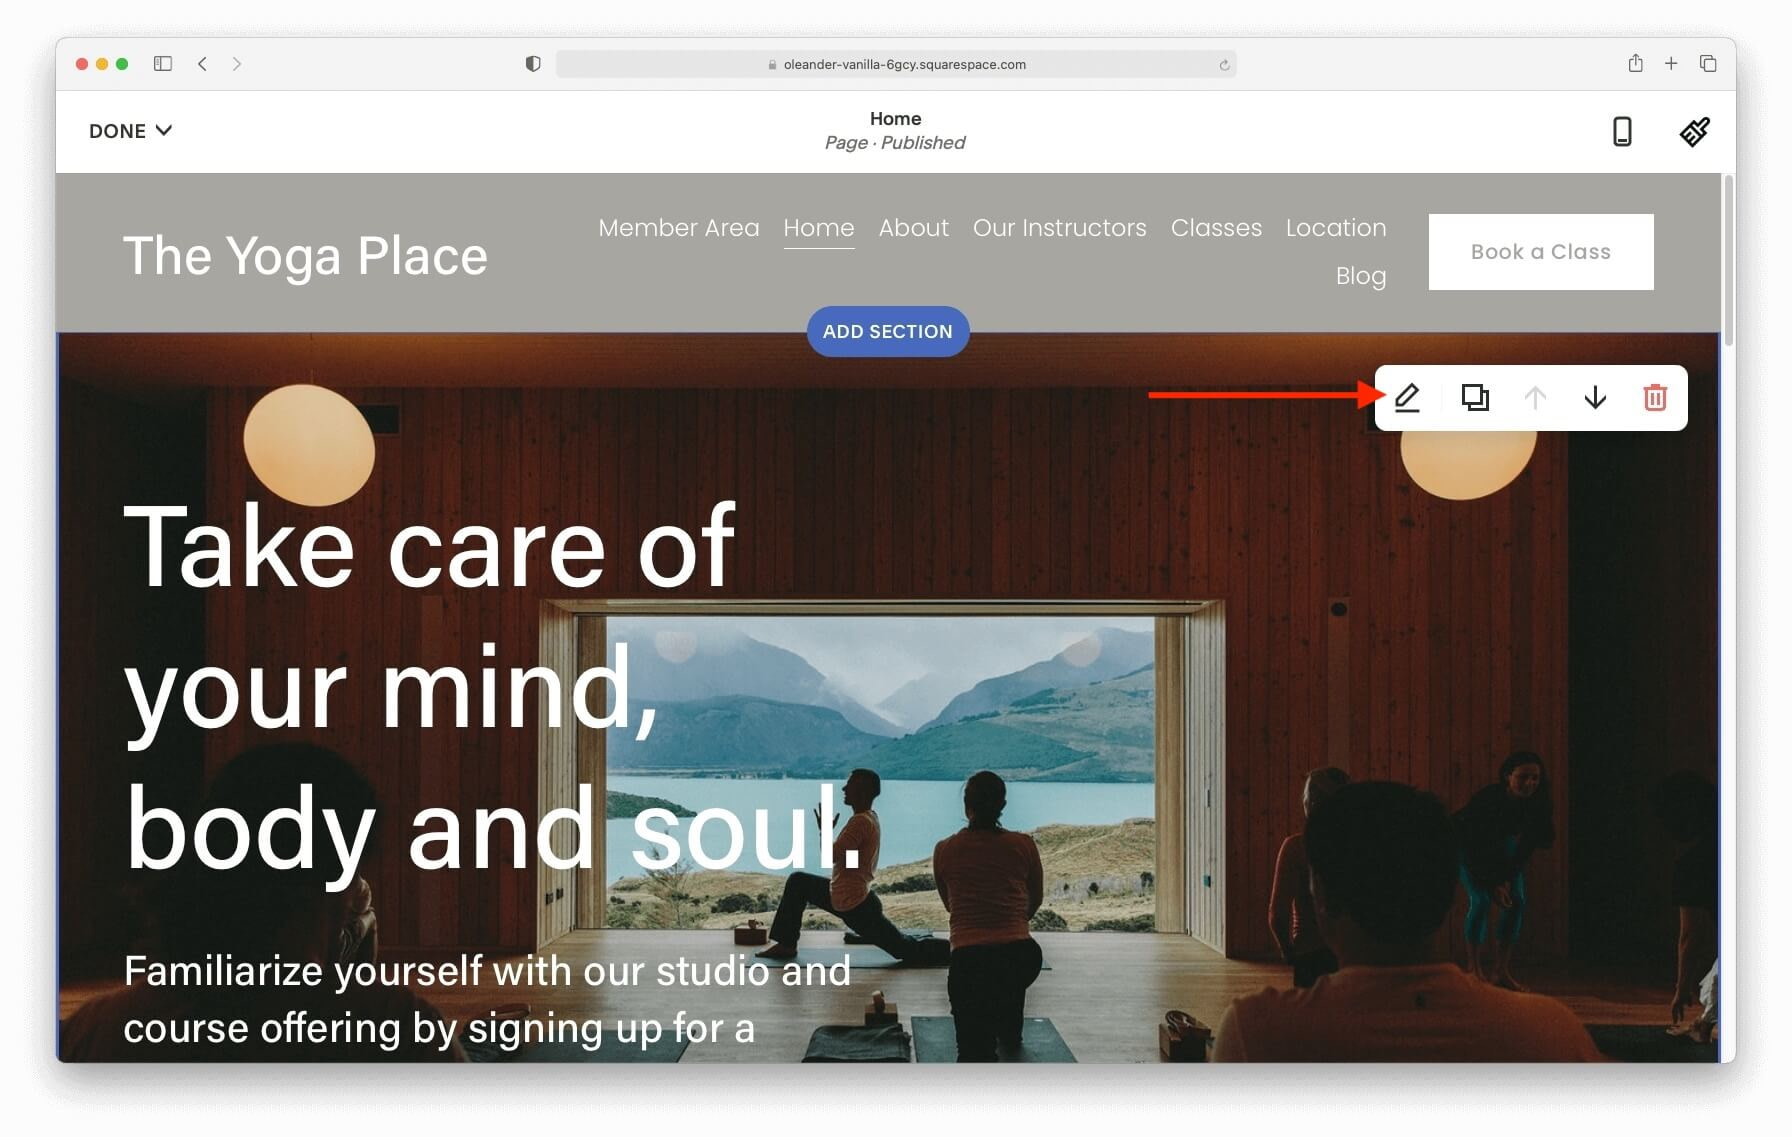
- The pencil gives you control over the section appearance. This includes section size, background, and color.
- Clicking the two pages will duplicate everything in the section. You’ll copy the layout, any images, as well as text. Your duplicated section will immediately appear below the existing one.
- The two arrows move the section up or down the page.
- The trash can deletes the entire section.
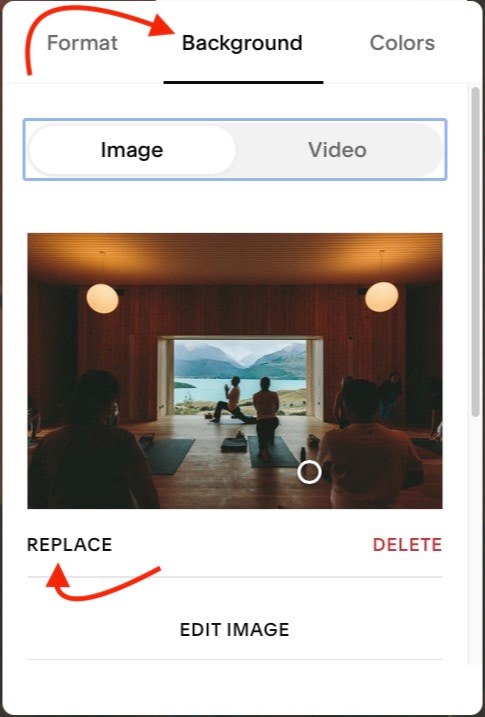
For example, to change a background image click on the pencil and Background. Click on Replace to upload a background image you like. If you have a YouTube or Vimeo link, you can find the video background settings under Video.
Adding sections
As we’ve been doing all the cursor rolling, you may have noticed a blue border with Add Section at opposite ends. Clicking on either of them will open the new section pop-up box containing every Squarespace section.

The most common and popular sections will appear at the top, so scroll through the entire list to see obscure sections like:
- Appointments
- Donations
- Products
- Calendars
- Charts
- Logo Wall
- Music
- and many more
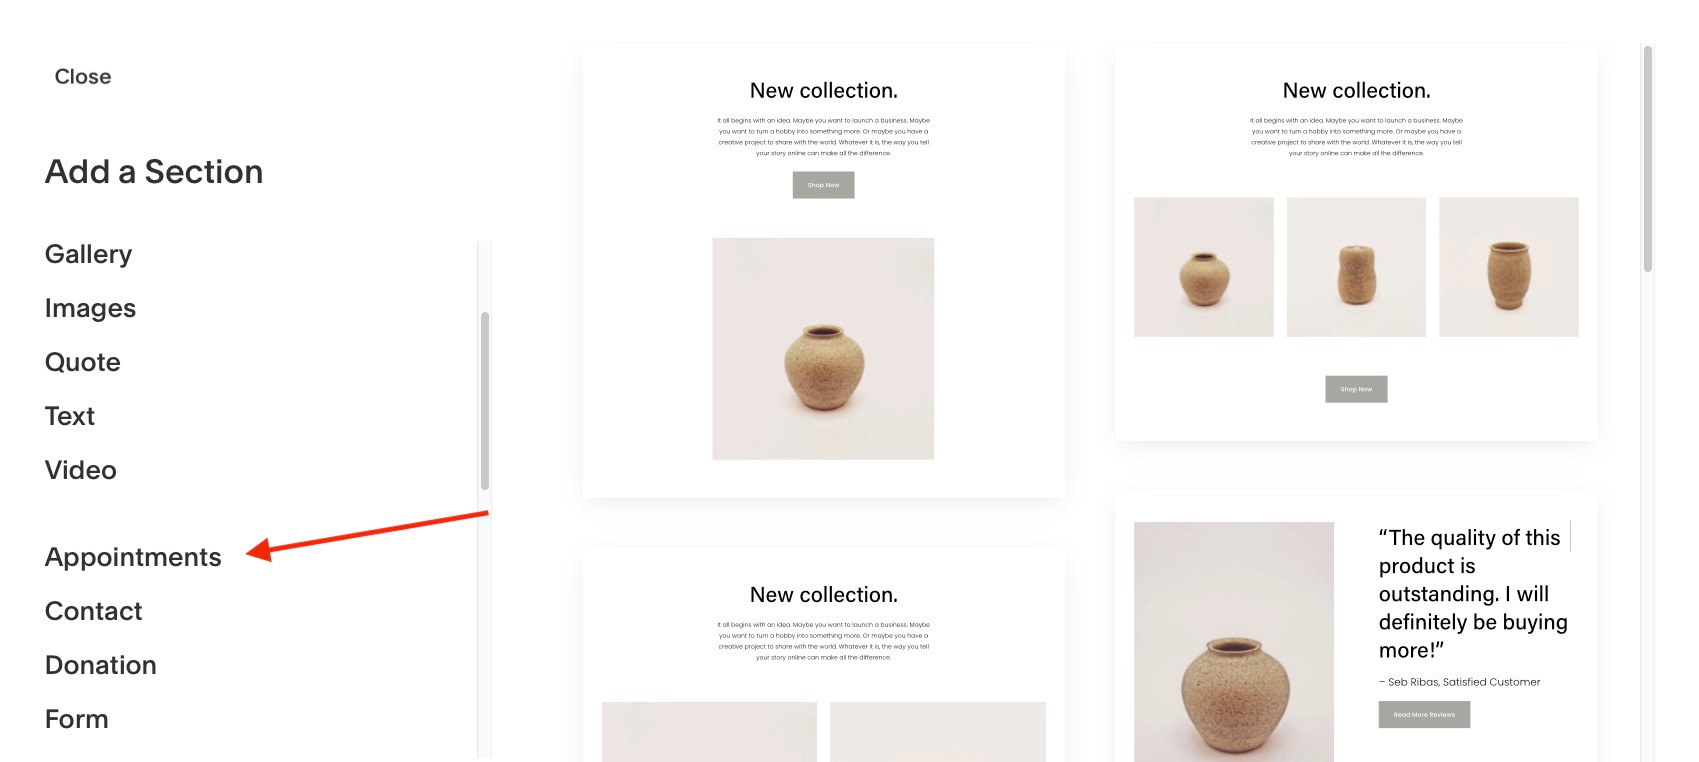
Each section has multiple layouts which you can scroll through before clicking to add the section to your page.
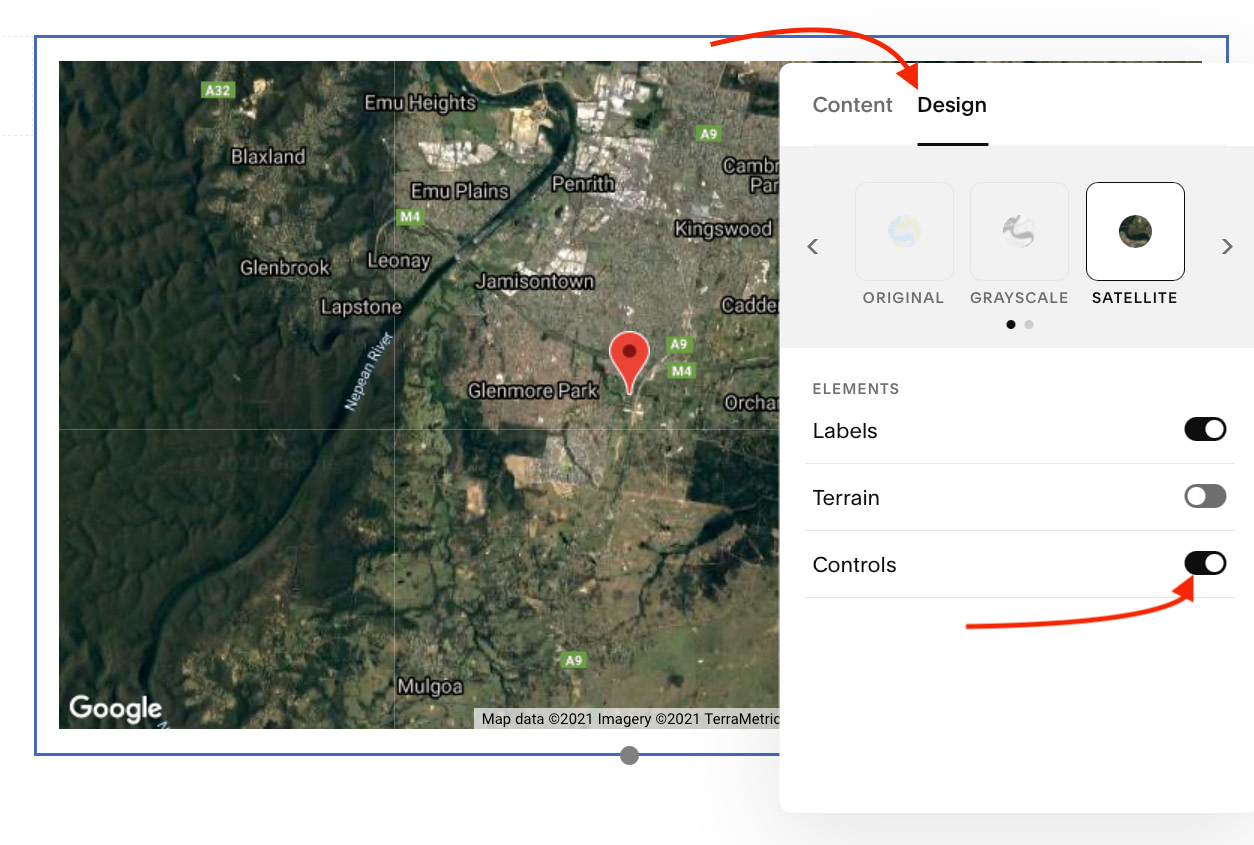
Not only do the layouts look different, but they also have different options depending on the elements they use. For example, the location sections have multiple map designs with simple on-off sliders for elements like scrolling.
Adding a page
No Squarespace tutorial could be complete without showing you how to add a page. You can create new pages and remove existing ones from the Pages menu.
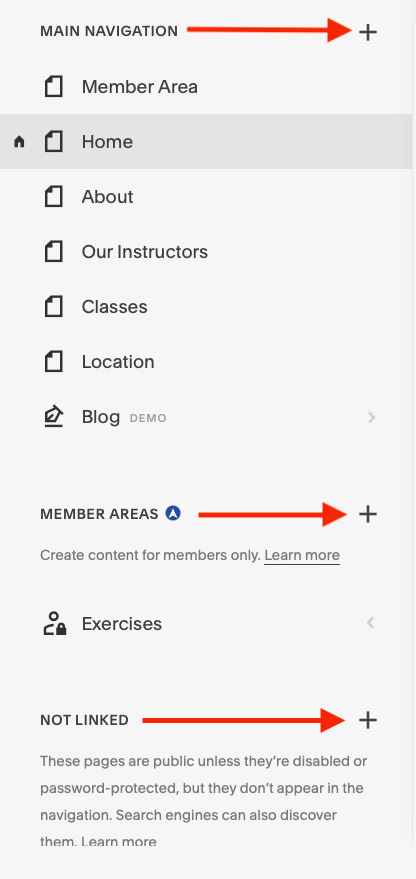
Each page in your main menu can be found under the Main Navigation header.
Any unlinked pages or membership areas will be below the main section.
To add a page, click the “+” button according to where you’d like the page to appear.
You can build a page from scratch or use a pre-designed Squarespace layout like:
- RSVP
- Services
- Team
- Gallery
- Portfolio
- Blog
- and more
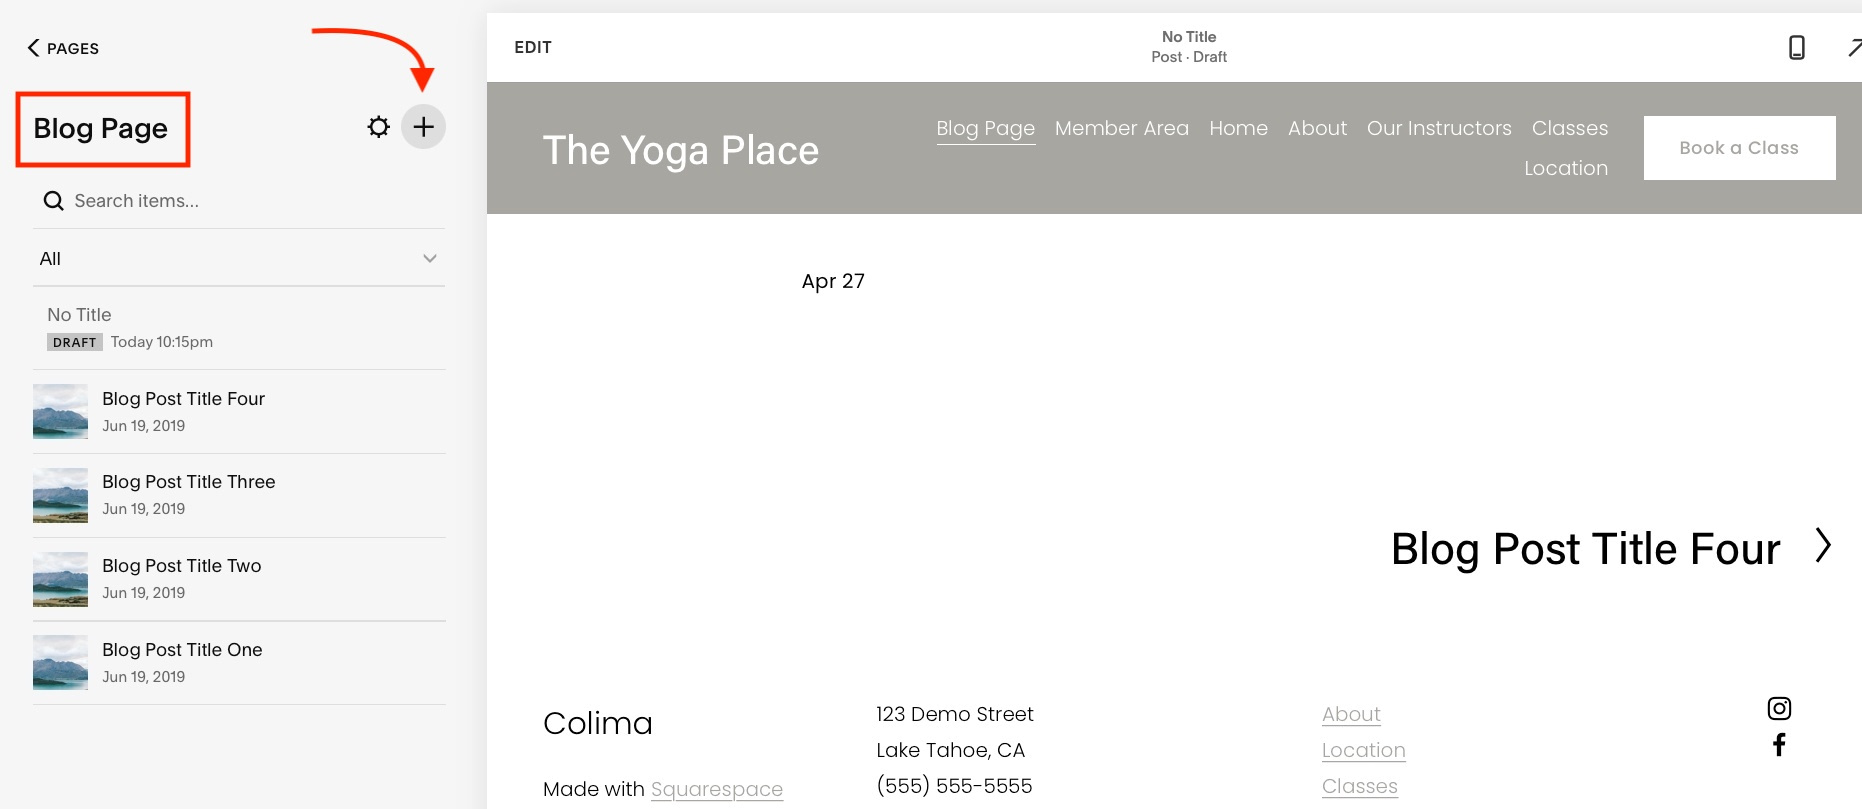
For example, if you decide to add a blog page, you can choose a layout you like and add it to the main menu. As can be seen, the menu will be updated automatically with your new page.
When you’re ready to write your first post, simply click on your blog page to open the archive. Once, the archive is opened click on the “+” button to start a new post.
Making design changes
It’s time for our Squarespace tutorial to move onto the Design tools that help you add the personal touch that gives your site it’s visual identity. Once you’re ready to start changing colors, sizes, and fonts click on the Design link to start exploring.
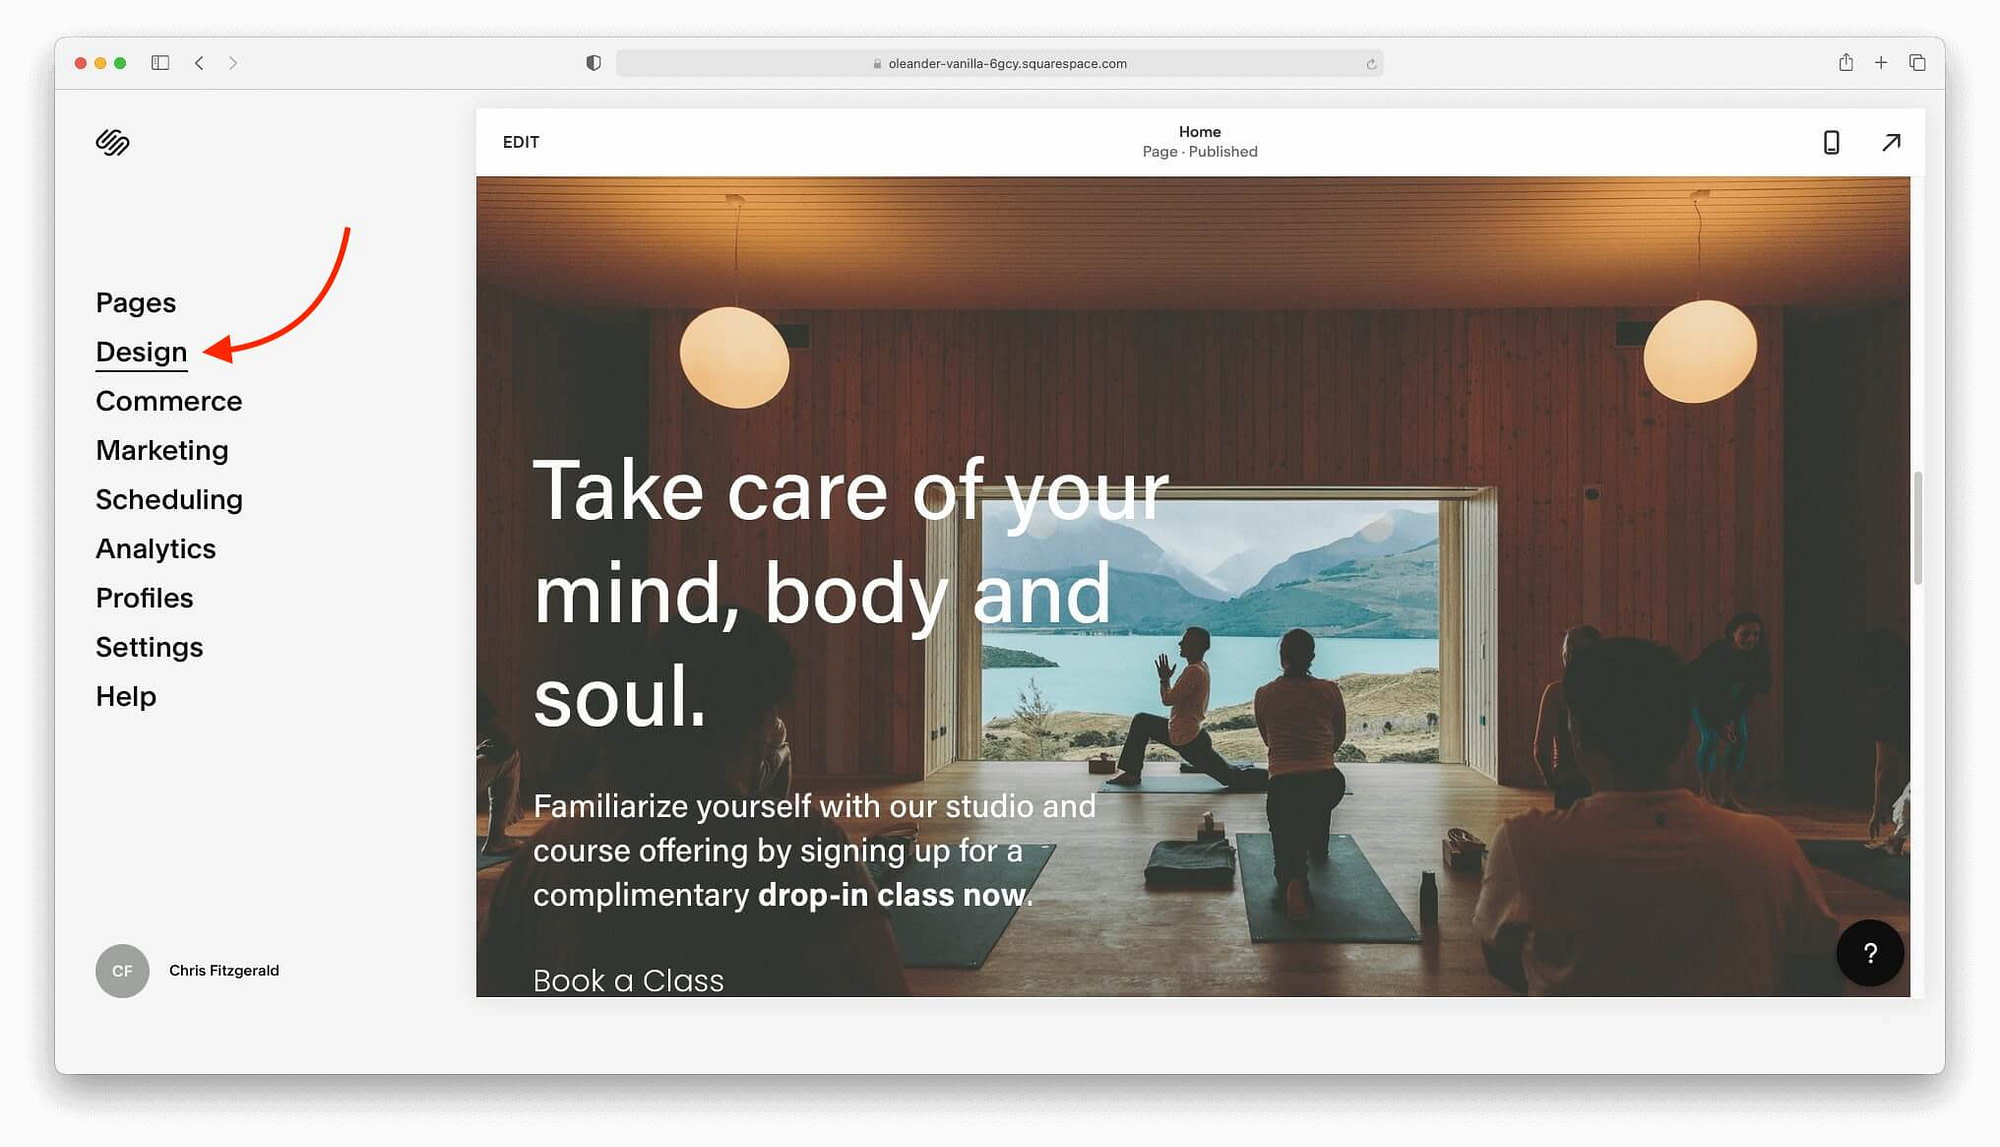
When you click through, you will be able to edit:
- Site styles like fonts, colors, animations, and more.
- Browser icons
- Lock screens
- Checkout pages
- 404 pages
- Social sharing logos
- Custom CSS
While you should experiment with all of these tabs, the site styles will have the most impact on your website. Click on the link to open the main menu:
You can see that site styles cover all of the important visual elements for your website. Whenever you need the design options, open the menu by clicking the paintbrush icon.
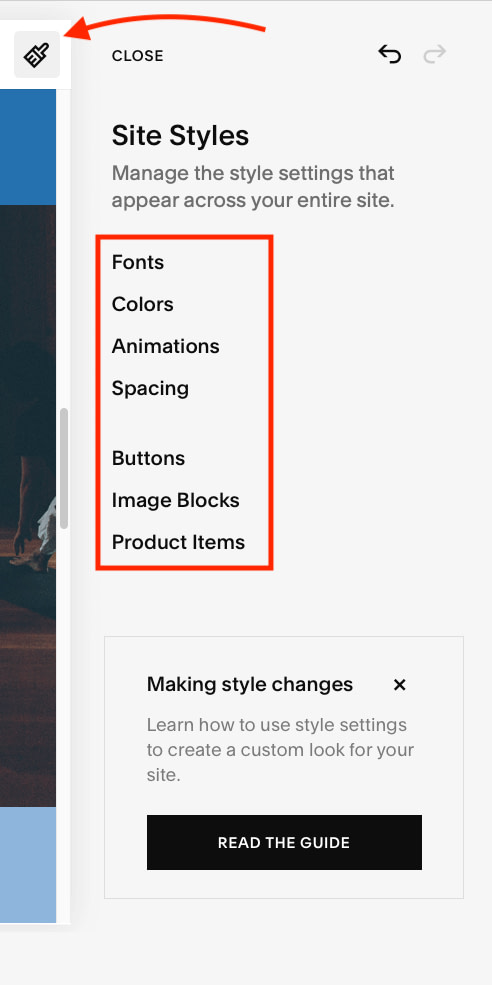
Once you select an option, Squarespace will automatically apply the style change to your entire page. You won’t have to go through the individual elements and the changes immediately. For example, changing the color palette updates all of the sections with the new colors.

Adding an eCommerce store
📋 Note; this step is optional. Not every user will want to launch an eCommerce store with Squarespace. That said, if that is your goal, Squarespace is perfectly capable of handling the task!
While Squarespace is not the most popular eCommerce platform, it does have enough commerce features to extend any website into an online store.
As a matter of fact, it doesn’t even matter if you’re not sure what to sell online just yet. Squarespace will give you the chance to explore your options.
In fact, you can add 200 products to a store page. If you want to generate income from your website, Squarespace Commerce is a solid option.
When you’re ready to start, click on the Commerce tab.
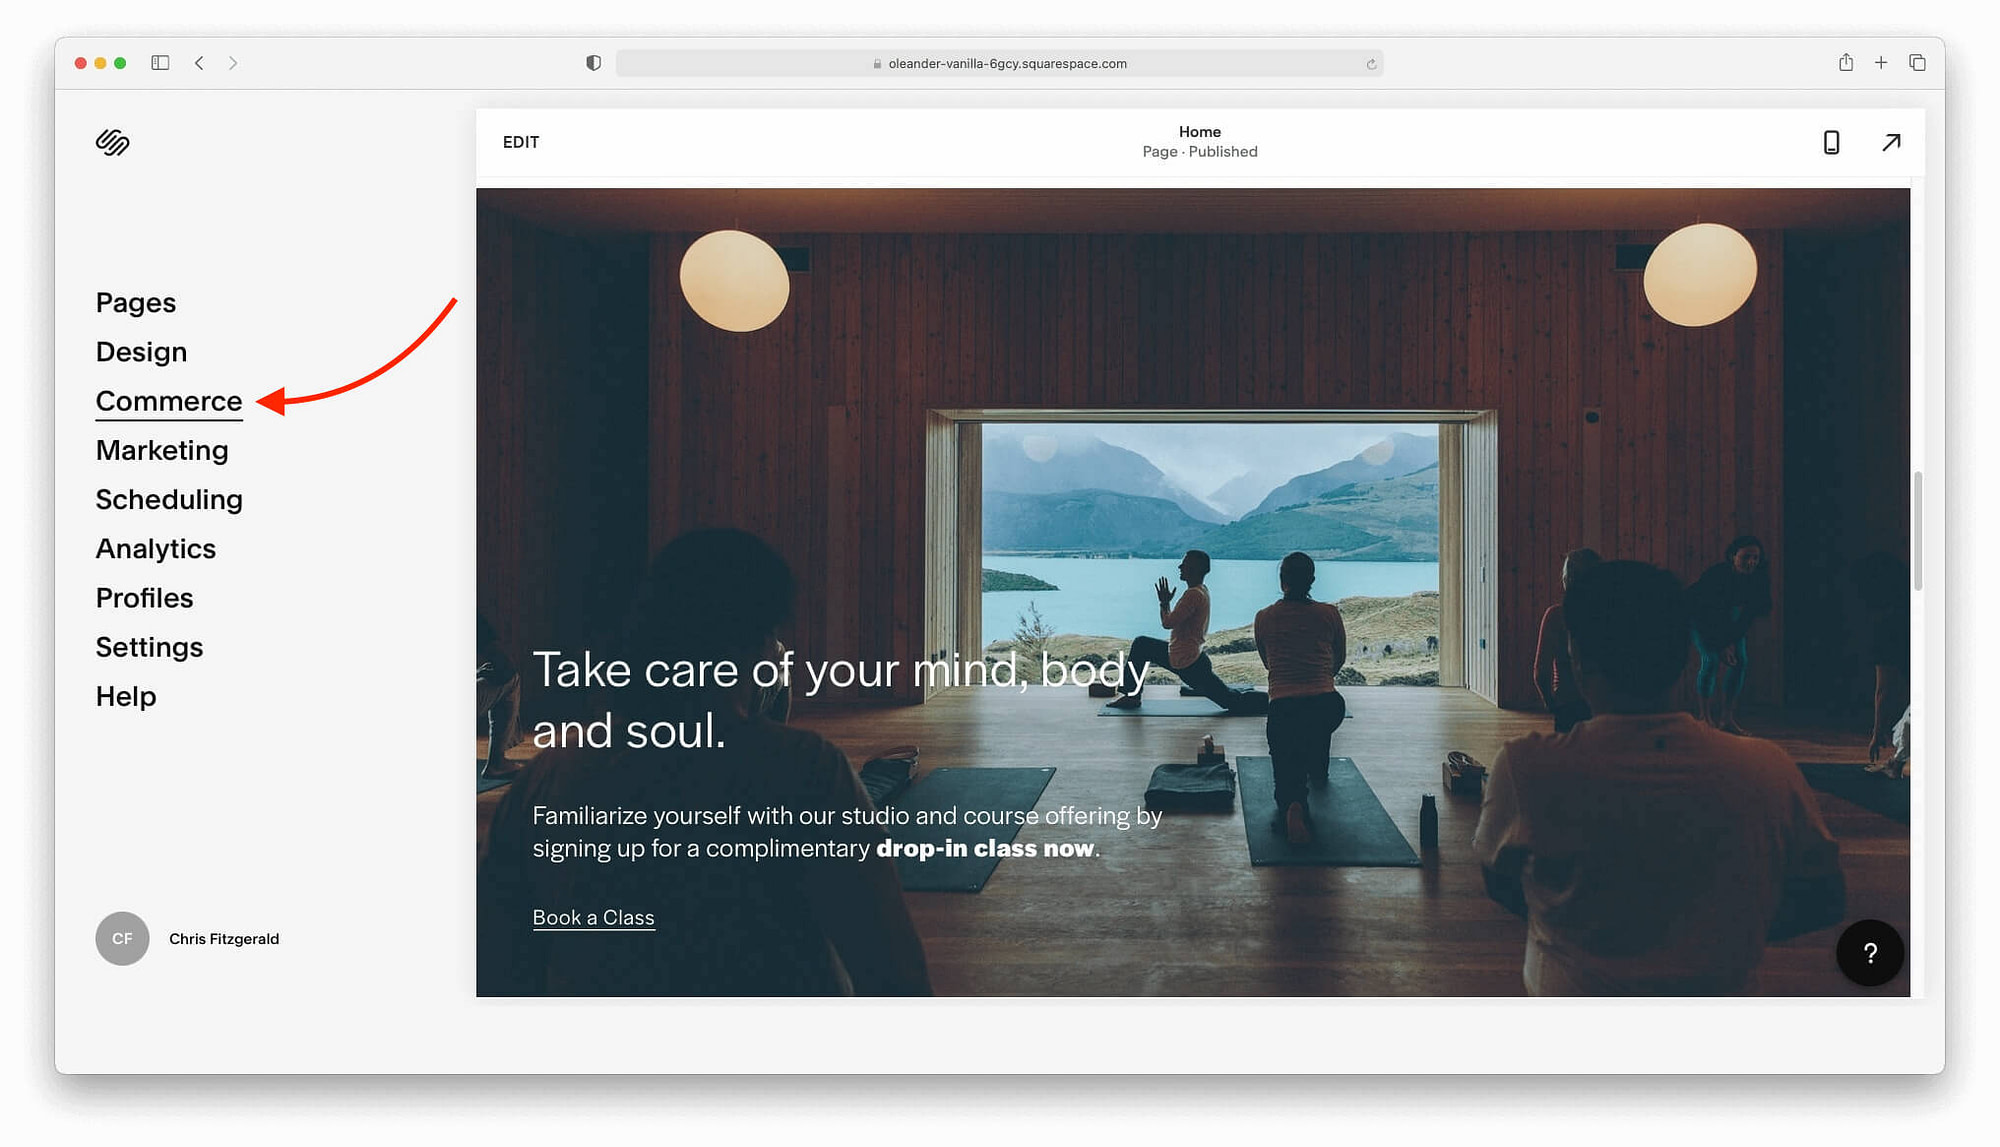
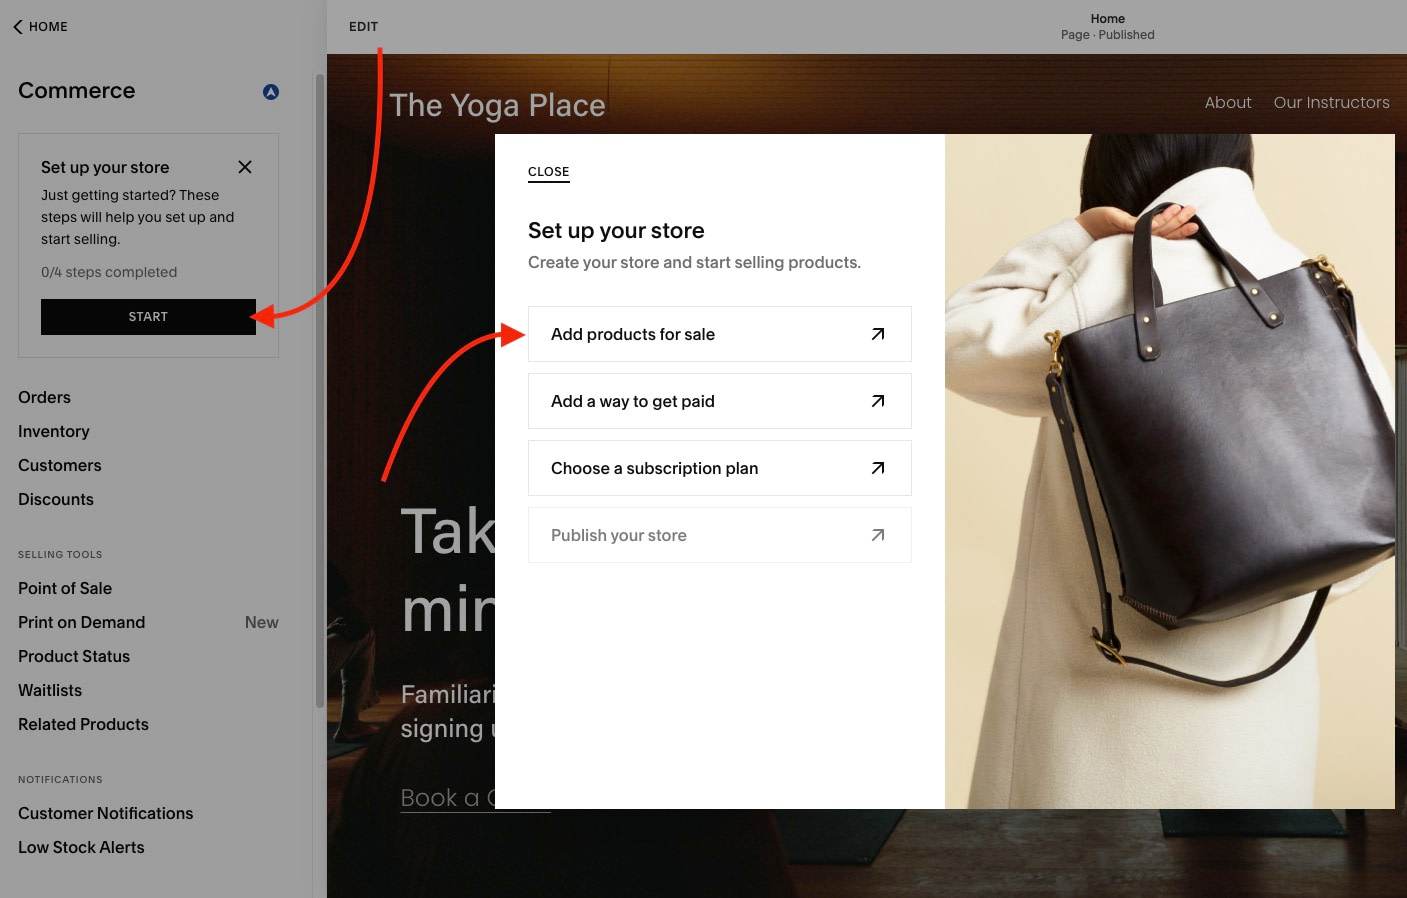
The store setup process can be handled with Squarespace’s four step eCommerce wizard. Click on Start and then Add products for sale.
At this point, Squarespace will ask you to choose a store layout. You should have at least two options. Click on your preferred option.

Your store should have a few demo products included in the layout. They can be edited to fit your products, or you can add new products by clicking the “+” button.

You can choose from four main product types with different settings :
- Physical
- Digital
- Service
- Gift Card
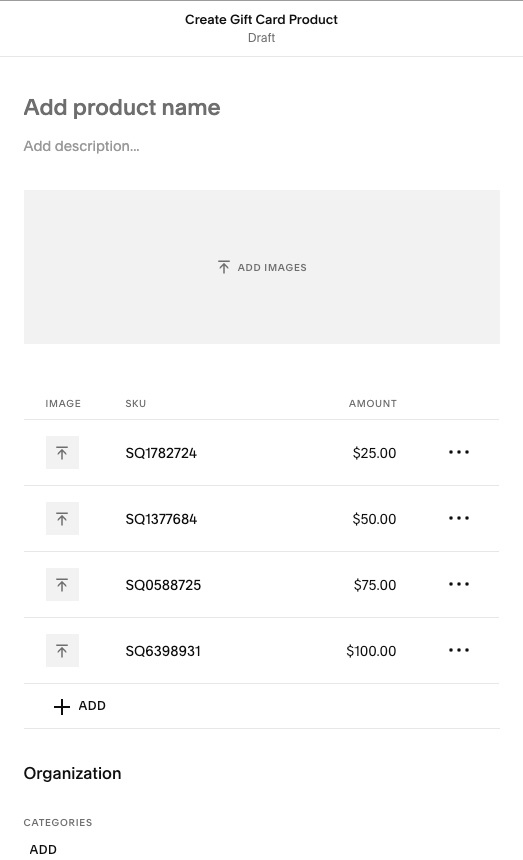

Each of the product types has different fields for each aspect of the product display. You can add multiple images, set prices, and manage your inventory all from the product pages.
Once you’ve completed the product appearance, scroll down to find customized options like buttons and shipping options.
Click Done → Save to add the product to your store.
Adding payment methods to your Squarespace store
It’s time for this Squarespace tutorial to integrate a payment gateway. You’ll find the Add a way to get paid option in the store set up menu.
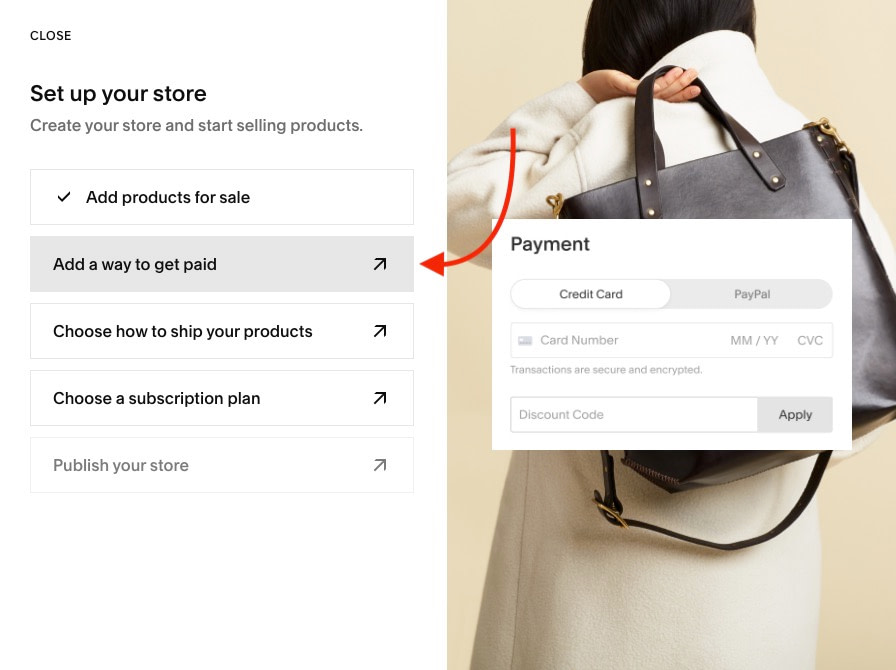
With Squarespace, you can integrate Stripe, PayPal, and Square (in the US). Click on your preferred gateway to link the gateway to your site.
Setting shipping requirements
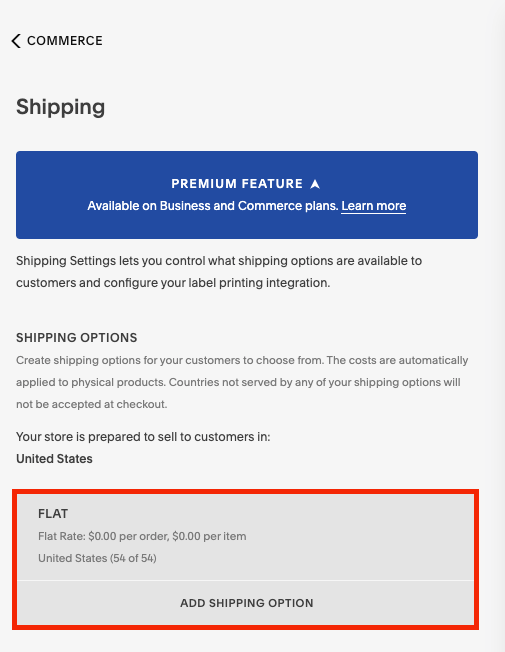
Click on the Choose how to ship your products button.
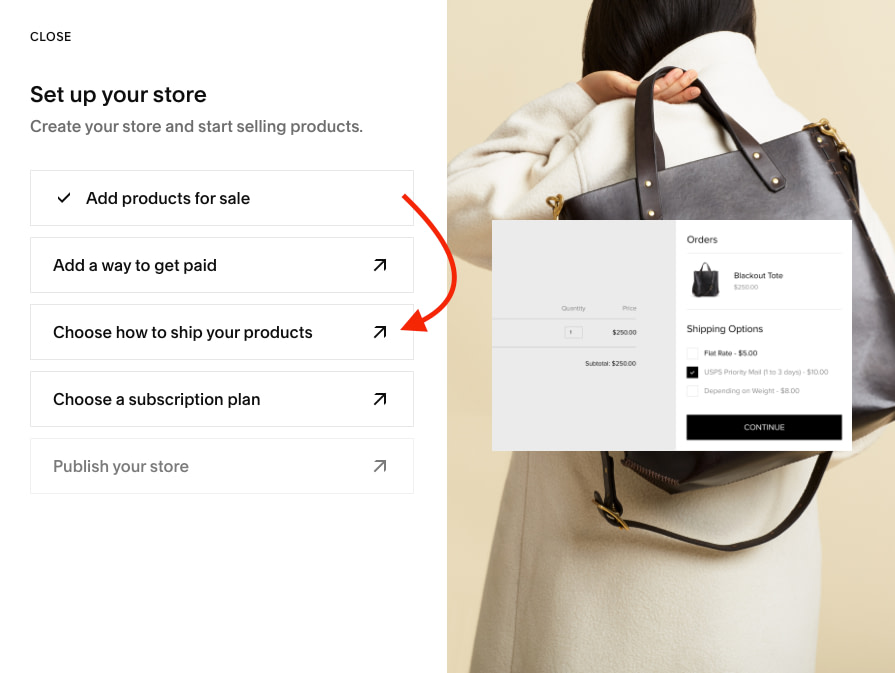
Use this options to decide on your shipping rates. As can be seen in the image, you can choose from flat rate, weight based shipping, or simply allow the carrier to calculate the pricing.
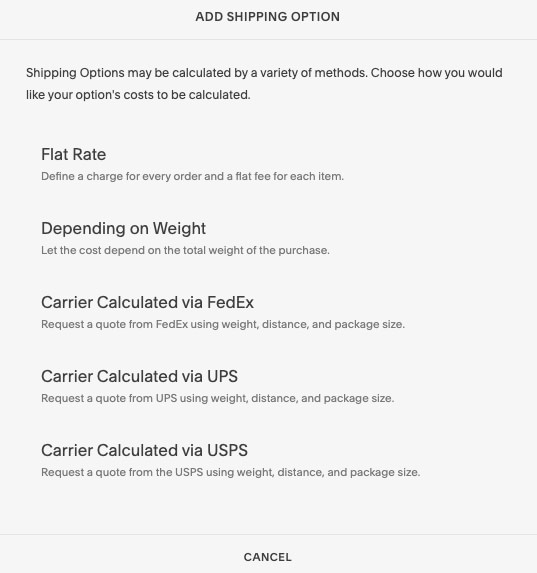
Once you have selected an option, it will appear in your shipping options alongside with the cost and regional limitations.
Mobile preview
When you’re happy with how your website looks, click on the phone icon in the top right corner of the editor.
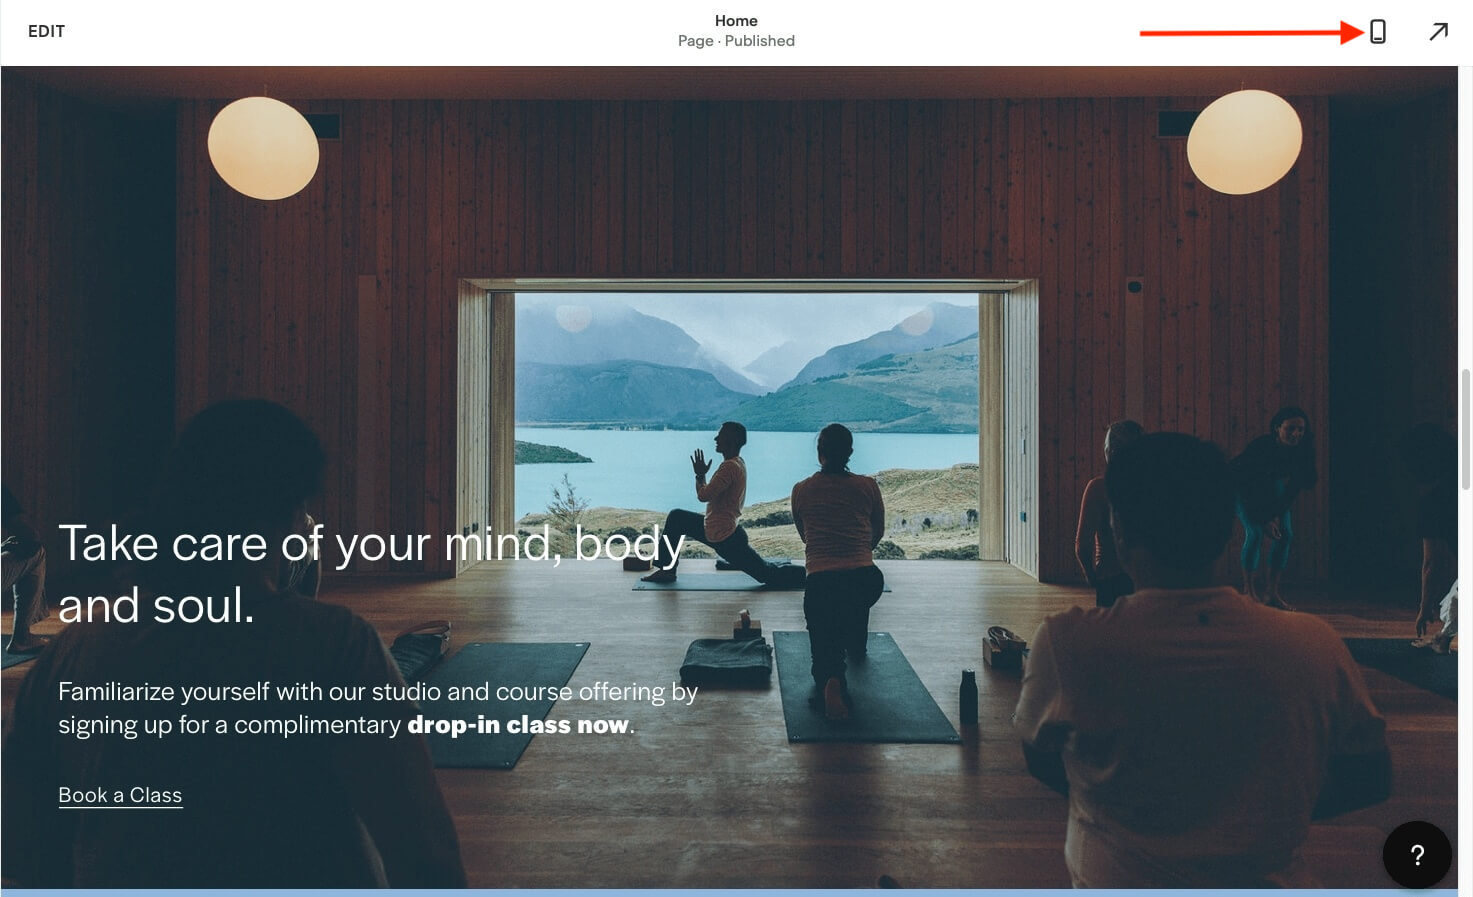
This will shift everything to a mobile preview of your site.
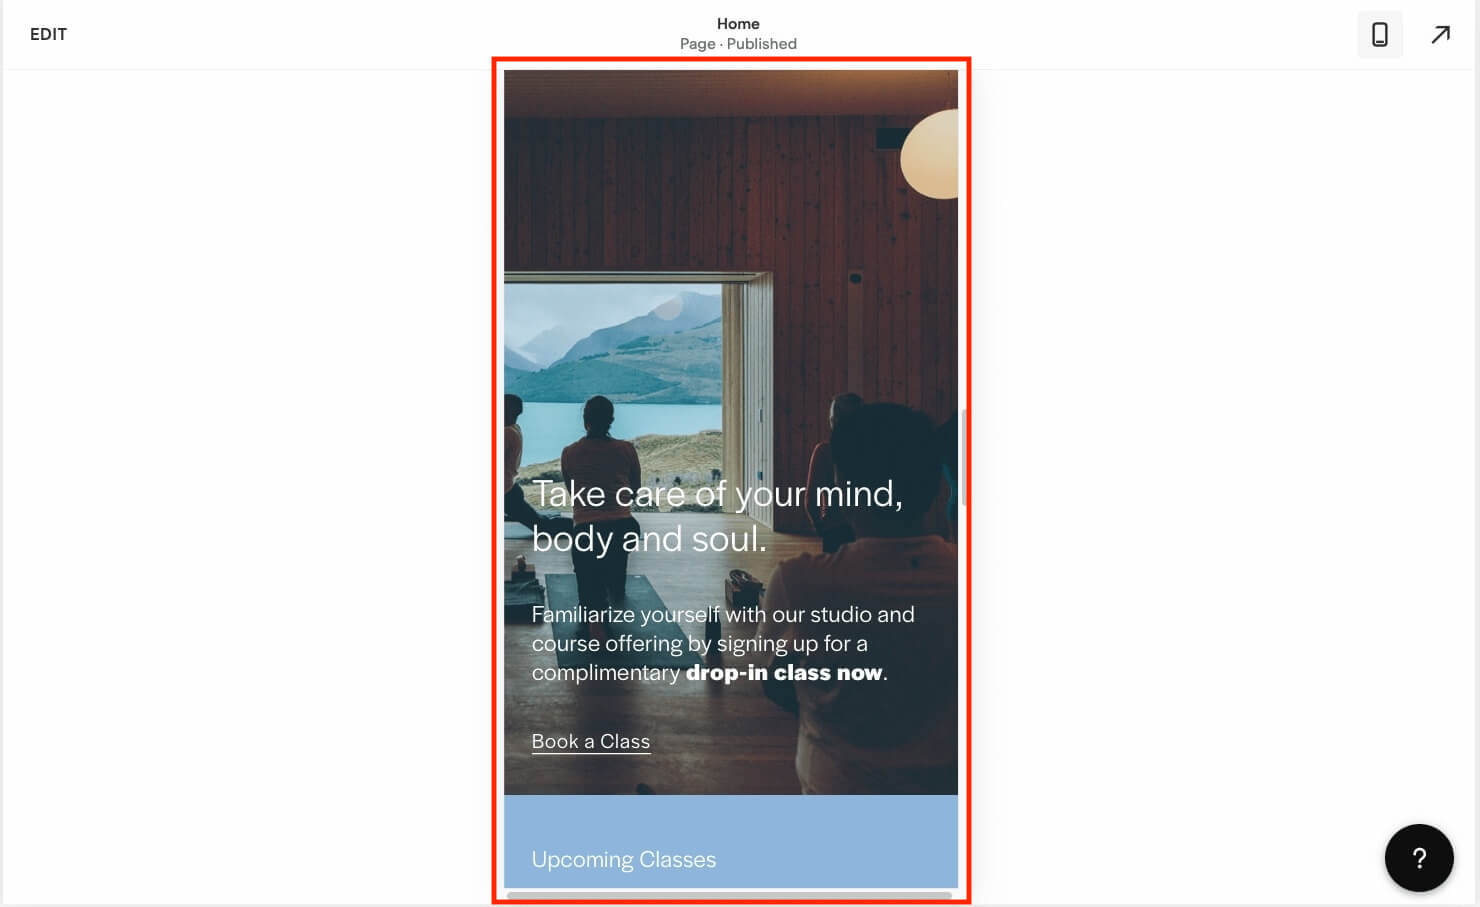
Scroll through the mobile preview and confirm you’re happy with how everything looks. It looks great, so let’s take the final step in the Squarespace tutorial: publishing your website for the world to see!
Publishing your site and pricing
Now, we’re ready to share the website with other people. Let’s upgrade our plan and publish the site.
Click on the Settings link to find the publishing options.
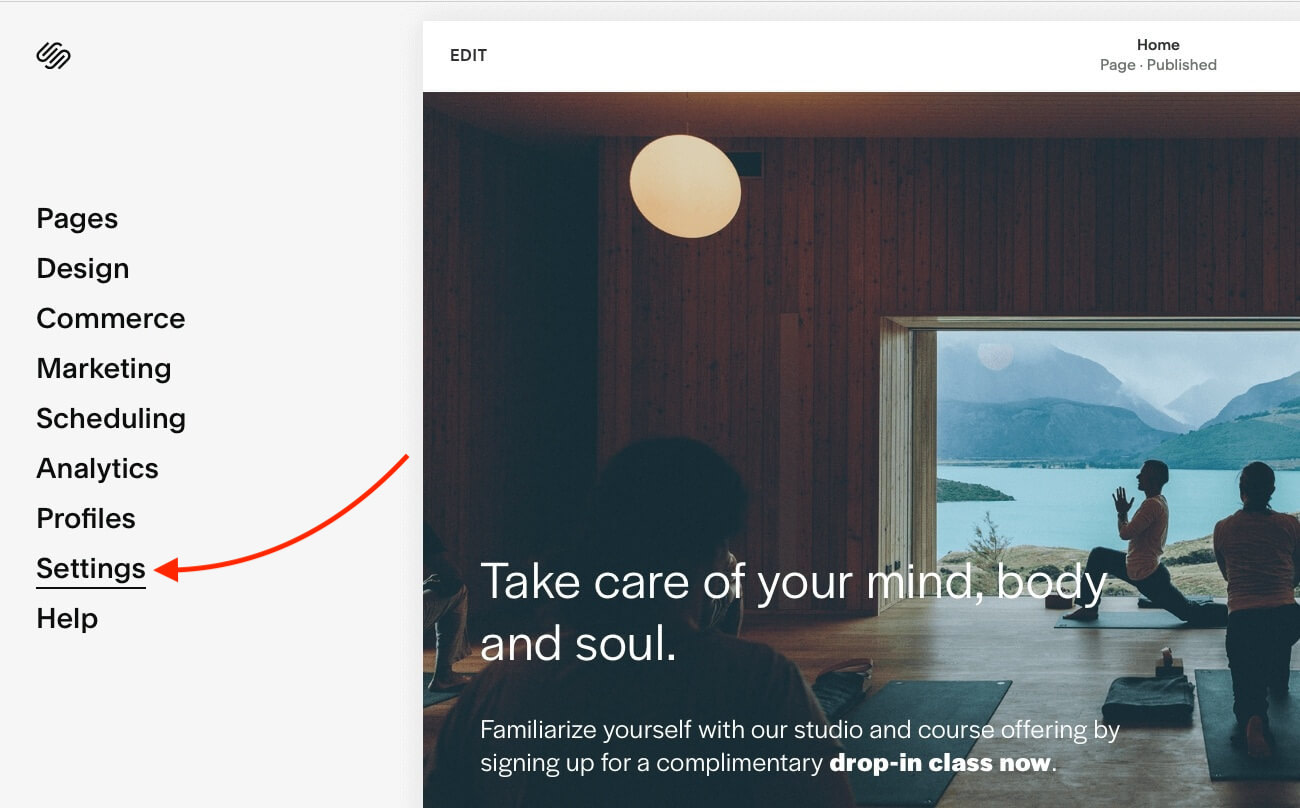
When the settings options open, it is the Site Availability that we’re interested in.
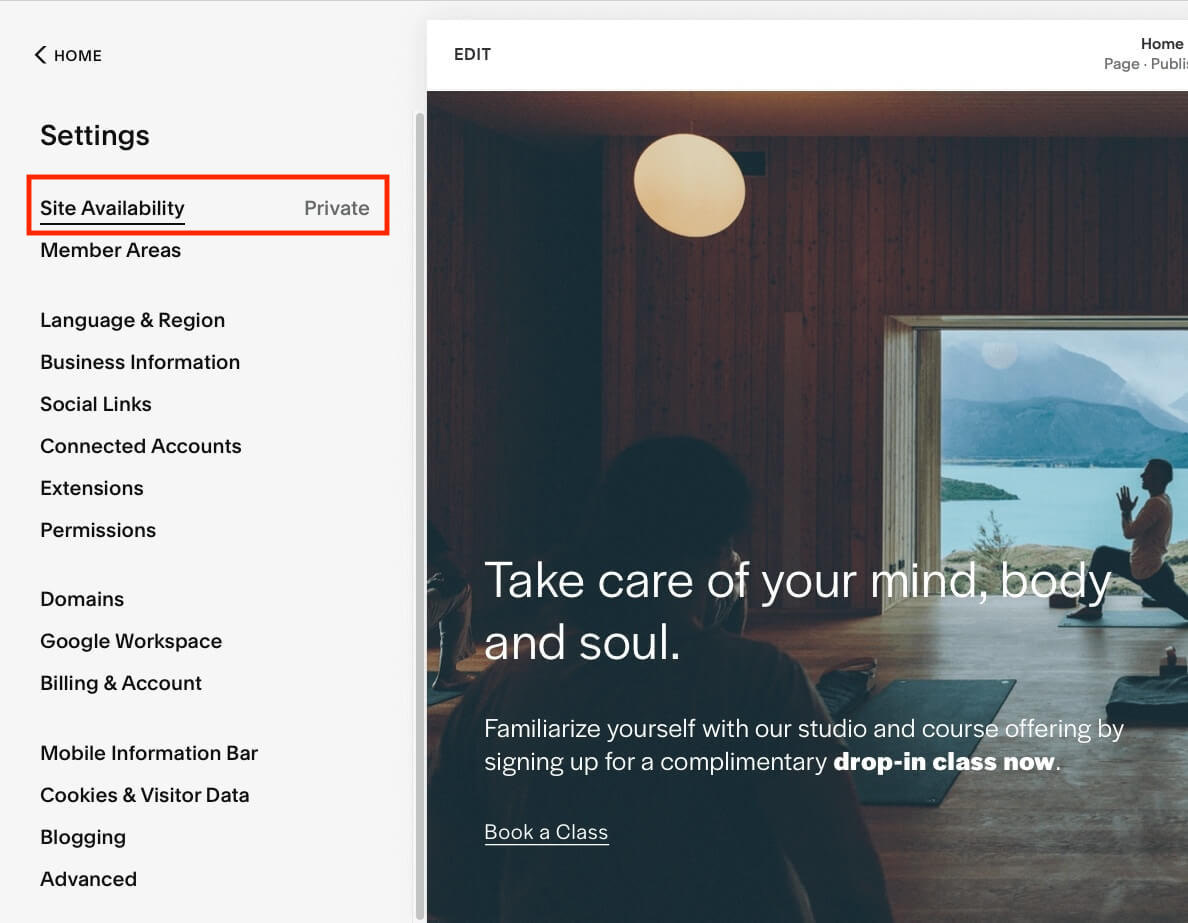
Click on site availability to open the option to upgrade and publish.
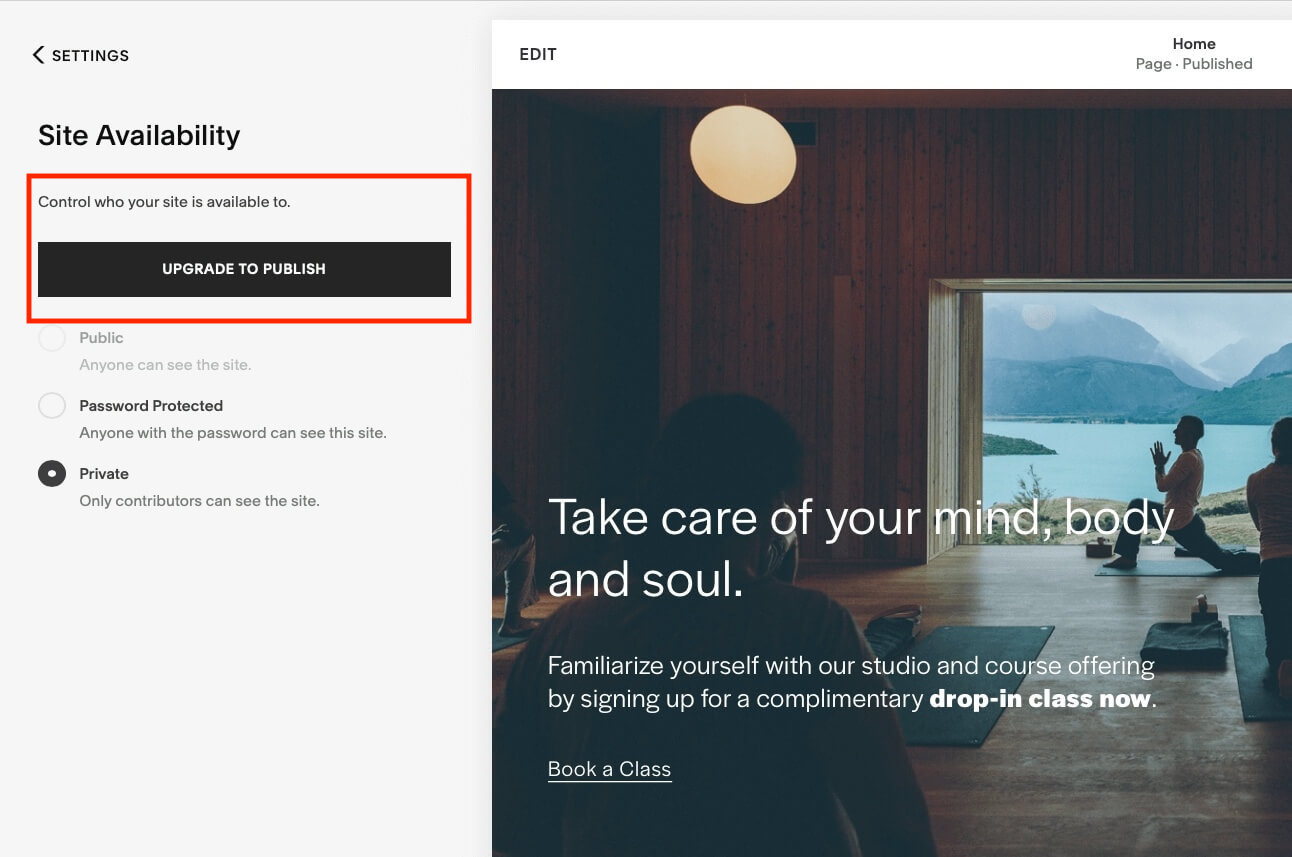
Squarespace has a number of different plans, but the higher-priced plans generally have better eCommerce options.

Pick the plan that’s best for you and celebrate. This Squarespace tutorial is over. You did it! Your website is now live!
Conclusion
As can be seen through this tutorial, I love Squarespace! Not only is it one of the best website builders for beginners, but you can also build anything with Squarespace (quickly).
We’ve covered a lot of ground here. To recap, we’ve learned:
- Personalizing your Squarespace experience
- How to pick a Squarespace design for your website
- Signing up with Squarespace
- Getting to know your Squarespace dashboard and editor
- Editing your website content
- Making design changes
- Adding an eCommerce store
- Previewing your site on mobile
- Publishing your site and pricing
What do you think of Squarespace as a website building tool? Are you enjoying your Squarespace experience? Feel free to share your thoughts in the comments below.














Or start the conversation in our Facebook group for WordPress professionals. Find answers, share tips, and get help from other WordPress experts. Join now (it’s free)!