
https://themeisle.com/blog/permalinks-in-wordpress/Permalinks are also among the key parameters of any WordPress blog, and something that you should set right away after you launch your shiny new website.
Here’s why:
Why permalinks in WordPress are important
Basically, it’s through permalinks that the world identifies the individual pieces of content on your WordPress blog … as grand as it might sound.
For instance:
- If another blogger wants to link to your content, they point to one of your permalinks.
- If you want to share your content on social media, you share the permalink.
- If Google wants to index a piece of your content, they use the permalink.
- If you want to show your content to a friend, by mentioning it in an email for example, then you give them the permalink.
- I might be missing some important uses, but you get the gist.
The problem with permalinks in WordPress
The main problem with permalinks in WordPress, as great as they are, is that the default permalink setting – the one that WordPress comes preinstalled with – isn’t optimized at all.
If you go to your wp-admin / Settings / Permalinks right after installing WordPress, you’ll see this:
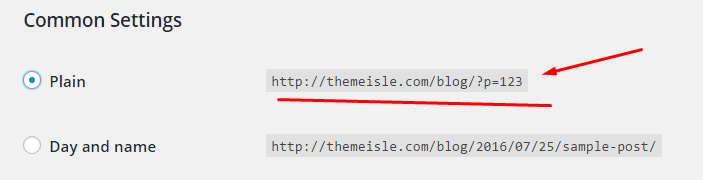
The default permalink structure therefore is:
http://www.YOURSITE.com/?p=123- where “123” is the ID of a given post or page in the database.
Why is this bad?
The chief reason is that a structure like that gives you no possibility to optimize the permalink for neither human beings nor Google (not good for your SEO).
Here’s why:
Say you publish a piece of content on, “Why Jamon Iberico Is the Greatest Ham in the World.” If your permalink is:
http://www.YOURSITE.com/why-jamon-iberico-is-the-greatest-ham– then you’re basically giving everyone a hint as to what this piece of content is about. This goes for both Google and human beings. Every person, algorithm, and bot can decode that information.http://www.YOURSITE.com/?p=27– then no one knows anything. As simple as that.
How to set permalinks in WordPress
Okay, luckily, this is very simple. But the task is two-fold:
- You need to set the permalink structure right after you launch a new WordPress site.
- You should set the permalinks for every piece of content individually.
In that scenario, #1 will give your site the right structure to work with for the future. And with #2 you can fine-tune the individual permalinks of all your posts and pages.
Let’s explain both of those quickly:
1. How to set the permalink structure in WordPress
1.1 Setting up a simple permalink structure
To set your permalink structure, go to your wp-admin / Settings / Permalinks. Once there, select this option:
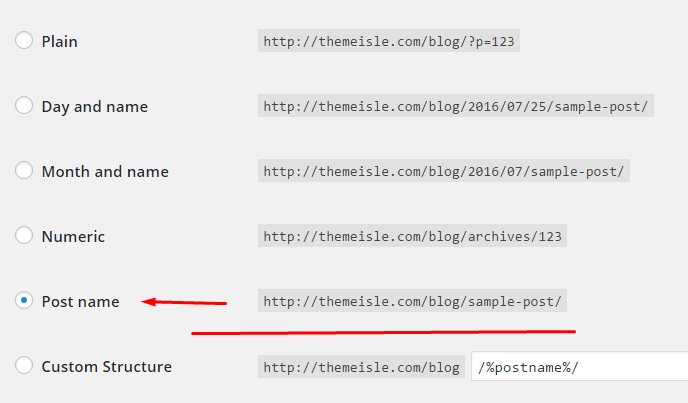
- Just to make sure we’re on the same page, it’s the one labeled “Post name.”
Now, why this one?
Quite simply, it holds the least amount of unneeded clutter… There are no seemingly random numbers, no dates, no arbitrary words (like “archives”). There’s just the post name that you can control 100% (more on that in the next point).
Note. Why you don’t want dates in your permalinks? The main reason is because dates discourage your visitors from reading your older content. Any date that’s older than last week (or so) looks like out-of-date information, despite the fact that it might still be very valid, or might even be evergreen.
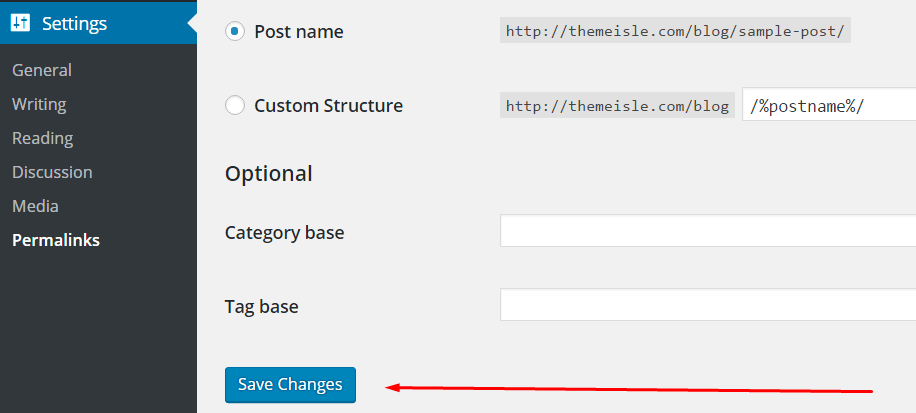
After you select that new permalink structure (“Post name”), just click “Save Changes” at the bottom of the settings page:
1.2 Adding custom permalinks
Another great way to set up permalinks is by using a custom structure. These are permalinks ending with .html or .php extension.
A user migrates his website with .html extension in the post’s URL and wants to keep everything almost exactly the same. To make the content easier to crawl for Google bots, i.e., to make it SEO friendly.
Whatever the case, here’s how to do it:
We are going to follow the same steps mentioned above, except this time we will use custom structure.
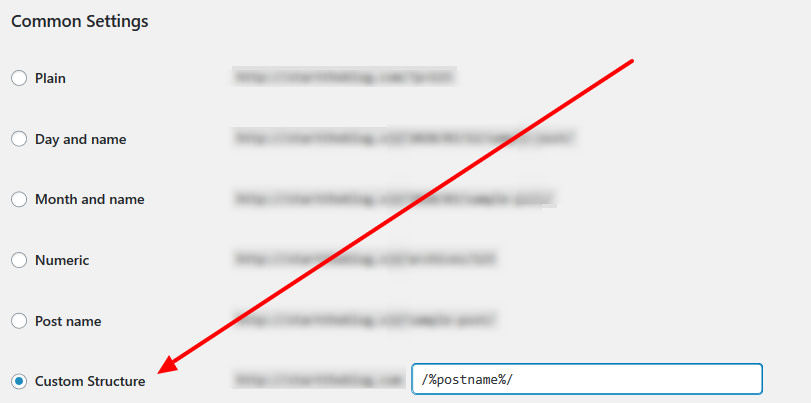
Usually, the custom structure will have the following code:
/%postname%/
If you don’t see it, enter the above code in the custom structure box and hit the save button.
Next, install the WordPress plugin titled Add Any Extensions to Pages.
Once you do that you will be able to open it via Settings → Add Any Extension to Pages. Enter the .html or other extension that you’d like to add and click on Update Settings.
One final step, go back to Settings → Permalinks and just click on the Save Changes button without actually changing any of the settings. This will reset the permalinks – a required step to make the new extensions work.
2. How to set the individual permalinks for posts/pages
Once you have the overall permalink structure set, you can proceed to tweaking your individual posts and pages.
This can be done through each individual post’s or page’s editing screen. When you’re editing content, you’ll see this little area directly below the title field:

You can click on the “Edit” button and adjust that permalink. A box will appear, and you can put pretty much whatever you wish there:
The standard, though, is to either use the given post’s whole title or some simplified version of it. For example, this post’s title is, “What Are Permalinks in WordPress? How to Set Them and Why,” but the permalink part is just, permalinks-in-wordpress, just like you can see above.
Note. Try not to update the permalink structure once you publish your post or page. One of the main ideas behind permalinks is that they are permanent, hence the name. Changing those links later on makes finding your content more difficult for people as well as search engines.
That’s pretty much all there is to permalinks in WordPress. The good thing is that point #1 you have to do only once after first launching your site. And from there, WordPress is quite good at proposing optimized permalinks for your posts and pages on its own, so #2 becomes easy too. When working on new content, you just need to have a look if WordPress’ version of the permalink makes sense, and then tweak it slightly in case of any issues.
Setting the right permalink structure is one of 10 things that you should do after launching any WordPress site. We talked about the other 9 in one of our previous posts. Check it out here.


After reading your post, my conclusion is this; I believe that the permalink structure doesn’t really matter to Google or any other search engine as far as display or indexing issues go. However, I believe the problem may lie in causing confusion to them about site functionality. For example, if a website site publishes news, I believe it should use a permalink structure like this: /%year% /%monthnum%/%day%/ and possibly with the time too but if you’re publishing content that will never expire, you should simply use: /%postname%.
I can’t find the permalinks settings anywhere. Do they change the site structure?
Or start the conversation in our Facebook group for WordPress professionals. Find answers, share tips, and get help from other WordPress experts. Join now (it’s free)!