Want to set up the WordPress Redis cache for your site? 💾
Redis is a caching technology you can use to increase website performance even further. It’s not WordPress-specific software, but it works perfectly with WordPress. Moreover, you don’t depend on your web host to install it for you (though it’s simpler if your host does offer pre-installed Redis).
In this article, we’ll talk a bit more about what Redis is and how it works. Then we’ll go over how to set up and configure a WordPress Redis cache.
Let’s get to it!
Why use WordPress Redis cache
The main thing you need to know about Redis is that it’s an “in-memory” caching system. Typically, caches use disks to store information. That means the server needs to look up information on a hard drive (or an SSD) when you query it.
As you might know, memory is much faster than other forms of storage. It’s not designed to store massive amounts of data, but only what you might need at the moment. Redis enables you to use the system’s memory as a cache. That means visitors can get faster loading times since the server can query memory instead of a disk.
Redis can also use the disk for caching, but it mainly relies on the system’s memory. Another perk of using Redis is that it’s “distributed”. That means multiple servers can share an instance of Redis, which is ideal if you’re using cloud hosting.
If all of this seems too technical, all you need to know is that Redis can make your WordPress website load faster. However, to set it up, you’ll need to be comfortable working at the server level. 👨💻👨💻👨💻
How to install Redis WordPress cache in three steps
It’s important to note that you require access to the server if you want to install Redis. That means being able to set up new software and change its configuration, which typically happens using the terminal.
If you use shared hosting, you won’t have access to the server or be able to change its configuration. Aside from access to the server, you’ll also need to use WP-CLI to configure the plugin we’ll use alongside Redis.
If you don’t have this access, we recommend reaching out to your host’s support staff to ask them if they have an option to install Redis for you.
- Step 1: Install Redis Server
- Step 2: Install the Redis PHP extension
- Step 3: Set up and configure Redis Object Cache WordPress plugin
Step 1: Install Redis Server 🖱️
Most web servers use Linux-based operating systems (OS). That means you can install software using the terminal, which is what we’ll do with Redis Server. To get started, open the terminal and enter the following command:
sudo apt-get update
This will update the package index, and it’s always recommended before installing a new software package on a Linux distribution. When the update is complete, enter the following command:
sudo apt-get install redis-server
There are other ways to install packages, depending on which Linux distribution you’re using. However, the command line offers the simplest and most straightforward option in most cases.
Once the package downloads, it’ll install automatically. To test if Redis Server is running correctly, you’re going to ping it with this command:
redis-cli ping
The software will return the message “PONG” if it’s running. That means you can move on to configuring it.
Step 2: Install the Redis PHP extension 🖱️
If you’re going to use a WordPress Redis cache, it makes sense to configure the software directly from WordPress. This approach means you won’t need to configure Redis manually using the command line, which can be a time-consuming process.
To make this happen, you’ll need a way for WordPress to communicate with Redis. That’s where the phpredis extension comes in.
The phpredis extension lets you set up an API that WordPress can use to communicate with Redis. It’s the bridge that will enable you to connect the CMS to the Redis server.
As with the Redis Serve, you can install phpredis by using the terminal and entering the following command:
sudo apt-get install php-redis
Once the installation is complete, it’s time to move to WordPress. Now we’re going to talk about how to interface the CMS with Redis.
Step 3: Set up and configure Redis Object Cache WordPress plugin ⚙️
Redis Object Cache is a WordPress plugin that connects with the phpredis API to help configure your WordPress site to use the Redis Server. If that sounds confusing, keep in mind that the plugin is basically plug-and-play. That means once you activate it, it’ll autoconfigure WordPress to cache your site using Redis.
Once you activate the plugin, go to Settings → Redis. Here you’ll see an overview of whether the plugin can connect to the Redis Server:
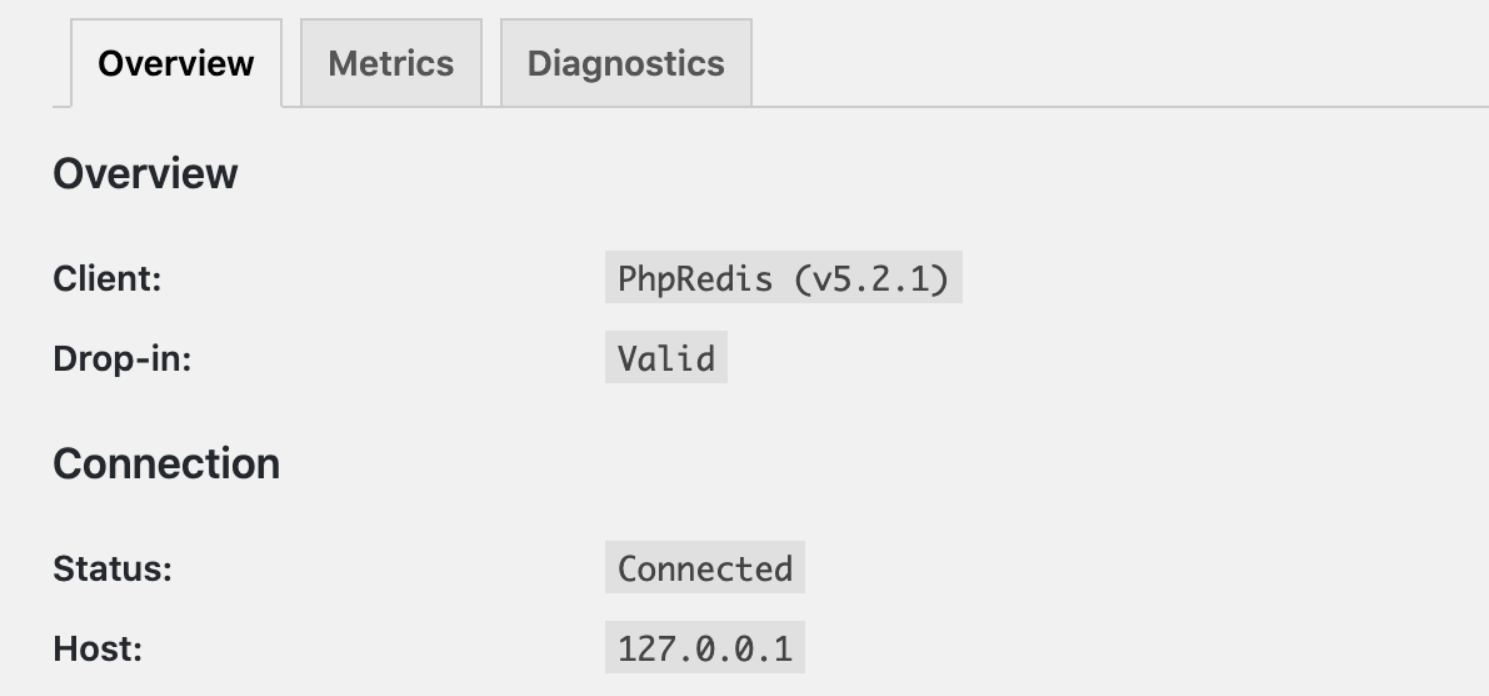
If the plugin shows the status as Connected, that means it will start using Redis to cache your site. The downside of using this plugin (and most other WordPress Redis cache tools) is they don’t offer configuration options from the dashboard.
Redis Object Cache requires you to use WP-CLI to make changes to its configuration. Once the plugin activates, you should see a near-immediate improvement in performance. However, if you want to configure Redis, you’ll need to use WP-CLI to change the software’s settings.
Try WordPress Redis cache today 🚀
Redis can be an amazing tool to improve your site’s performance. If you have access to the server, you can install Redis and configure it to work with WordPress relatively simply. To do this, you’ll need to be able to use the terminal and WP-CLI.
👉 If you have access to the server and WP-CLI, here’s what you need to do to use WordPress Redis cache:
- 🖱️ Install Redis Server.
- 🖱️ Install the Redis PHP extension.
- ⚙️ Set up and configure Redis Object Cache.
If you don’t want to deal with installing and configuring Redis yourself, you could also use a managed WordPress hosting provider that handles things for you.
Do you have any questions about how to set up and configure the WordPress Redis cache? Let’s talk about them in the comments section below!















Or start the conversation in our Facebook group for WordPress professionals. Find answers, share tips, and get help from other WordPress experts. Join now (it’s free)!