
If you are not sure how to start a membership site, or which WordPress plugin you should use, then it’s time you turned your attention to Paid Memberships Pro. This impressive free plugin has numerous features and an intuitive user experience that will enable you to quickly turn your website into a successful membership site.
In this article, we will look in-depth at how to start a membership site with Paid Memberships Pro. We will discuss what this solution has to offer, and then run through step-by-step how to get this plugin up and running.
By the end of this post, you will be ready to set up a membership site using Paid Memberships Pro.
Paid Memberships Pro: An introduction 🏦Ⓜ️
Paid Memberships Pro is a free WordPress membership plugin that helps you turn your website into a fully functioning membership site. Allowing you to restrict access to premium content, sign up members, and take recurring subscriptions, Paid Memberships Pro is a great solution for online businesses, e-Learning websites, community or directory sites, to name a few options.
So let’s check out some of the features Paid Memberships Pro has to offer…
- Free core plugin
- Six popular payment gateways (including PayPal, Stripe, and Authorize.net)
- Unlimited membership levels
- Flexible membership pricing
- Extensive options for content restriction
- Member dashboard
- Customizable reports
Paid Memberships Pro also offers two premium plans, which provide 60+ add-ons, unlimited support tickets, plugin updates, developer chats, and much more.
We’ll use the free version for this how to start a membership site tutorial, though…
How to start a membership site with Paid Memberships Pro ⛔✋💰
To get started with this tutorial, you’ll first need to install the free Paid Memberships Pro plugin from WordPress.org. We have a guide on how to install a WordPress plugin if you need some help.
Once you’ve done that, you’ll find a new Memberships tab displayed in your WordPress dashboard menu.
Now, you’re ready to set up the plugin…
- Create membership levels
- Set up membership pages
- Add a payment gateway
- Set up email
- Configure the advanced settings
- Restrict content access
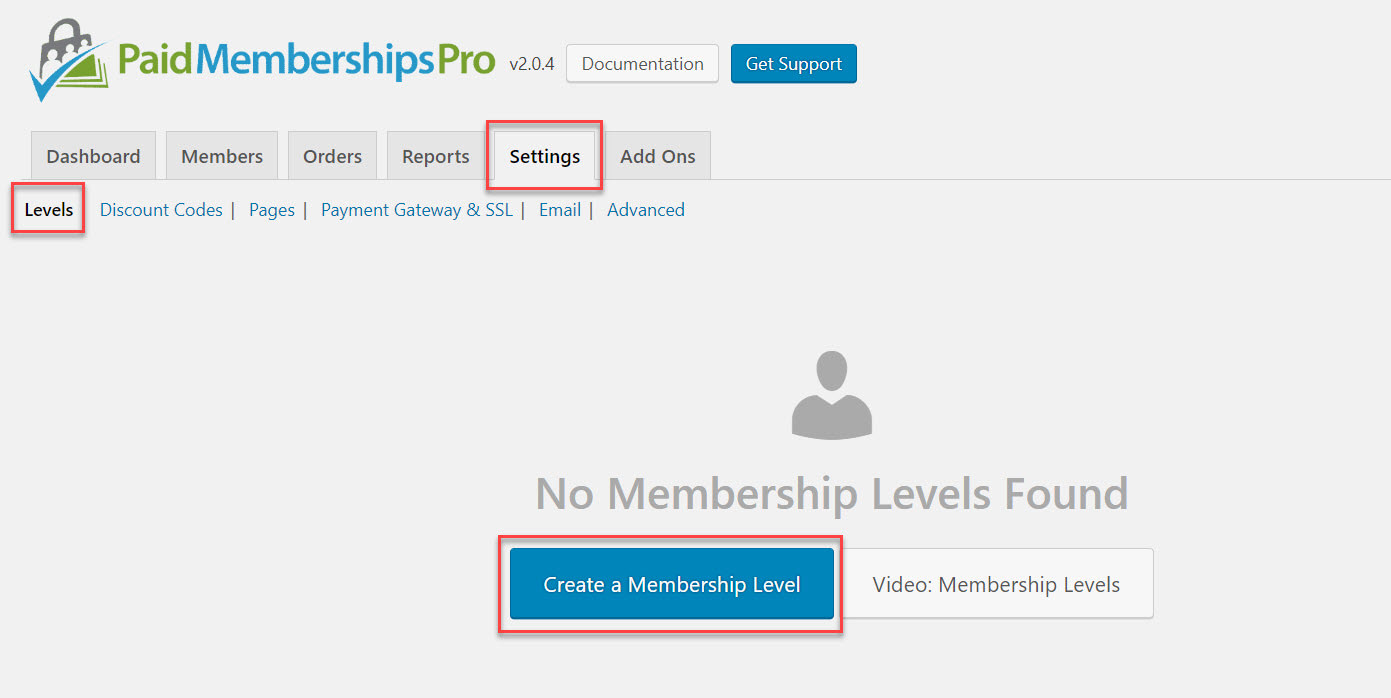
1. Create membership levels
The first step is to create your membership levels, or plans. To do this, select Memberships > Settings from your WordPress dashboard and then click on Create a Membership Level.
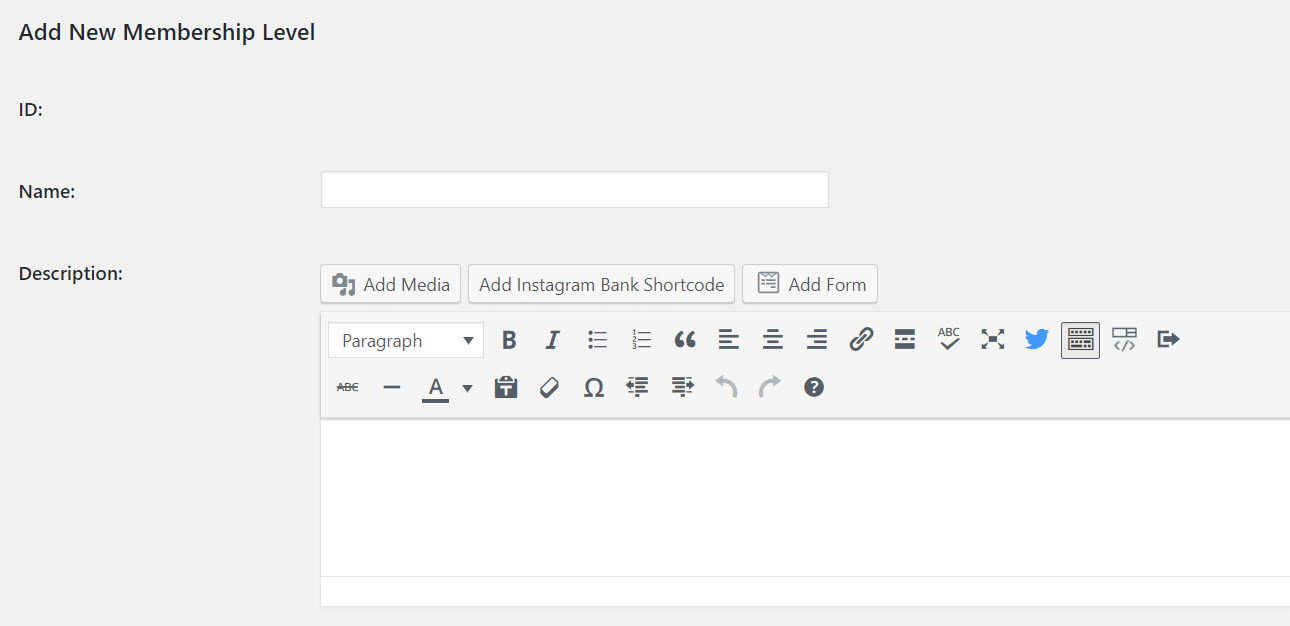
Give your membership level a name and description, providing your audience with all the information they need about the plan and the features offered. You can also add a confirmation message that will be displayed to users once they sign up for the plan.
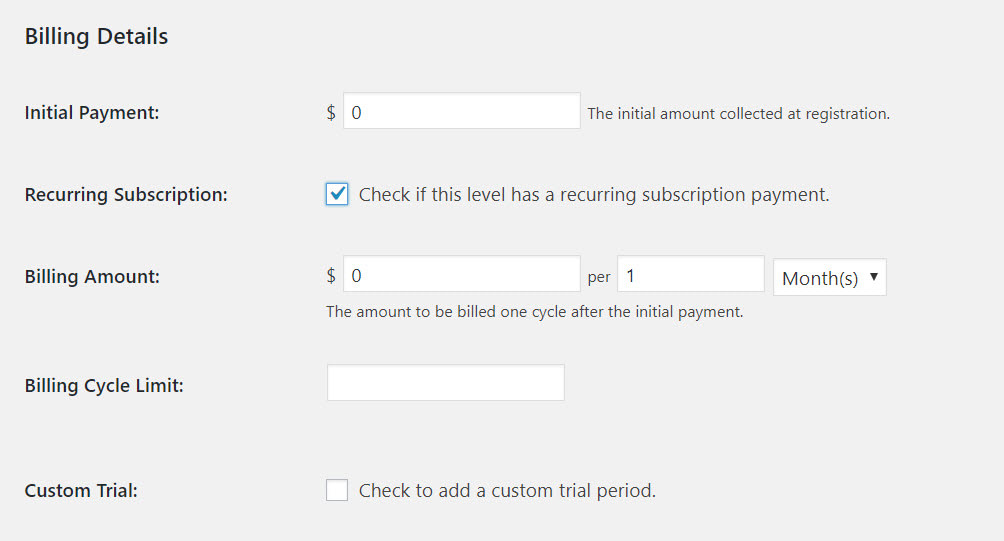
Scroll down the page to Billing Details. Here you can choose how much to charge your users for accessing your content, set payments as a recurring subscription, and more.
Lastly, under Content Settings, select the content categories you would like members of this plan to be able to access.
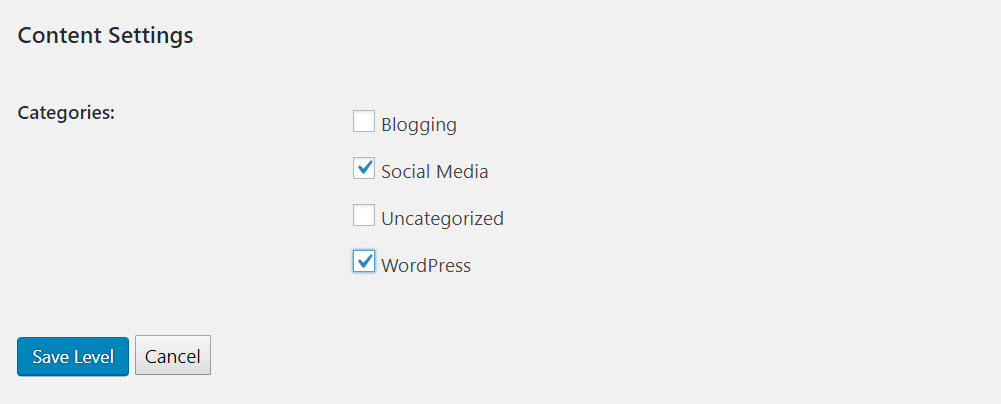
Remember to select Save Level at the bottom of the page before moving on to create further membership plans.
2. Set up membership pages
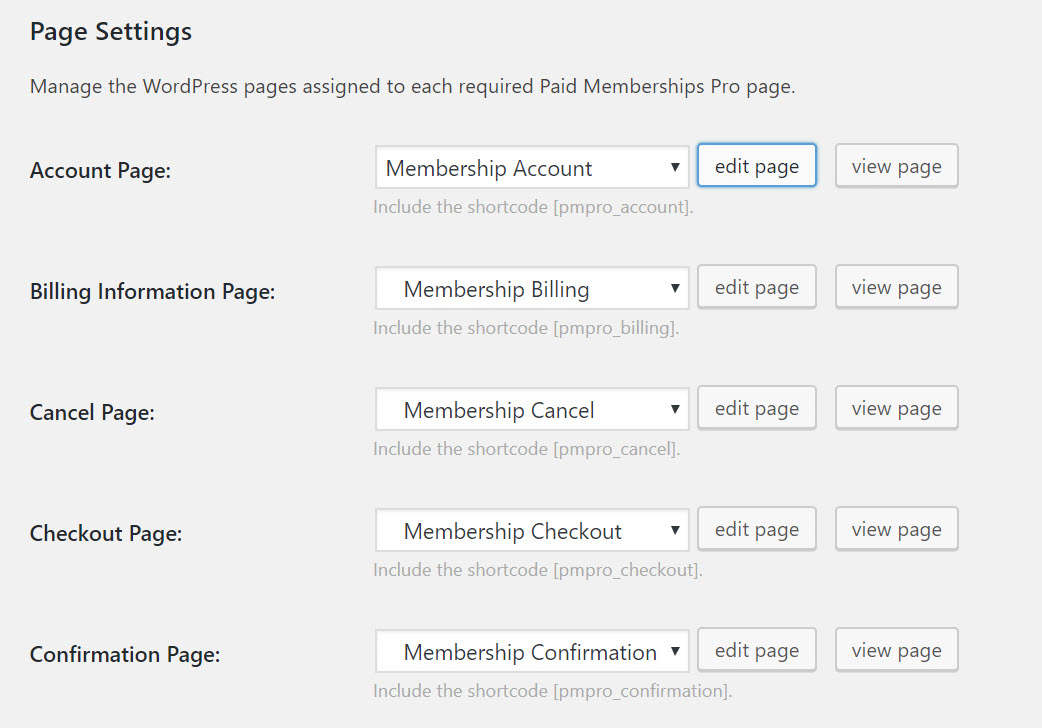
Once you have created the membership plans, you will next need to set up the membership pages. There are several front-end pages that are required for your membership website. You can create these pages yourself, or Paid Memberships Pro will generate them for you.
To have the plugin create pages for you, select Settings > Pages, and then Generate Pages for Me.
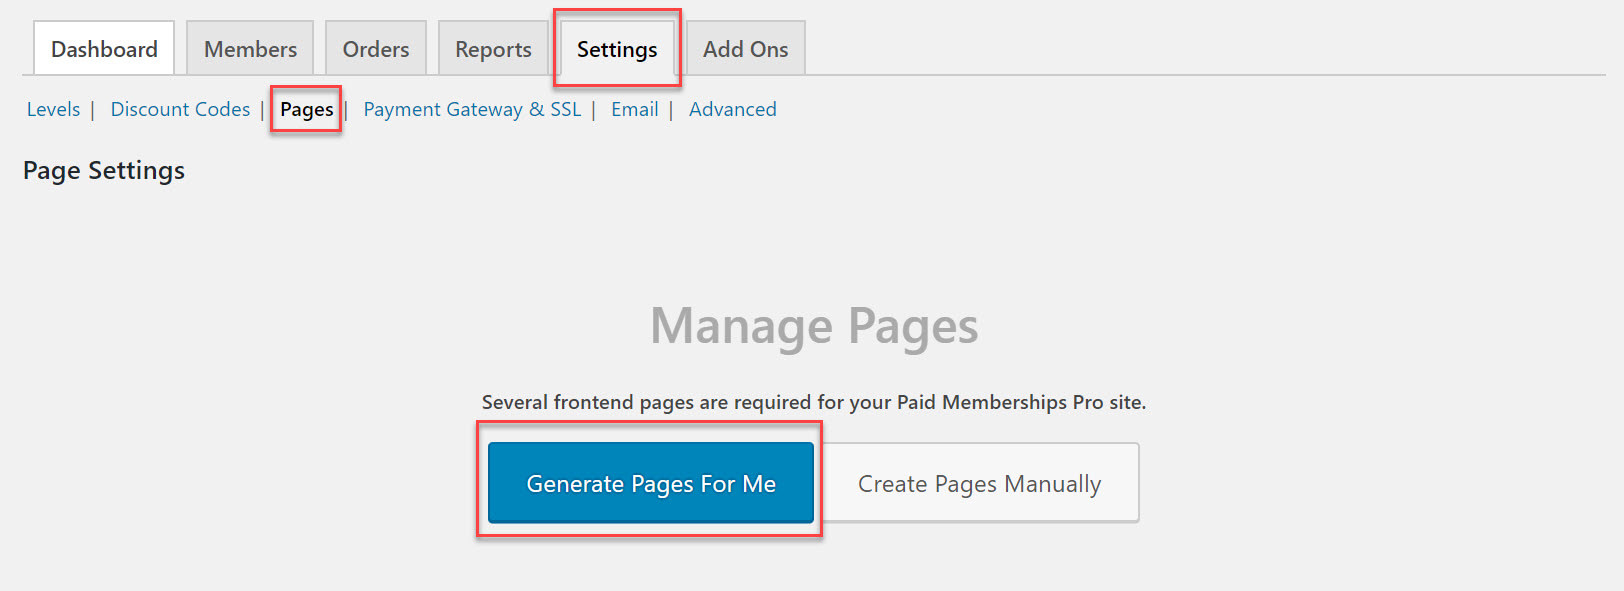
You will now find that Paid Memberships Pro has generated all the appropriate membership pages you will need. You can then Edit and View the pages as necessary.
Don’t forget to select Save Settings at the bottom of the page.
3. Add a payment gateway
As mentioned, Paid Memberships Pro ships with a number of payment gateway options that work out of the box. These include…
- Stripe
- PayPal
- Authorize.net
- Braintree Payments
- 2Checkout
- Cybersource
Before you commit to a payment gateway, do your research to find out which provider best fits your needs.
To add a payment gateway provider, select Payment Gateway and SSL under the Settings tab. Then select your chosen payment gateway and follow the instructions:
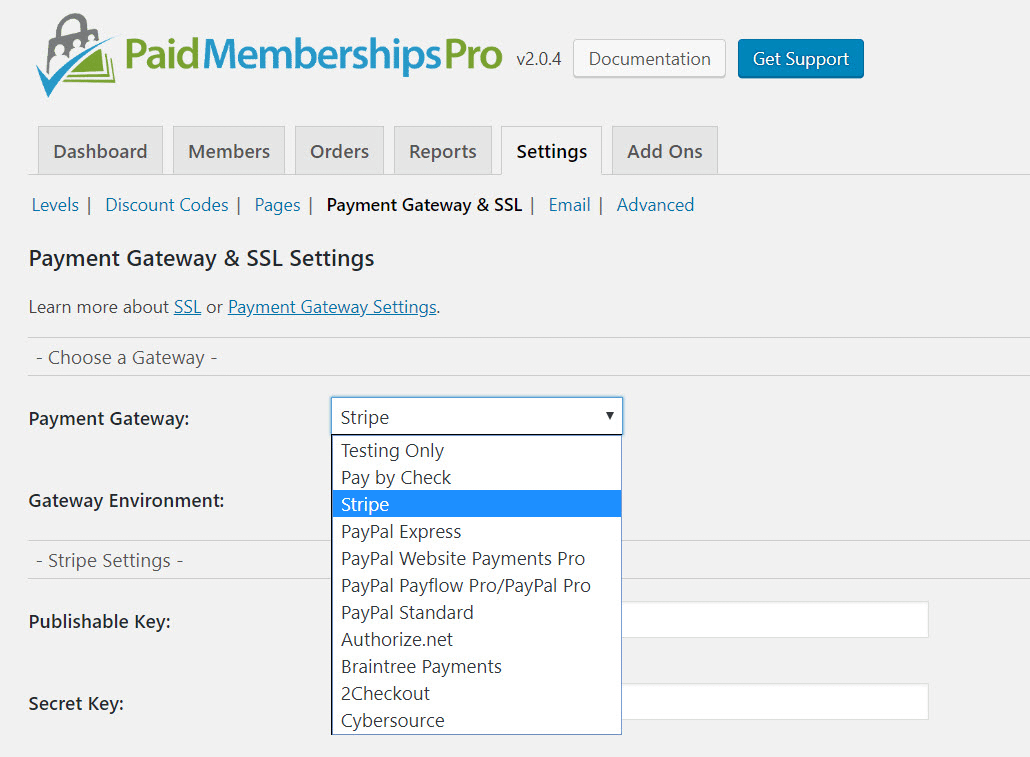
Once you have finished, click on Save Settings at the bottom of the page.
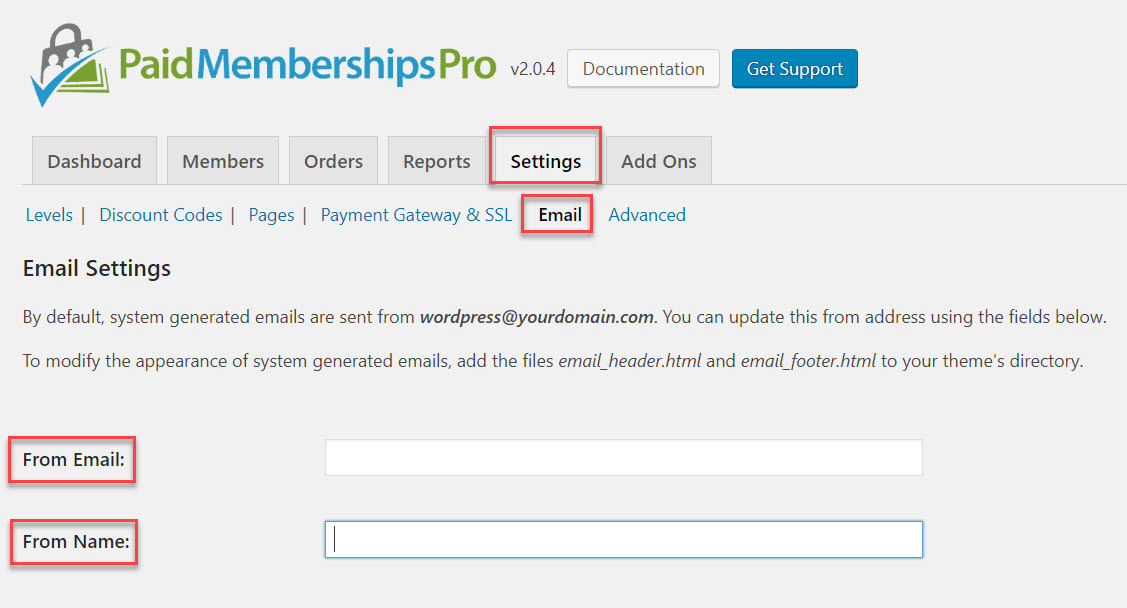
4. Set up email
Paid Memberships Pro has the functionality to send a variety of emails to your users once they have signed up to your membership site. To set up the email service, select Settings > Email. Then add your email address and name into the From Email and From Name fields.
Paid Memberships Pro allows you to select the occasions when you want an email sent. These include…
- Checkout
- Admin Changes
- Cancellation
- Bill Updates
To customize the text of these system-generated emails, you can install the free Paid Memberships Pro Email Templates Add On plugin.
5. Configure the advanced settings
Under Settings > Advanced, you can configure some of the messages displayed to your audience, as well as other aspects of your membership site. Here are a few of the settings you can alter…
- Edit the message displayed to non-users who try to view restricted pages.
- Restrict member-only content from being displayed in searches and archives.
- Show content excerpts to non-members.
- Set up a Terms and Conditions section that users must agree to before signing up.
Once you have completed all of the above steps, your membership site is nearly ready to go live. You now just need to restrict access to your content, so only those who have subscribed to a membership plan can access it. Let’s take a look at how to do this…
6. Restrict content access
The final step of how to start a membership site is to choose what content to restrict.
Restricting access to content on your website is a quick and easy task. Open a page or post, and then within the Editor you have two options…
First, under Require Membership, select the membership plan you would like the post or page to belong to.
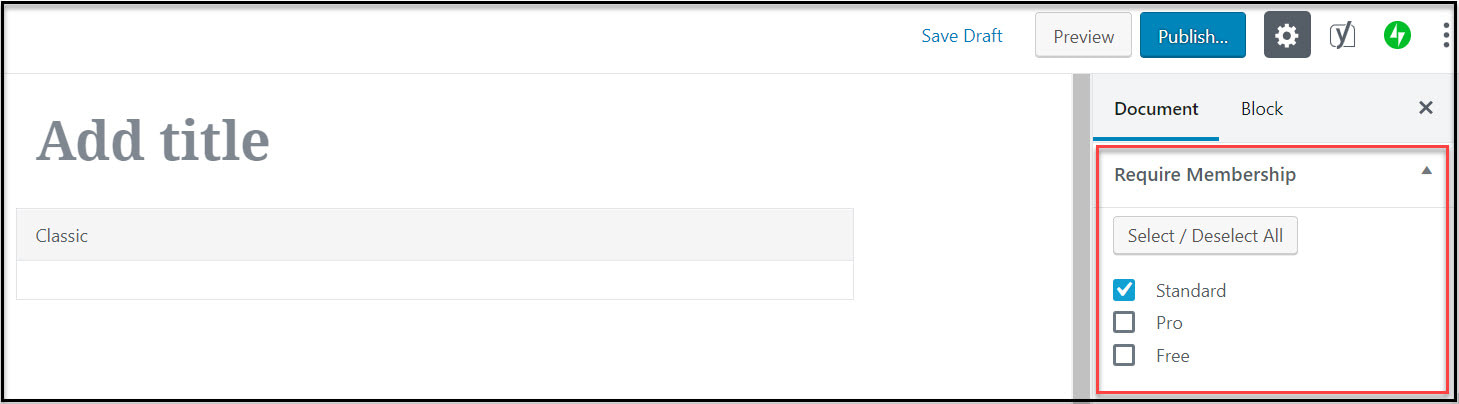
Second, under Categories, select the same category that you previously chose to restrict in the Membership Level settings.

Then re-publish the page or post. You should now go through and open each web page and blog post to check that access has been restricted, and can be viewed by those on the appropriate plans.
To speed up this process, you can follow our guide on how to switch between WordPress user accounts.
Final thoughts on how to start a membership site with Paid Memberships Pro 💭
Paid Memberships Pro has a lot to offer and is an extremely effective WordPress plugin.
It provides a quick and easy set up alongside all the features you need to get your membership site off the ground.
And with the option of upgrading to one of the premium plans, adding advanced features to your membership site in the future is always a possibility.
Do you have any questions on how to start a membership site with Paid Memberships Pro? If so, feel free to ask away in the comments below…


Or start the conversation in our Facebook group for WordPress professionals. Find answers, share tips, and get help from other WordPress experts. Join now (it’s free)!