
With Google Analytics, you can find out how many visitors your site serves, how they’re finding your content, and more. If you know how to segment Google Analytics, you can track almost any variable you want.
For example, you can configure Google Analytics to track which of your WordPress authors receives the most page views. All it takes is a little bit of extra work using Google Tag Manager.
In this article, we’ll show you how to segment your analytics by author using Google Analytics and Tag Manager. While that’s the focus of this article, you’ll be able to apply the same approach to other segments, too. For example, tracking content from specific WordPress categories.
Why you may want to segment Google Analytics 💡
Google Analytics enables you to track a massive amount of information. This is useful for creating targeted marketing campaigns, auditing your site’s user experience (UX), and more.
However, every website uses different metrics to measure its success. Where some might only care about overall traffic, you may be more interested in knowing what type of content performs best, or which elements users are clicking on.
If you segment Google Analytics, it can help you focus on the information that matters most to you. In short, this process involves creating subsets of data. This strategy is often used in marketing to identify and track multiple audiences.
However, you can create custom segments for just about any type of data you want. For instance, you could track page views by author to monitor your writers’ performance. This could help you decide which freelancers you want to hire again, or who you should assign a particularly important post to.
By creating custom ‘dimensions’, you can specify which metrics you want to track. Plus, you can access this data through the Google Analytics interface, so you don’t have to deal with raw numbers.
How to segment Google Analytics by author in WordPress (in five steps) 👨🏽💻
There are many ways to segment your WordPress site’s analytics.
With a little extra work, you can segment your analytics for free using a targeted approach with Google Tag Manager and a free plugin. Here’s how:
- Configure Google Tag Manager
- Create a custom dimension in Google Analytics
- Add author and post page type variables to Tag Manager
- Implement a trigger to fire during post views
- Set up a tag to track authors in Google Analytics
Step 1: Configure Google Tag Manager
First, make sure you already have Google Analytics connected with your WordPress site. Then you can configure Google Tag Manager, which will enable you to pass the right data from WordPress to Google Analytics.
You can connect Google Tag Manager with your site manually or using a plugin such as Google Tag Manager for WordPress:
Once you activate the plugin, go to Settings → Google Tag Manager. At the top of the page, there’s a field where you need to enter your Google Tag Manager ID:

To get that ID, log in to Google Tag Manager. It should open to a page that lists your current ‘accounts’ or website containers (or prompts you to create one, if this is your first time using Google Tag Manager).
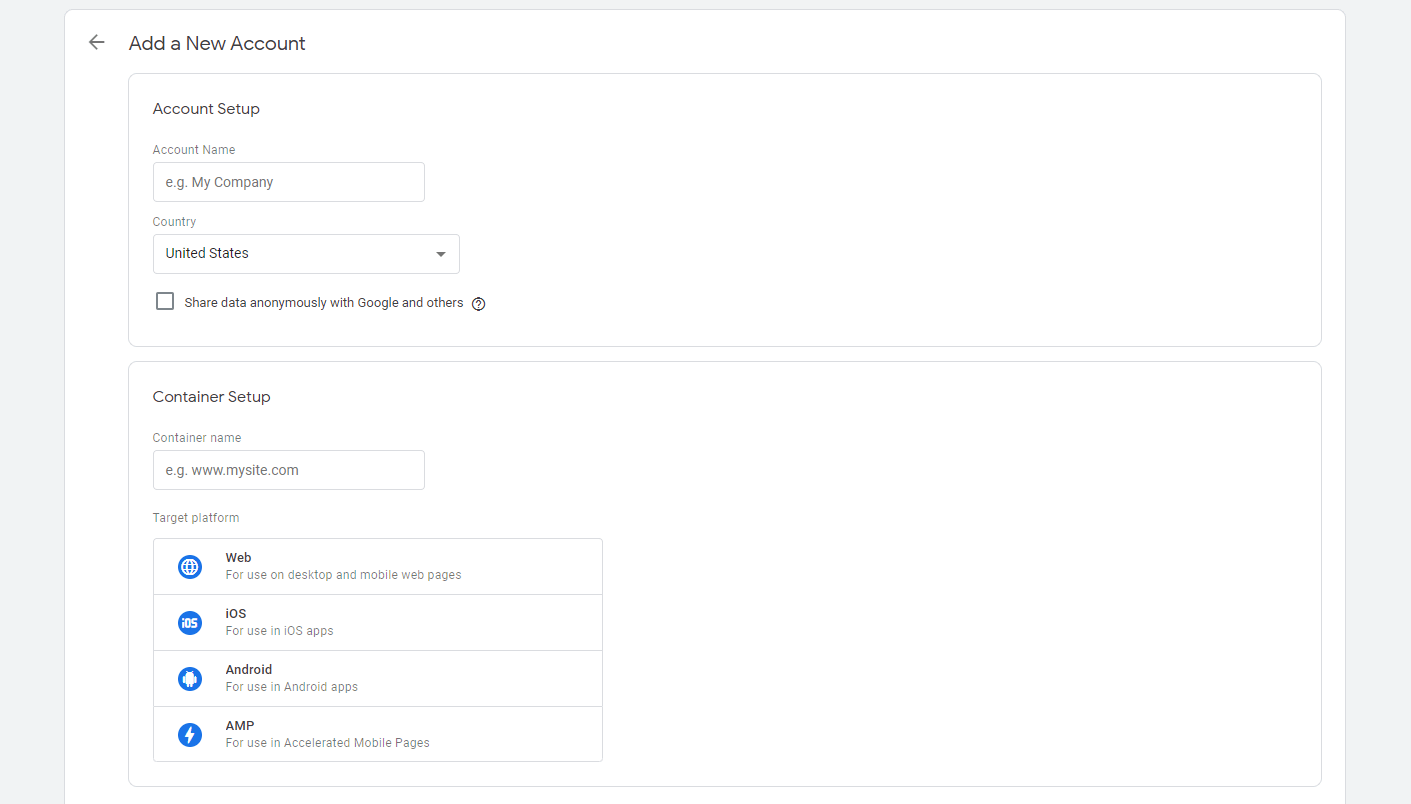
Click on the option to create a new account, enter a name for it, provide your website’s URL, and select the Web option:
Once the account is set up, you’ll see it in your Tag Manager dashboard. There should be a column that reads Container ID. Copy your website’s ID and paste it within the corresponding field in WordPress.
If you scroll through the settings, you’ll notice a section called Basic data. Here, you can configure the information WordPress will pass on to Tag Manager’s data layer:
By default, the plugin passes on several variables to Tag Manager, including each post’s author, publication date, category, and more.
You can use these variables to segment your website’s analytics. For the purposes of this tutorial, we’re going to focus on segmenting by author. However, you can use the rest of these steps interchangeably with any of the variables.
For now, select Posttype of current post/archive and Post author name. Then save the changes to your settings.
Step 2: Create a custom dimension in Google Analytics
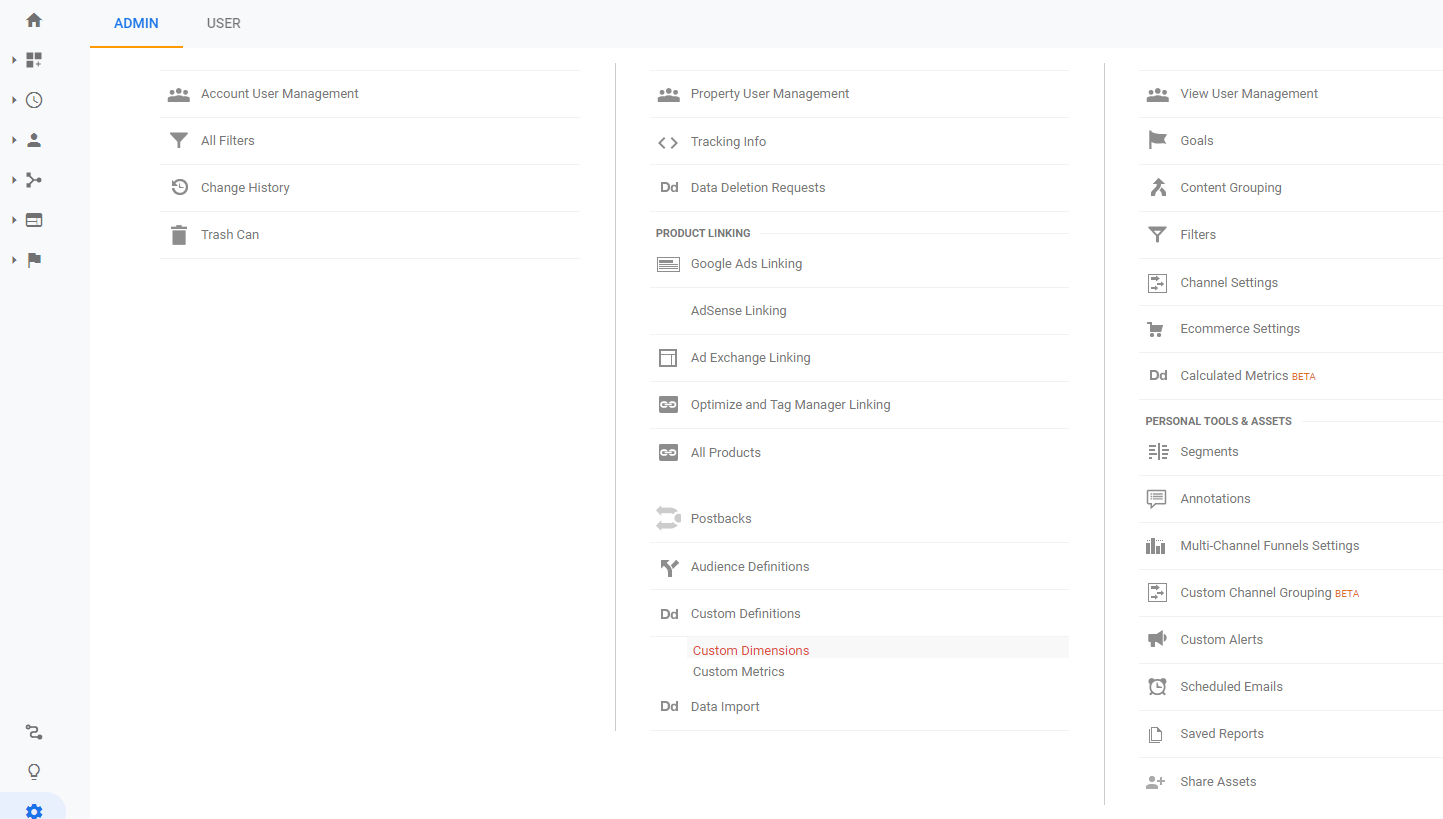
Next, head over to your Google Analytics dashboard and open your admin settings. There, click on Custom Definitions → Custom Dimensions:
Click on the NEW CUSTOM DIMENSION button in the tab that pops open. Then, set a name for your custom dimension, select Hit under Scope to track page views, and select the Active checkbox.
Once the dimension is set, it’ll appear under Custom Dimensions. Take note of the Index number next to its name:

Ours is “1” since we only have one custom dimension set for now. You’ll need this number for the next step, so remember it.
Step 3: Add author and post page type variables to Tag Manager
For this step, you’re going to tell Tag Manager to pull the corresponding author name every time someone visits one of your posts. That way, you can pass on that data to Google Analytics and access it using that platform.
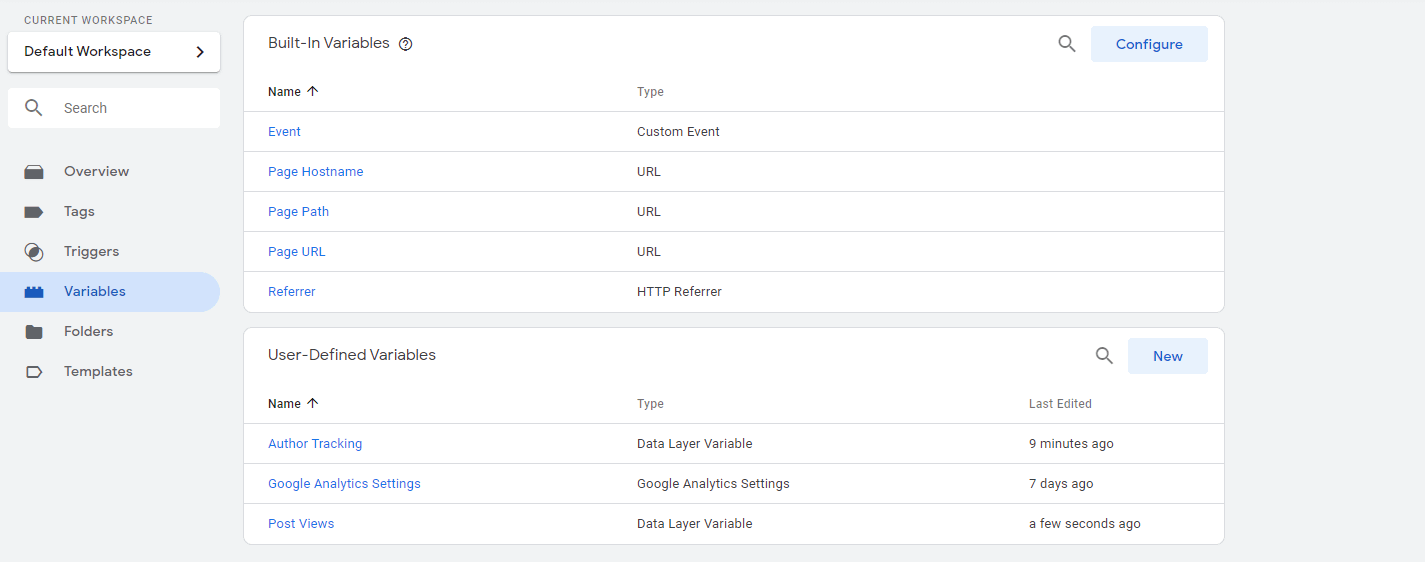
The first thing you need to do is open the property you set up in Tag Manager during Step 1. On the next screen, look for Variables and select New under User-Defined Variables:

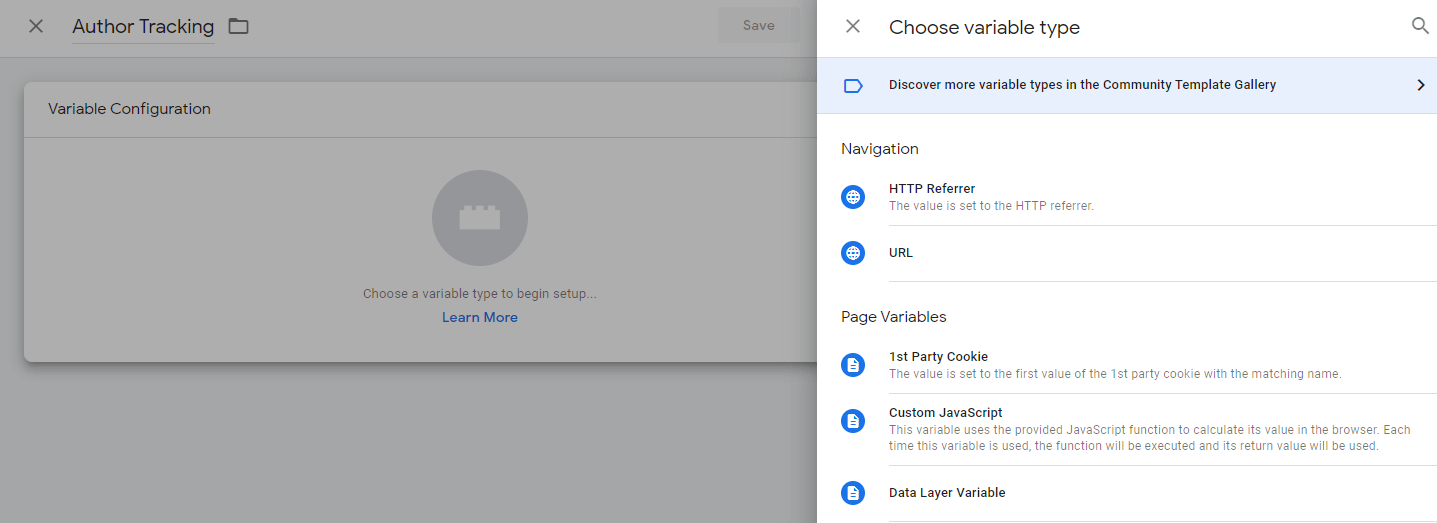
A new window will pop up, where you can set a name for your variable and configure what type of data you’re working with. Here, select the Data Layer Variable option:
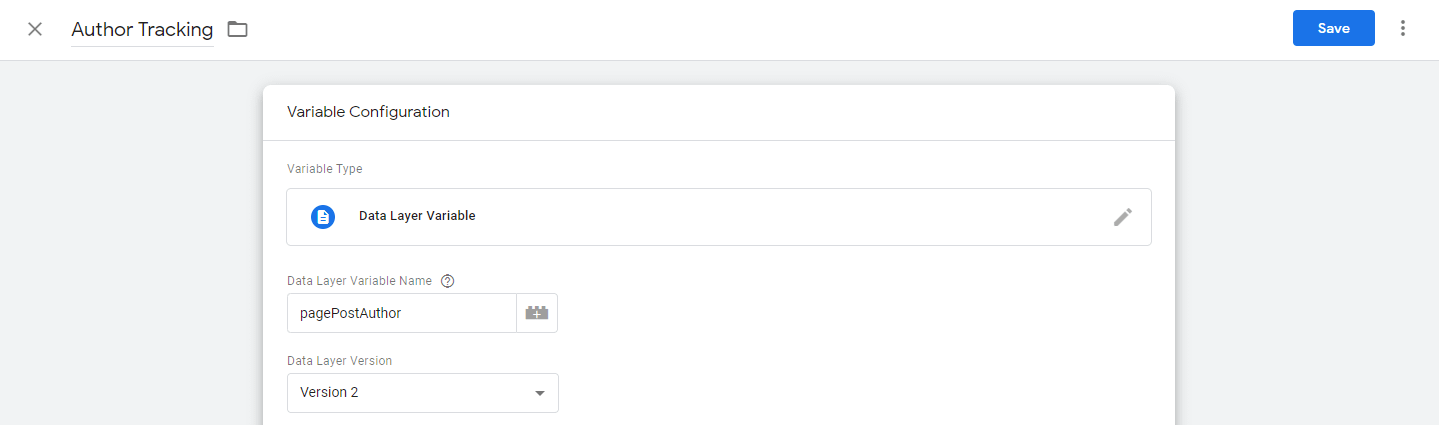
Now set the variable name to pagePostAuthor, which you set up in Google Tag Manager for WordPress during Step 1:
Save that variable, then repeat the process to set up a second variable, using the variable name pagePostType:

When that’s done, you should end up with two new variables. In our case, they’re titled Author Tracking and Post Views:
Now Google Tag Manager knows what data it needs to pull, so it’s time to configure your trigger.
Step 4: Implement a trigger to fire during post views
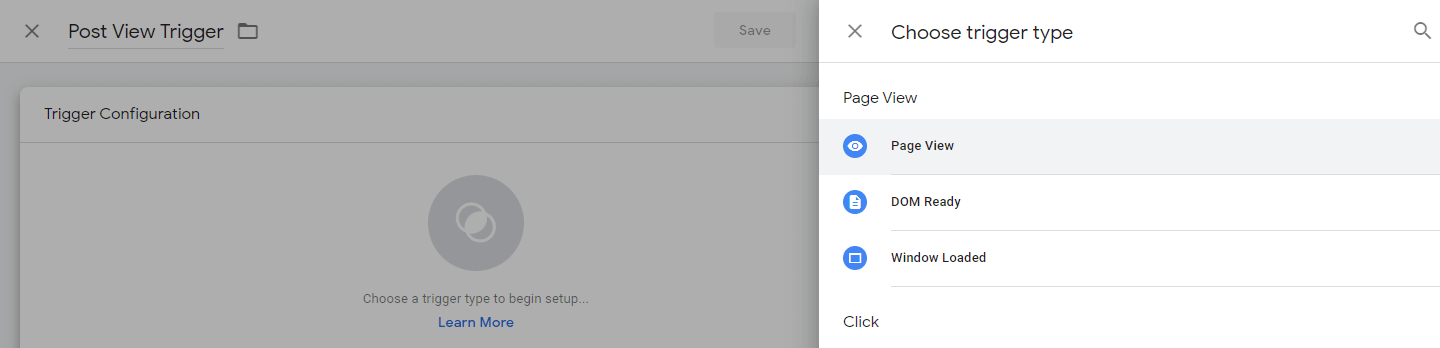
Navigate to the Triggers tab in Tag Manager. Click on the New button and set a name for your trigger, then select Page View as the type:
Tag Manager will ask whether the trigger should fire on all page views or only some of them. Select the Some Page Views option and look for the event variable you set up in the previous step – ours is called Post Views:
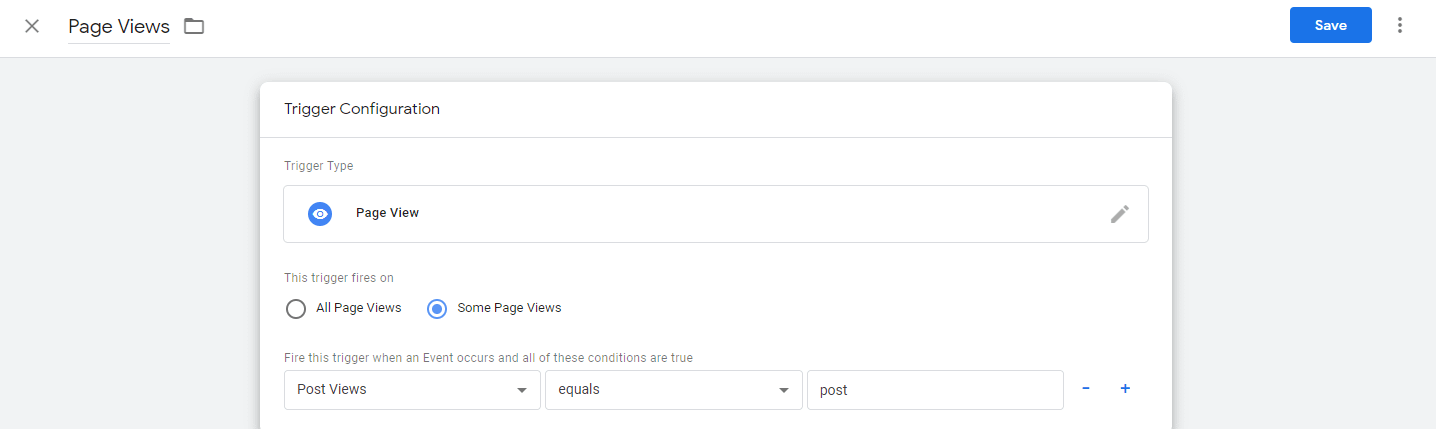
The rest of the configuration should read equals post. That means the trigger will fire when the page type on your website is a post and records page views.
Step 5: Set up a tag to track authors in Google Analytics
All that’s left is to set up a ‘tag’ for Google Analytics so the platform receives all the data you’ve configured Tag Manager to track.
Return to your Tag Manager workspace and open the Tags tab, then click on New. New tags are divided into two sections, Tag Configuration and Triggering.
For Tag Configuration, select Google Analytics: Universal Analytics. Once that’s set, select the checkbox for Enable overriding settings in this tag and enter your Analytics tracking ID below:
Open the More Settings tab and select Custom Dimensions → Add Custom Dimension. Under Index, add the custom dimension number from Step 2. For Dimension Value, select the author variable you set up during Step 3:
Now you can move on to the Triggering section. Here, select the trigger you set up during Step 4. The full configuration should look like this:

Click on Save and you’ll return to your Tag Manager workspace. Now, you can click on the Submit button to publish your changes to Google Analytics.
Once the changes are live, you’ll be able to check your page views segmented by author by navigating to Audience → Custom → User Defined in Google Analytics and selecting the Author option.
How to segment Google Analytics using other data 📊
As we mentioned before, you can set up any type of custom dimension you want in Google Analytics. Segmenting data by author is simple because we have a plugin that enables us to tell Google Analytics which variables to track.
If you want to dig deeper, Google Analytics offers a lot of options for breaking down your data into the subsets you want to focus on. The possibilities are nearly endless, but some other examples include:
- Including information such as age, gender, and interests in your custom reports to improve your targeted marketing strategy
- Tracking traffic sources to determine the success of certain campaigns or the effectiveness of your social media engagement
- Determining page views per post category so you can see which topics your visitors prefer
You already know how to configure basic segmentation. However, Google Analytics also offers a library of crowd-sourced segments you can access for free and put to use on your own website to speed the process up.
Conclusion 🏁
Learning how to segment Google Analytics takes a little work, but it’s well worth it.
Once you know how to create custom dimensions to track the data that’s most valuable to you, you can get a lot more out of your analytics reports.
In this post, we used that process to segment Google analytics by WordPress author in five steps:
- Configure Google Tag Manager for WordPress.
- Create a custom dimension in Google Analytics.
- Add author and post page type variables.
- Implement a trigger to fire during post views.
- Set up a tag to track authors in Google Analytics.
For some other ways to get more out of Google Analytics, check out our guides to setting up a custom Google Analytics SEO dashboard and tracking user engagement.
Do you have any questions about how to segment Google Analytics data? Let’s talk about them in the comments section below!


Or start the conversation in our Facebook group for WordPress professionals. Find answers, share tips, and get help from other WordPress experts. Join now (it’s free)!