Ever say something and wish you could take it back? It’s not possible in real life, but revisions are totally doable on your WordPress site. We’ll show you how to unpublish a page in WordPress, so that it’s no longer visible to anyone that visits your site. In addition, we’ll teach you how to hide or archive pages, so that they are only visible to a selected audience, or password protect your work, so it’s not as easily accessible.
Whether you’ve accidentally published a draft version of an article, or simply changed your mind about it, you’ll need to know how to unpublish a page in WordPress – and this guide will teach you to do it!
Let’s take a look at 🔎 a few of the ways you can unpublish WordPress pages.
📚 Table of contents:
How to unpublish a single page in WordPress
When you unpublish a page in WordPress, it’s removed from your live website but leaves you the option to edit the page and republish it later.
All you need to do is switch the published page to draft status. Visitors won’t be able to see it, but logged-in users can access and edit it via the WordPress dashboard.
This is a good option if you’d like to improve or correct the content in your post. In your WordPress admin console, go to Pages > All Pages. Use your mouse to hover over the page, and click on the Edit link when it appears.
Clicking edit will open up the page. At the very top, you’ll notice a button saying Switch to Draft.
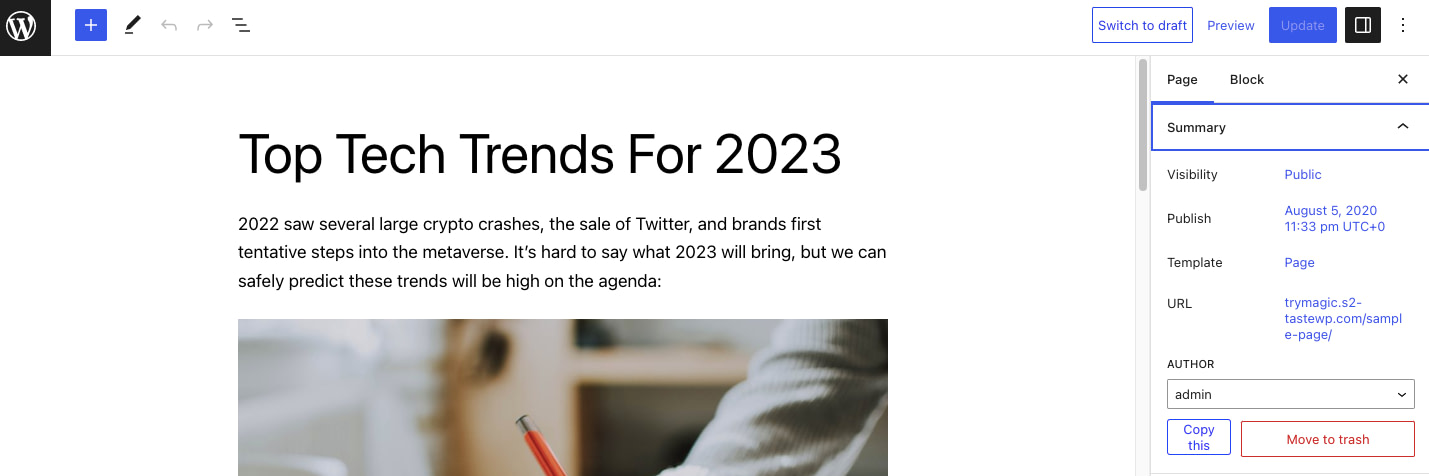
Clicking on this button will open up a pop-up asking if you would like to unpublish your post. Click OK to unpublish your post.

This will now turn your live post into a draft. You can either edit the post or delete it. If you would like to delete the page, simply click on the Trash link underneath the post in your admin console.
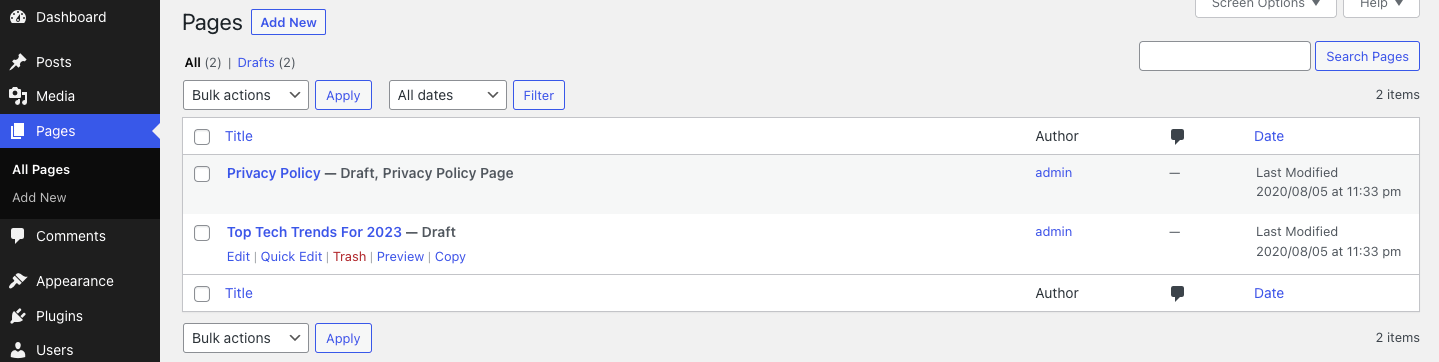
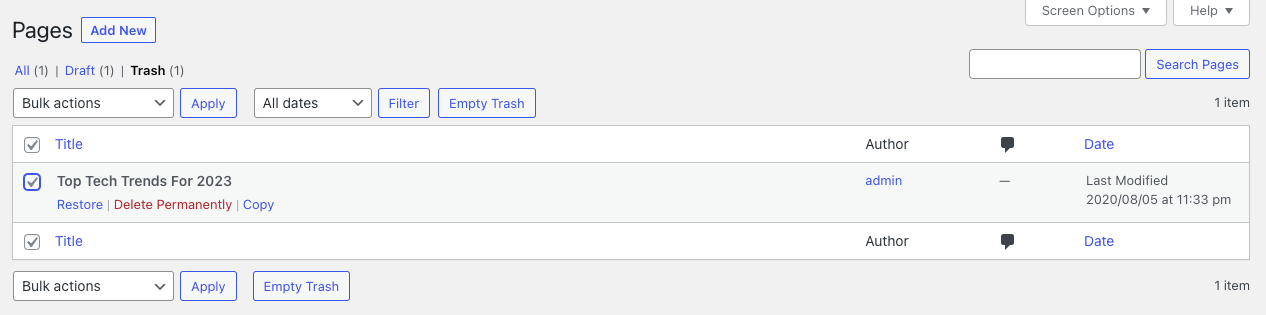
As a word of warning, note that WordPress will delete anything in your trash after 30 days. If you change your mind, you can recover the page by going to Pages > All Pages, and then the Trash link. It will give you the option to restore your page or to delete it permanently.
Things to keep in mind when unpublishing a page
Now you know how to unpublish a page in WordPress, but proceed with caution! Even though you’ve removed the page, if it’s indexed, it’s going to show up in search engine results. That means visitors are going to land on a 404 page and will probably go elsewhere. Let’s just say it’s not a good look as a website owner, so you need to redirect the URL of the removed page to another page that you’ve published.
Choose a page that contains similar (if not the same) information as the one you’ve unpublished. You’ll keep your SEO benefits and, hopefully, your new visitors, too. It’s also going to help you if you’ve left an internal link to that page somewhere that doesn’t exist anymore. Instead of removing links one by one, you can implement a simple redirect. Here’s a how-to guide on doing just that.
💡 You should also change your menu structure if the page or page you’ve unpublished is in there. Menus are there to help visitors make their way around your WordPress website; a dead-end link is going to have a negative impact on their user experience.
How to unpublish multiple pages in WordPress
You already know how to unpublish a page in WordPress – a single page – but if you are redesigning your WordPress site or want to move to a new domain, you might need to delete or edit multiple pages or posts at the same time. (It’s also possible to unpublish your entire WordPress site if you need to).
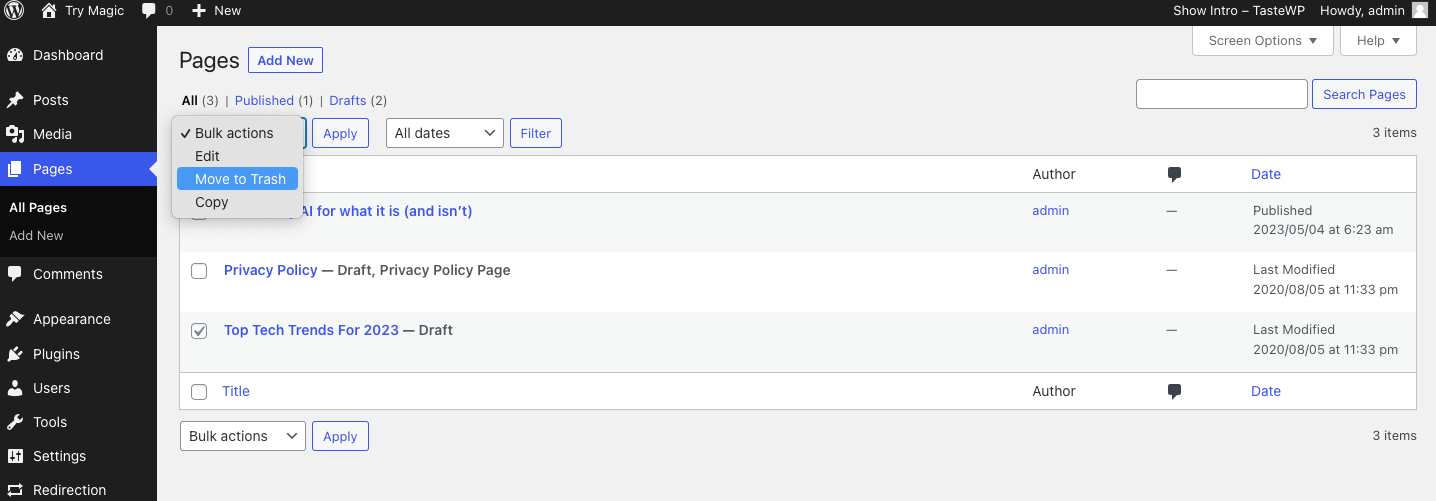
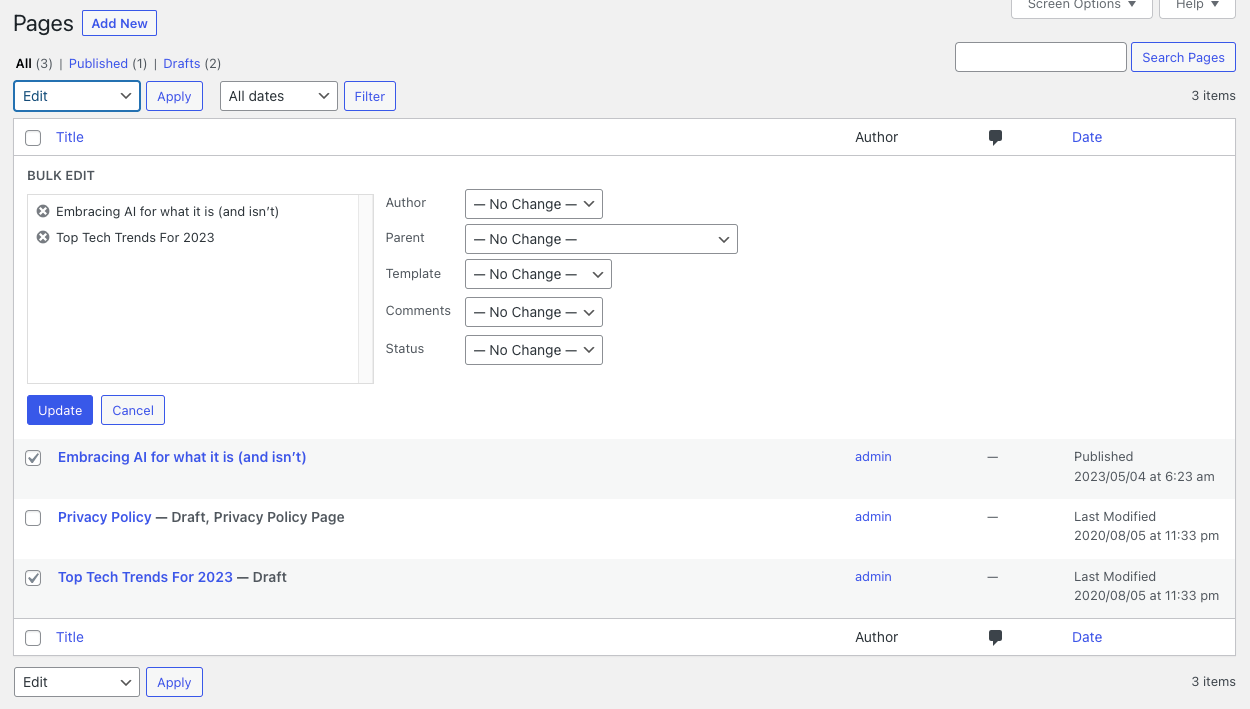
You don’t have to unpublish each page in WordPress one-by-one; you can unpublish everything at once from your WordPress admin dashboard. All you need to do is go to Pages > All Pages and check the box next to the pages that you want to unpublish.

Click on Bulk Actions and select Edit from the dropdown menu. Hit Apply.
Using this action, you can turn all the posts you’ve selected into sticky posts, change the author, or edit the pages in a number of other ways.
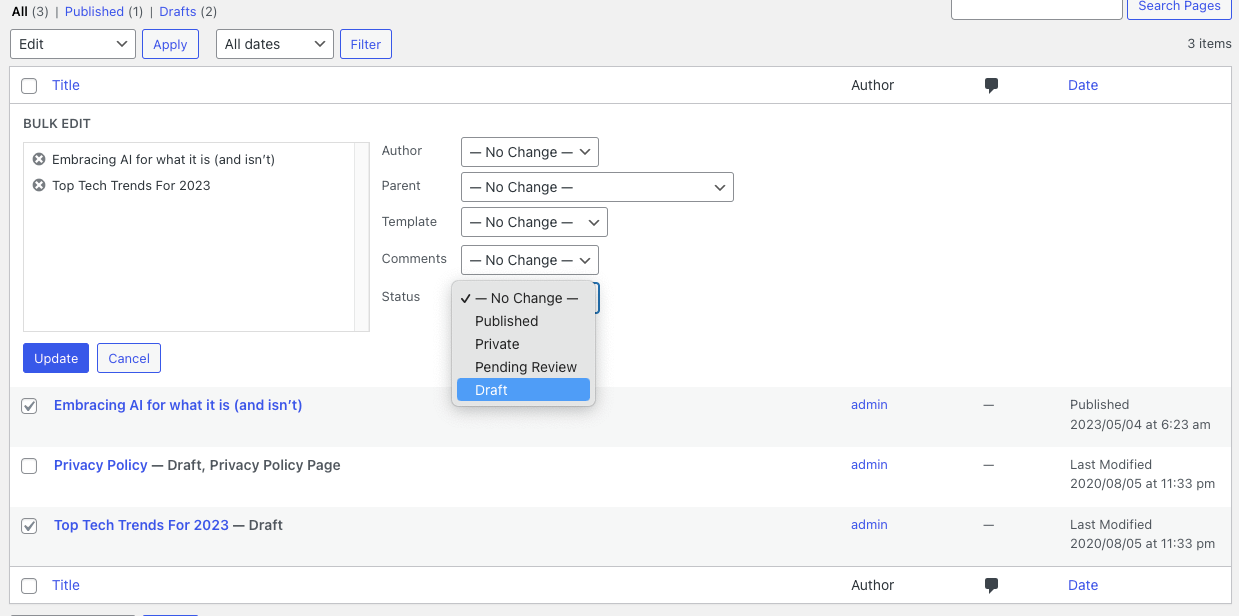
You can also turn multiple live pages into drafts by opening the Status dropdown menu and selecting Draft. Click on the Update button, and you’re good to go.
If you are 100% sure you won’t need these pages again, you can move them to the trash by opening the Bulk options dropdown and choosing the Move to Trash option.
Just like the previous example, deleting or removing content can lead to multiple broken links and dead ends. Unless you want to delete your WordPress site permanently, it’s a good idea to implement redirects wherever possible.
How to password protect a page in WordPress
If you don’t want to technically unpublish a page in WordPress (or a post), but you don’t want the public to see it either, you can password-protect your pages or make them private.
To limit sections of your website to your co-workers, members, or clients, simply open the page you want to password-protect.
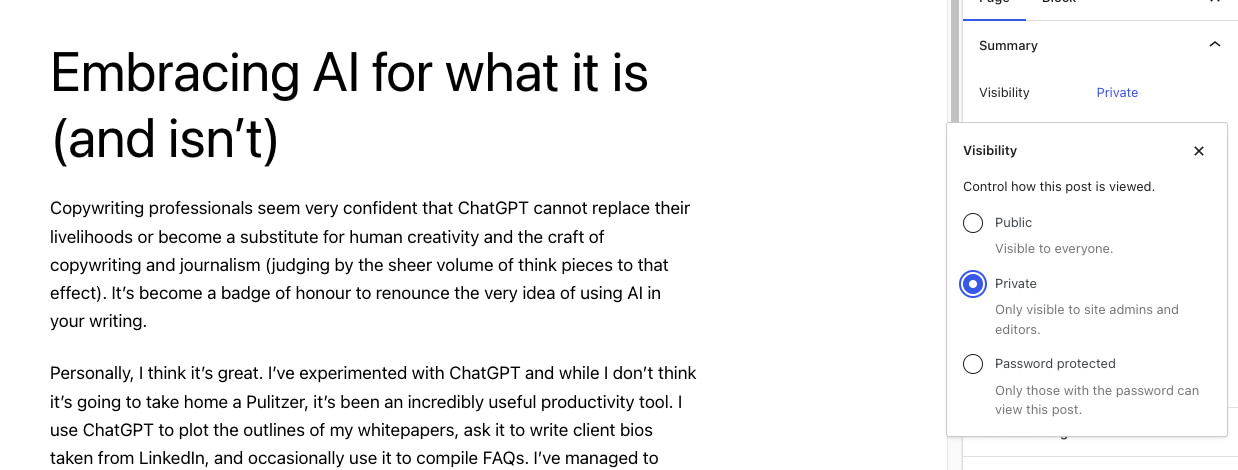
In your admin console, go to Pages. Hover over the page you would like to password-protect and click Edit. This will open up the page. Click on the Public button next to the Visibility option.
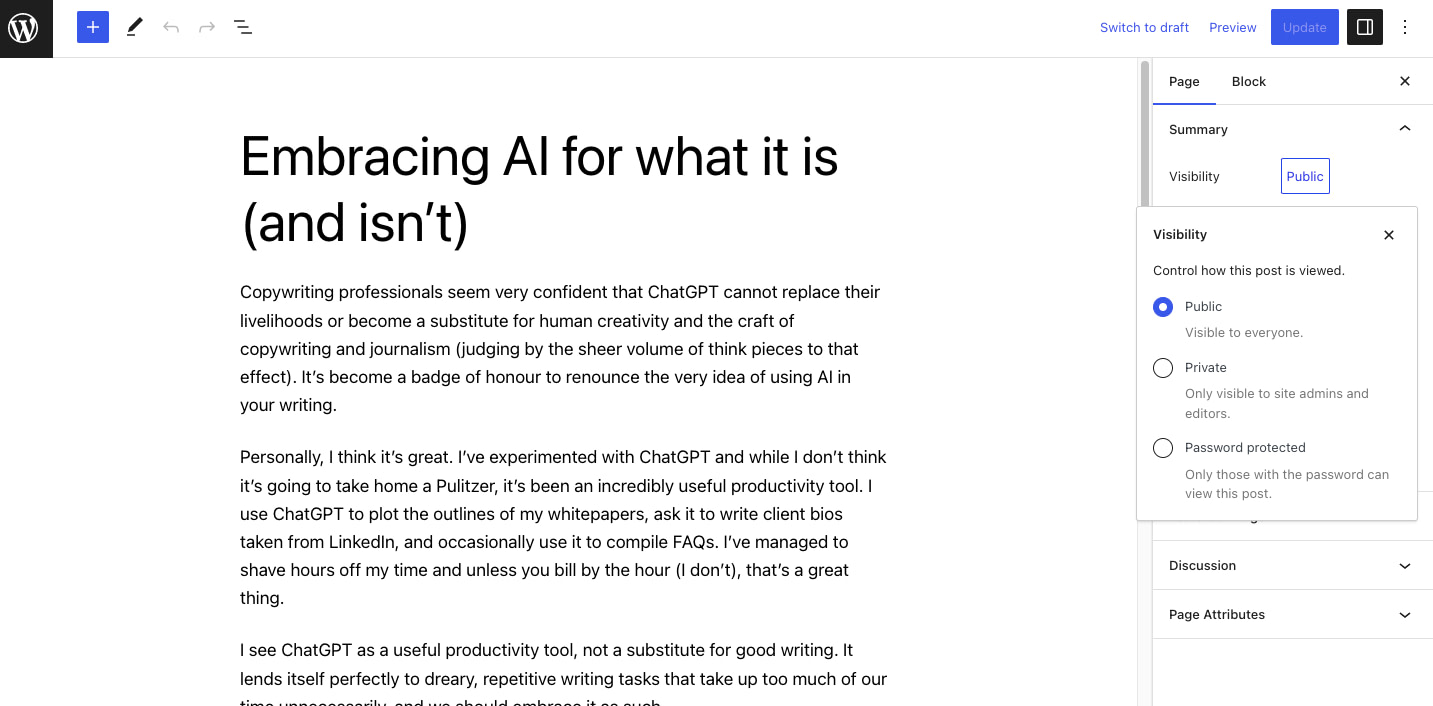
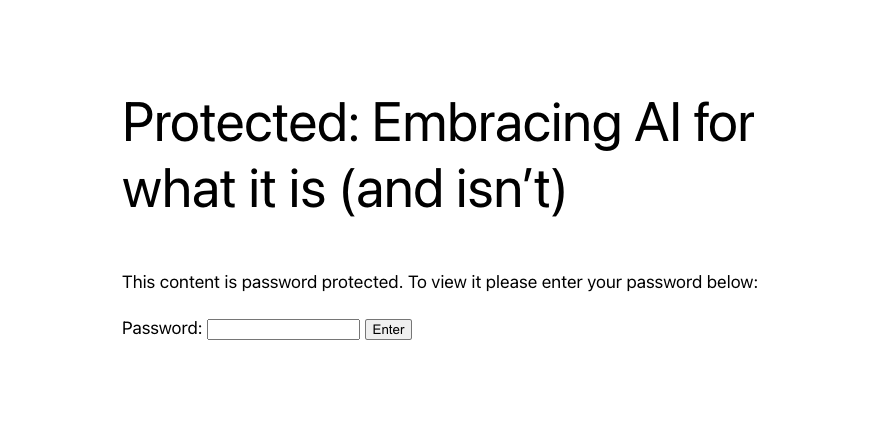
Select the Password Protected button and enter a password. Anyone with the password will be able to view the content, so use a secure password that includes a combination of letters, numbers, and symbols. Click Update to save your changes.
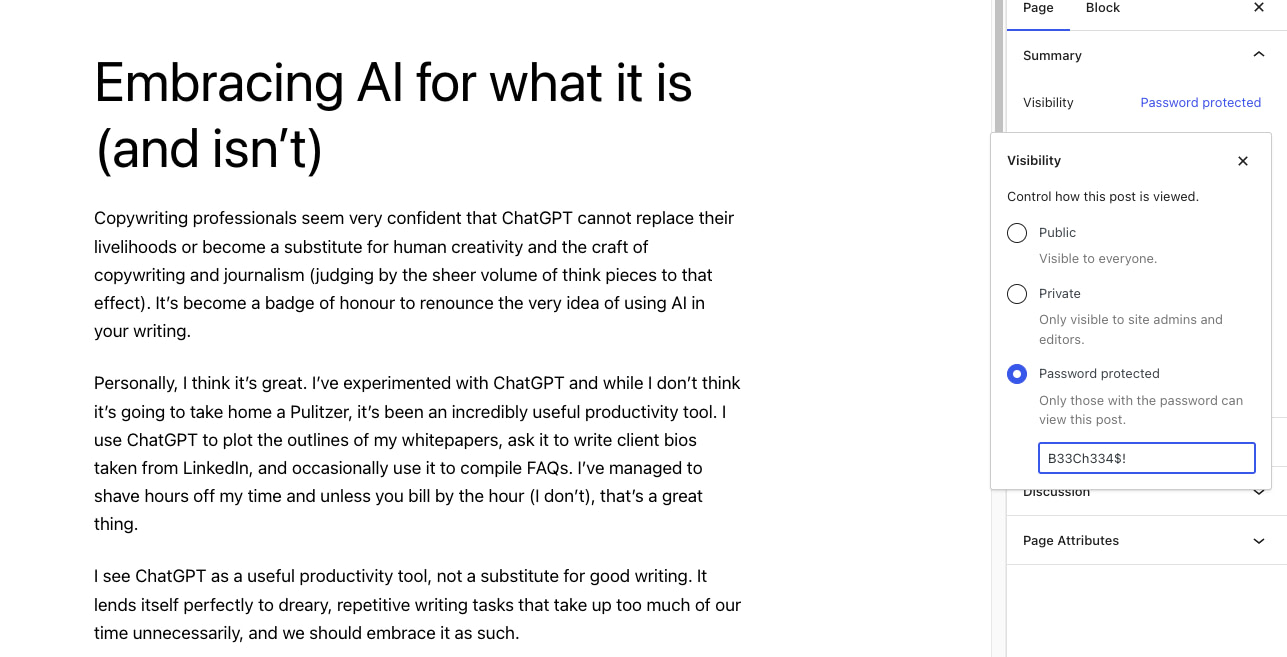
Anyone who lands on that page that doesn’t have Editor or Administrator rights will be asked to enter a password before they can view the content.
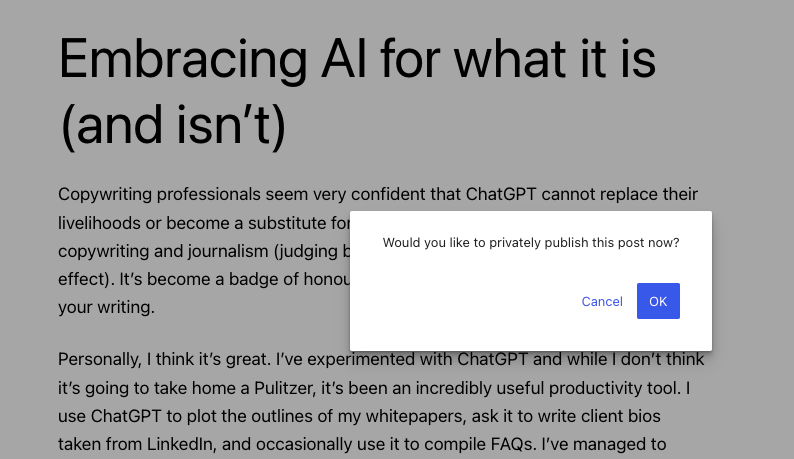
Alternatively, you can set the page to private by clicking on the Public button next to the Visibility option and selecting Private.
You’ll see a pop-up asking you to confirm the change; click on the OK button to make your changes.
If you make a post or page private, only members with specific user roles will be able to view it. The downside of this method is that making a post private will remove it from your site. It’ll also show a 404 error to non-logged-in users who click on the URL. If you share the URL far and wide, this can lead to a bad user experience.
When it makes sense to unpublish a page
If the pages you are deleting from your site are outdated, no longer relevant to your brand, or poor quality, unpublishing or improving the content is only going to enhance your user experience and improve your SEO rankings. Google prefers to rank websites with good content (what they call “people-first” content) over bad content.
By setting your WordPress posts to private, you’ll effectively lock all unauthorized users out of that content. Password protection keeps areas of the WordPress site private in a similar way. You can decide who can access the content at any time. It’s particularly handy if you want to keep content separate for co-workers or clients, or want to restrict access to the site while you are working on it.
Password protection can also be a great way of giving paid or premium users extra perks. By only supplying the password to users that sign up for your newsletter or a promotion, you can convert visitors more easily.
How to unpublish a WordPress page in 3 easy ways 😎
There you have it. You just learned three easy ways how to unpublish a page in WordPress. To recap, these are: unpublishing a page by setting it to draft, unpublishing multiple pages by using the bulk actions tool, or password protecting your pages to hide them from public view.
Using a platform other than WordPress but still want to unpublish some of its posts or pages? Here’s our handy guide to unpublishing pages in Wix.
Hopefully this tutorial answered all of your questions about how to unpublish a page in WordPress. If you still need help though, drop a comment below. We’ll do our best to assist you.


Or start the conversation in our Facebook group for WordPress professionals. Find answers, share tips, and get help from other WordPress experts. Join now (it’s free)!