
Learning how to reduce image size can help you create a fast-loading website while still offering an excellent experience to your visitors in the form of great-looking images. 🧑🏫
In this guide, you’ll learn how to reduce image size without losing quality. We’ll show you how to make a picture file size smaller manually or with a free WordPress image optimization plugin.
What is the ideal image file size for websites?
There are too many variables to declare a single “ideal” file size. For example, a colorful image with lots of vivid detail will always be larger than an image with a white background and black text.
The general rule of thumb is that you want your images to be as small as possible without negatively affecting user experience to a great degree.
Basically, you want to make your website load as quickly as possible while still making sure your images look good to human visitors. It’s a balancing act.
For some images, this might be 20 KB, while others might require 200 KB.
If you follow the steps in this article, you’ll be able to ensure that each image is as small as possible without affecting the experience of your visitors.
How to reduce image size (in two steps)
There are two main steps to reduce image size:
- Resize the dimensions of your images to be as small as possible.
- Compress images to further reduce file size.
1. Resize images to the optimal dimensions for your site
The first thing you want to do is make sure your images are saved at the dimensions you want to use on your website. The process for this will vary slightly depending on whether you are using a Mac or Windows computer.
Which image dimensions are best? Well, this depends on your WordPress theme.
Most WordPress themes have a content area that’s about 750-850 px wide.
However, because of the growing popularity of high-resolution screens, you’ll normally want to ~double this value so that your high-resolution visitors still have a great experience.
When in doubt, resizing images to a maximum width of 1,500 px is a good place to start.
🖼️ Resizing images on Mac
You can reduce image size on Mac in five simple steps:
- Open the file you want to resize in the Preview app
- Go to “Tools” and select “Adjust size”
- Check the “Resample” box; the tool is automatically set to maintain the aspect ratio when images are resized
- Enter the width you would like to resize the image to; the height will be calculated by the program
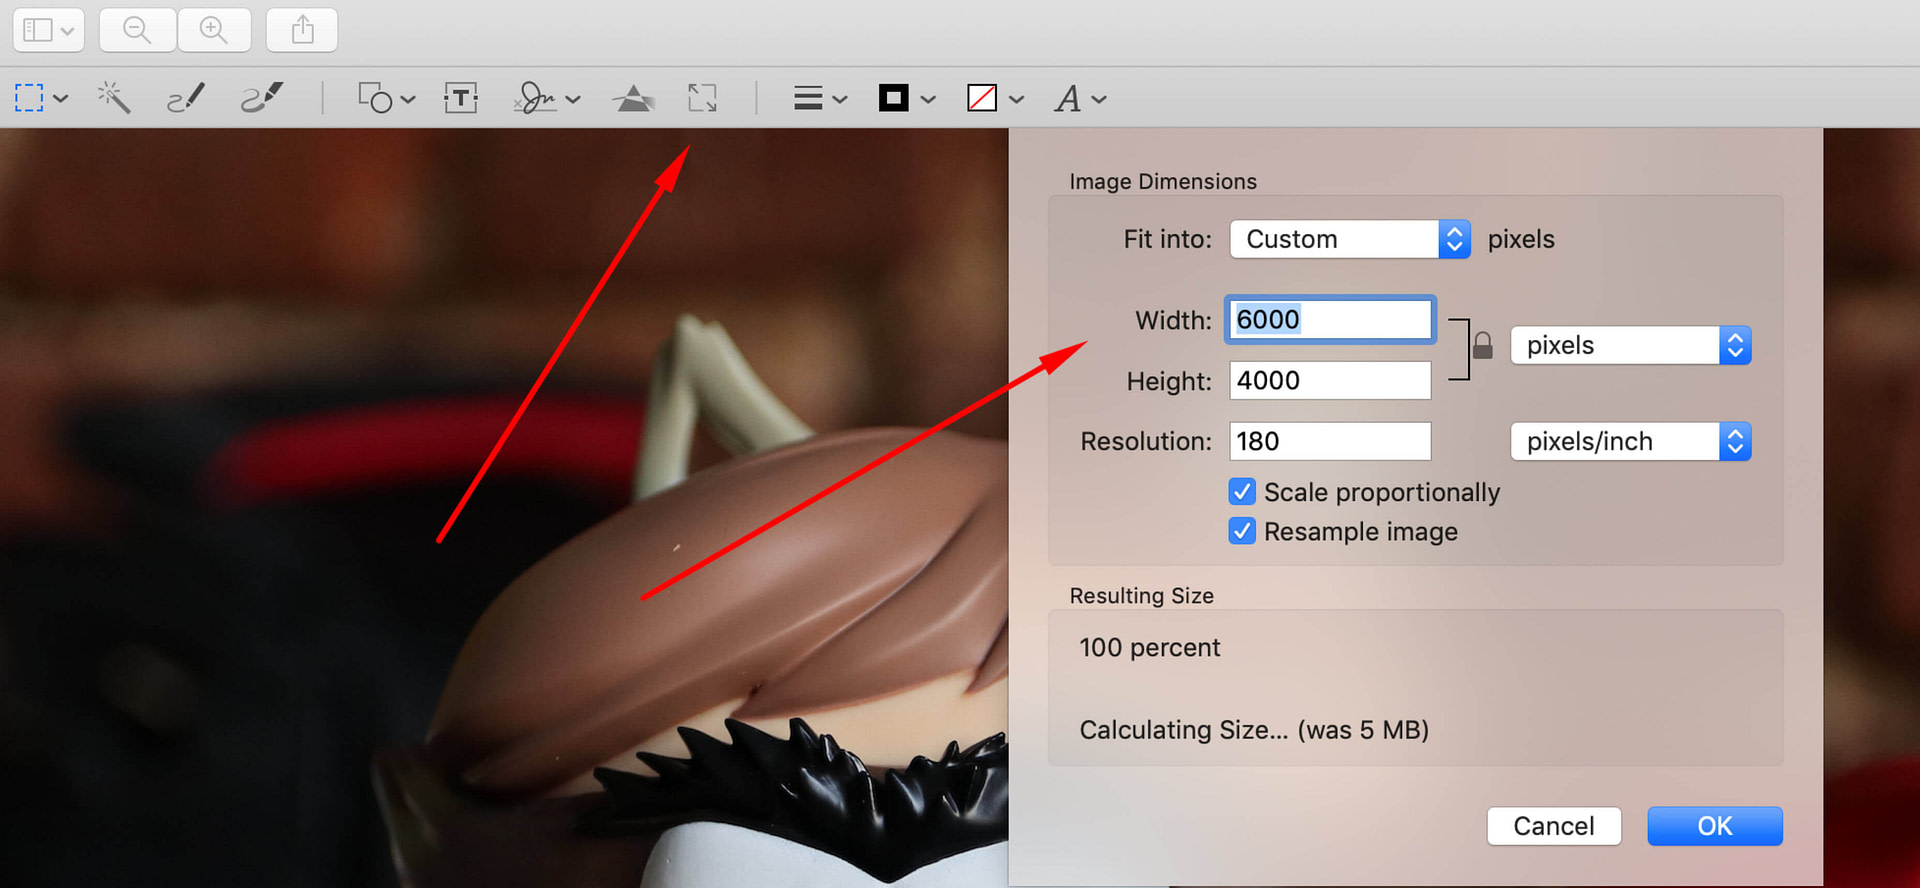
- Click “OK”
Once the image has been resized, you can save it as either a PNG or a JPG and upload it to your website.
🖼️ Resizing images on Windows
Resizing images is also quite simple on Windows.
The first thing you’ll need to do is open the image you want to resize in Paint. You can then select “Resize” from the options in the toolbar.

Now you can choose the amount you want to reduce the image size by; you can express this as a percentage or by changing the total number of pixels the image has. Paint is automatically set to maintain the aspect ratio of resized images.
When you have entered the ideal size for your image, press “OK” for the image to be resized.

You can then save the file as either a PNG or a JPG and upload it to your website.
2. Compress images to further reduce their size
Once you have a properly-sized image, the next step is to compress it to further reduce the file size of your photo.
Here, we’ll give you two options:
- Optimole – can automatically compress WordPress images as you upload them and also apply other optimizations, such as WebP.
- TinyPNG – a manual tool that you can use before you upload images to WordPress.
Optimole (automatic)
Optimole is a freemium WordPress plugin that can automatically compress and resize your images when you upload them to WordPress – you don’t need to lift a finger.
It also implements some other performance optimization tactics beyond reducing the file size, such as serving images via a content delivery network (CDN), lazy loading, and converting them to WebP.
Optimole can also automatically resize images as you upload them. So if you use, Optimole, you can actually skip the first step and let Optimole do everything for you.
You can install Optimole on your WordPress site in a few easy steps:
- Go to the “Plugins” area of your WordPress admin panel
- Click “Add new”
- Use the search bar to find Optimole
- Click “Install”
- When the plugin is installed, click on the green “Activate” button to start using Optimole
In order to use Optimole, you will be taken to a page instructing you to create an Optimole account. Click on the “Register & email API key” button and enter your email address in the box that appears.
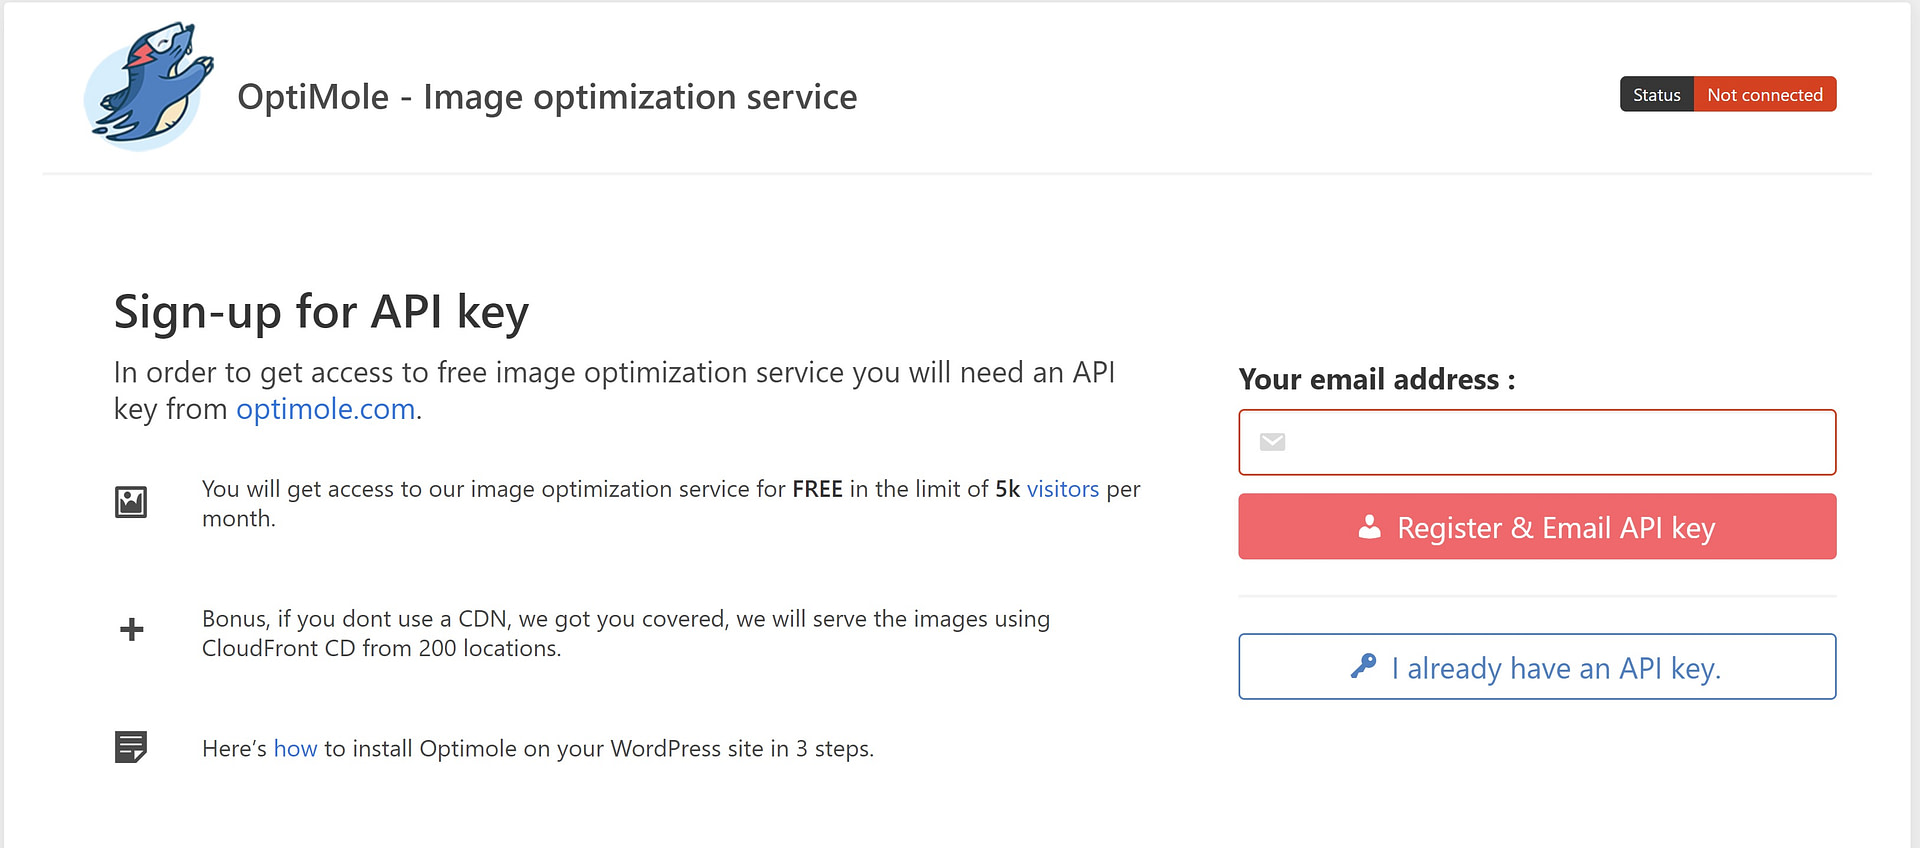
Press the button again to send a verification email. You can then enter the API key from your email on the next page of the Optimole settings.

Once you’ve set it up, Optimole will automatically inspect and optimize existing images in your media library. Optimole will also automatically optimize and reduce the size of new photos as they are added to your media library. This means that all you need to do to reduce image size is to upload the image to your WordPress site.
Optimole pricing 💰
Sites with fewer than 5,000 monthly visitors can use Optimole for free.
The lowest-tier premium plan is available for $19.08/month and allows for up to 25,000 monthly visitors.
TinyPNG (manual)
If you’re willing to do things manually, another way how to reduce image size is to compress images before you upload them to WordPress. This method is 100% free, but it requires more work than using Optimole.
This guide will show you how to use TinyPNG to make an image smaller, but most online image compression tools work in essentially the same way.
To use TinyPNG, all you need to do is drag-and-drop one or more images into the interface.
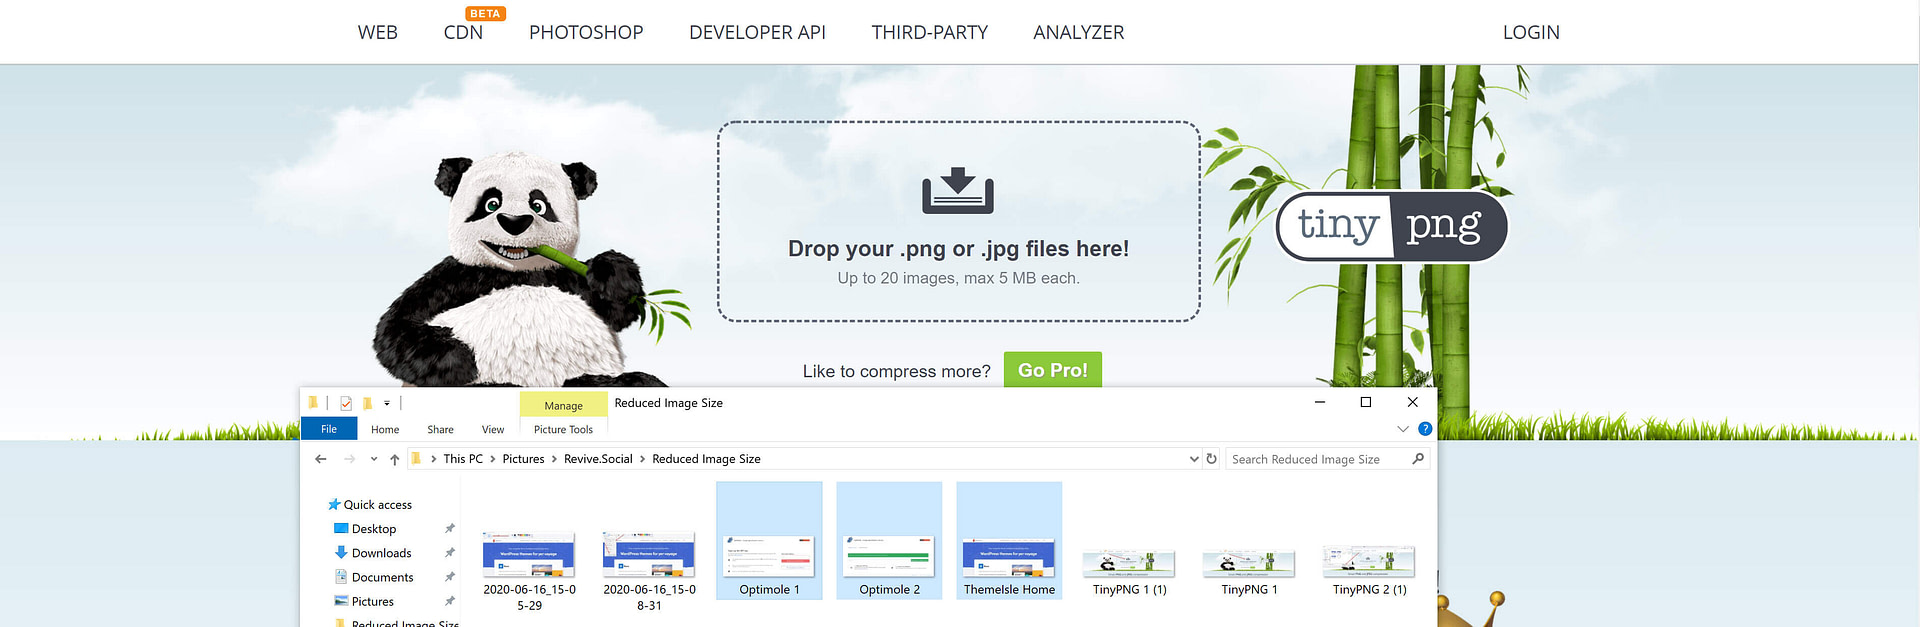
TinyPNG will then automatically compress your images and prepare them for download. If you have selected multiple images, you will be given the option to download them together as a .zip.
Then, you need to upload these compressed images to your WordPress site.
Final thoughts 🏁
Learning how to reduce image size is essential to optimizing your website speed. To make a picture file size smaller, you first need to resize the images on your computer before uploading them to your website.
Then, you can:
- Use Optimole to optimize images, with the bonus of automated optimization for all future images.
- Use an online tool like TinyPNG or TinyJPG to manually compress images.
🎁 For more on how to reduce image sizes, you can check out our round up of the best WordPress image optimizer plugins.
Do you still have any questions about how to reduce image size? Ask us in the comments!


Or start the conversation in our Facebook group for WordPress professionals. Find answers, share tips, and get help from other WordPress experts. Join now (it’s free)!