
Switching your WordPress theme is something that requires some forethought, particularly if you’ve been using the same theme for a long time. While the actual process of changing WordPress themes is easy, you’ll want to prepare beforehand to avoid any problems with your site after you make the switch.
By preparing, we mean making sure that your new theme won’t break any of your site’s elements or features. The only way to ensure that is by testing your new theme in a safe environment, which is exactly what we’ll show you how to do.
In this article, we’re going to talk about why it’s important to play it safe when changing WordPress themes. Then, we’ll guide you through the process in three steps. Let’s get to work!
Why it’s important to be careful when changing WordPress themes
Technically, changing WordPress themes is easy. All you have to do is upload a new theme to your website and activate it. It’s a process that can take minutes if you already have your theme files ready to go (or if you’re downloading a theme from WordPress.org).
The problem is that the process of switching your theme doesn’t always go smoothly. In our experience, the longer you’ve used the same theme, the more likely you are to run into errors when changing to a new one. For example:
- Some your site’s elements may stop working. Your new theme may not be compatible with one or more of your plugins, for example.
- Any customizations you’ve made to your theme will disappear. If you’ve altered your theme’s code – or even set up a child theme – those changes will be lost.
- Your pages may not display correctly. Some themes contain their own visual features that may not translate well to other themes. For example, if you used a page builder to create your pages, its elements might not play nice with your new pick. Or, you might’ve used some custom shortcodes that are specific to your theme.
Naturally, these issues don’t mean that you should never change your theme – just that you need to be careful while doing so.
To get started, you’ll want to pick the right theme to replace your current choice. There are some considerations that go into choosing a quality theme, and you should keep them in mind while you search. Once you know what theme you want to change to, you can turn your attention to making the switch thoughtfully and carefully.
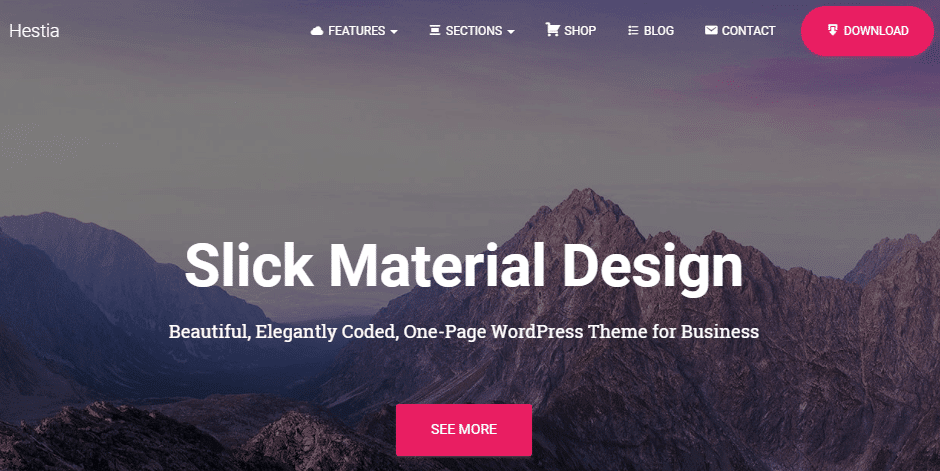
Hestia is one of our own themes and is a solid multipurpose option.
Three steps to take before and after changing WordPress themes
If you want to avoid creating compatibility issues or breaking aspects of your site, it’s smart to approach theme replacements methodically. Here’s how we recommend you do just that.
Step #1: Create a backup of your website
First, you should never undertake a major update of your site without backing everything up. In fact, you should avoid going very long without backing up your site anyway. After all, something can always go wrong. If it does, having a recent copy provides you with a painless way to restore your site to its last working state.
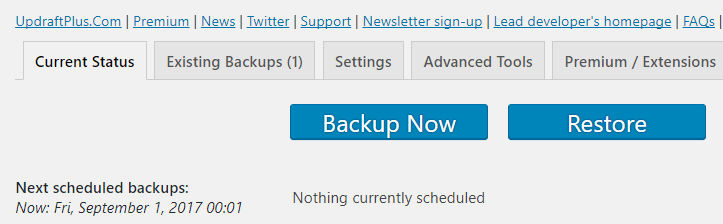
If you’ve never created a restore point for your website, we recommend using UpdraftPlus, which makes the process simple. Plus, it enables you to automate your backups, so you won’t have to perform them manually:

Before we move on, you’ll need to install and activate the plugin. Then, create your first backup by going to Settings → UpdraftPlus Backups from your WordPress dashboard, and clicking on the Backup Now button:
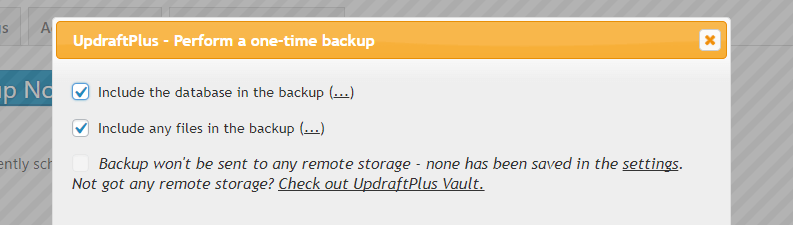
Check the options to include both your database and all other files in your backup, and click on Backup Now once more:
Depending on the size of your site, the process might take a while. Once it’s done, go to the Existing Backups tab to find a list of your current restore points:
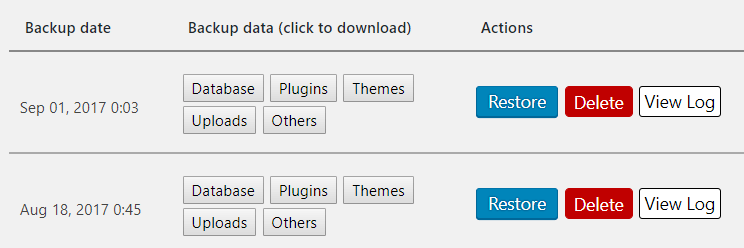
Now, if anything goes wrong while switching your theme, you can return to this tab and click on the Restore button next to your latest backup. The plugin will return your website to its previous state, and you can try again or choose a different theme.
Step #2: Create a staging site to test your theme
As any developer will tell you, it’s never a smart move to test changes to your site in a live environment. That’s why staging websites exist. These are test copies of your site that the public can’t access, and where you can try out any alterations without affecting your real site.
We’ve already written a complete guide to setting up your own staging site in multiple ways, such as manually or by using a plugin. Give it a read now, and choose whichever method you prefer. Personally, we’re big fans of the WP Staging plugin for its ease of use and flexibility:
However, if your web host provides you with built-in functionality for setting up staging sites, that’s often the easiest option. You can also use an online demo tool if you want to emulate your site rather than create an actual copy. No matter what method you pick, once your staging website is ready, it should be an exact copy of your live site.
Now, you’re ready to start testing.
Step #3: Check your pages, posts, and plugins for errors
At this stage, you’re ready to upload and activate your new theme on your staging website. After that, it’s time to start the testing process. That means going through each of your pages, posts, and plugins to look for errors. What may go wrong will depend on your unique setup, but here’s what you’ll want to pay attention to:
- Check all your pages and a variety of posts, to make sure they’re displaying as they should.
- Go through your plugins one by one, and test to see whether the functionality they add is still working as intended.
- Test out your navigational links, which should all lead to their intended destinations.
In most cases, changing WordPress themes will shake up the look of your site. However, all its major features should still work. If that isn’t the case, you probably need to look for a better-coded alternative.
When you’re confident that your new theme won’t break your site, you can return to your live website and activate the theme there. To be safe, you’ll still want to test everything one more time. But if you’ve followed all of these steps, you should be safe from any site-breaking errors and ready to start enjoying your site’s new look!
Conclusion
Changing WordPress themes sounds simple, but if your website has been around for a while, the switch can have unexpected consequences. For example, a new theme might not play nicely with your existing layout or your plugins. That doesn’t happen often, but it’s still important for you to test any new theme you want to use before installing it on your site.
Here’s how we recommend you approach the process of changing WordPress themes:
- Create a backup of your site.
- Test your new theme on a staging site.
- Check your pages, posts, and plugins for errors.
Do you have any questions about how to change your WordPress theme safely? Let’s talk about them in the comments section below!


Hi John. Thanks very much for your post! I’ve always hated my blog design, but three years ago I just wanted to get started and so I picked whatever. Now I realize I REALLY need to update my blog look and it’s overwhelming. Thanks for all your advice.
Good Post ?
Or start the conversation in our Facebook group for WordPress professionals. Find answers, share tips, and get help from other WordPress experts. Join now (it’s free)!