
As an active WordPress user, sometimes you may encounter errors that disrupt your workflow. To resolve them, you may need to disable all your WordPress plugins. Fortunately, you can easily do so even if you lose access to your WordPress admin dashboard.
In this post, we will show you three different ways to disable all WordPress plugins at once.
Let’s get started!
How to deactivate all WordPress plugins (3 methods)
Here are the three methods that we’ll cover:
- Your WordPress dashboard
- FTP/File Manager (if you’re locked out of your dashboard)
- phpMyAdmin (if you’re locked out of your dashboard)
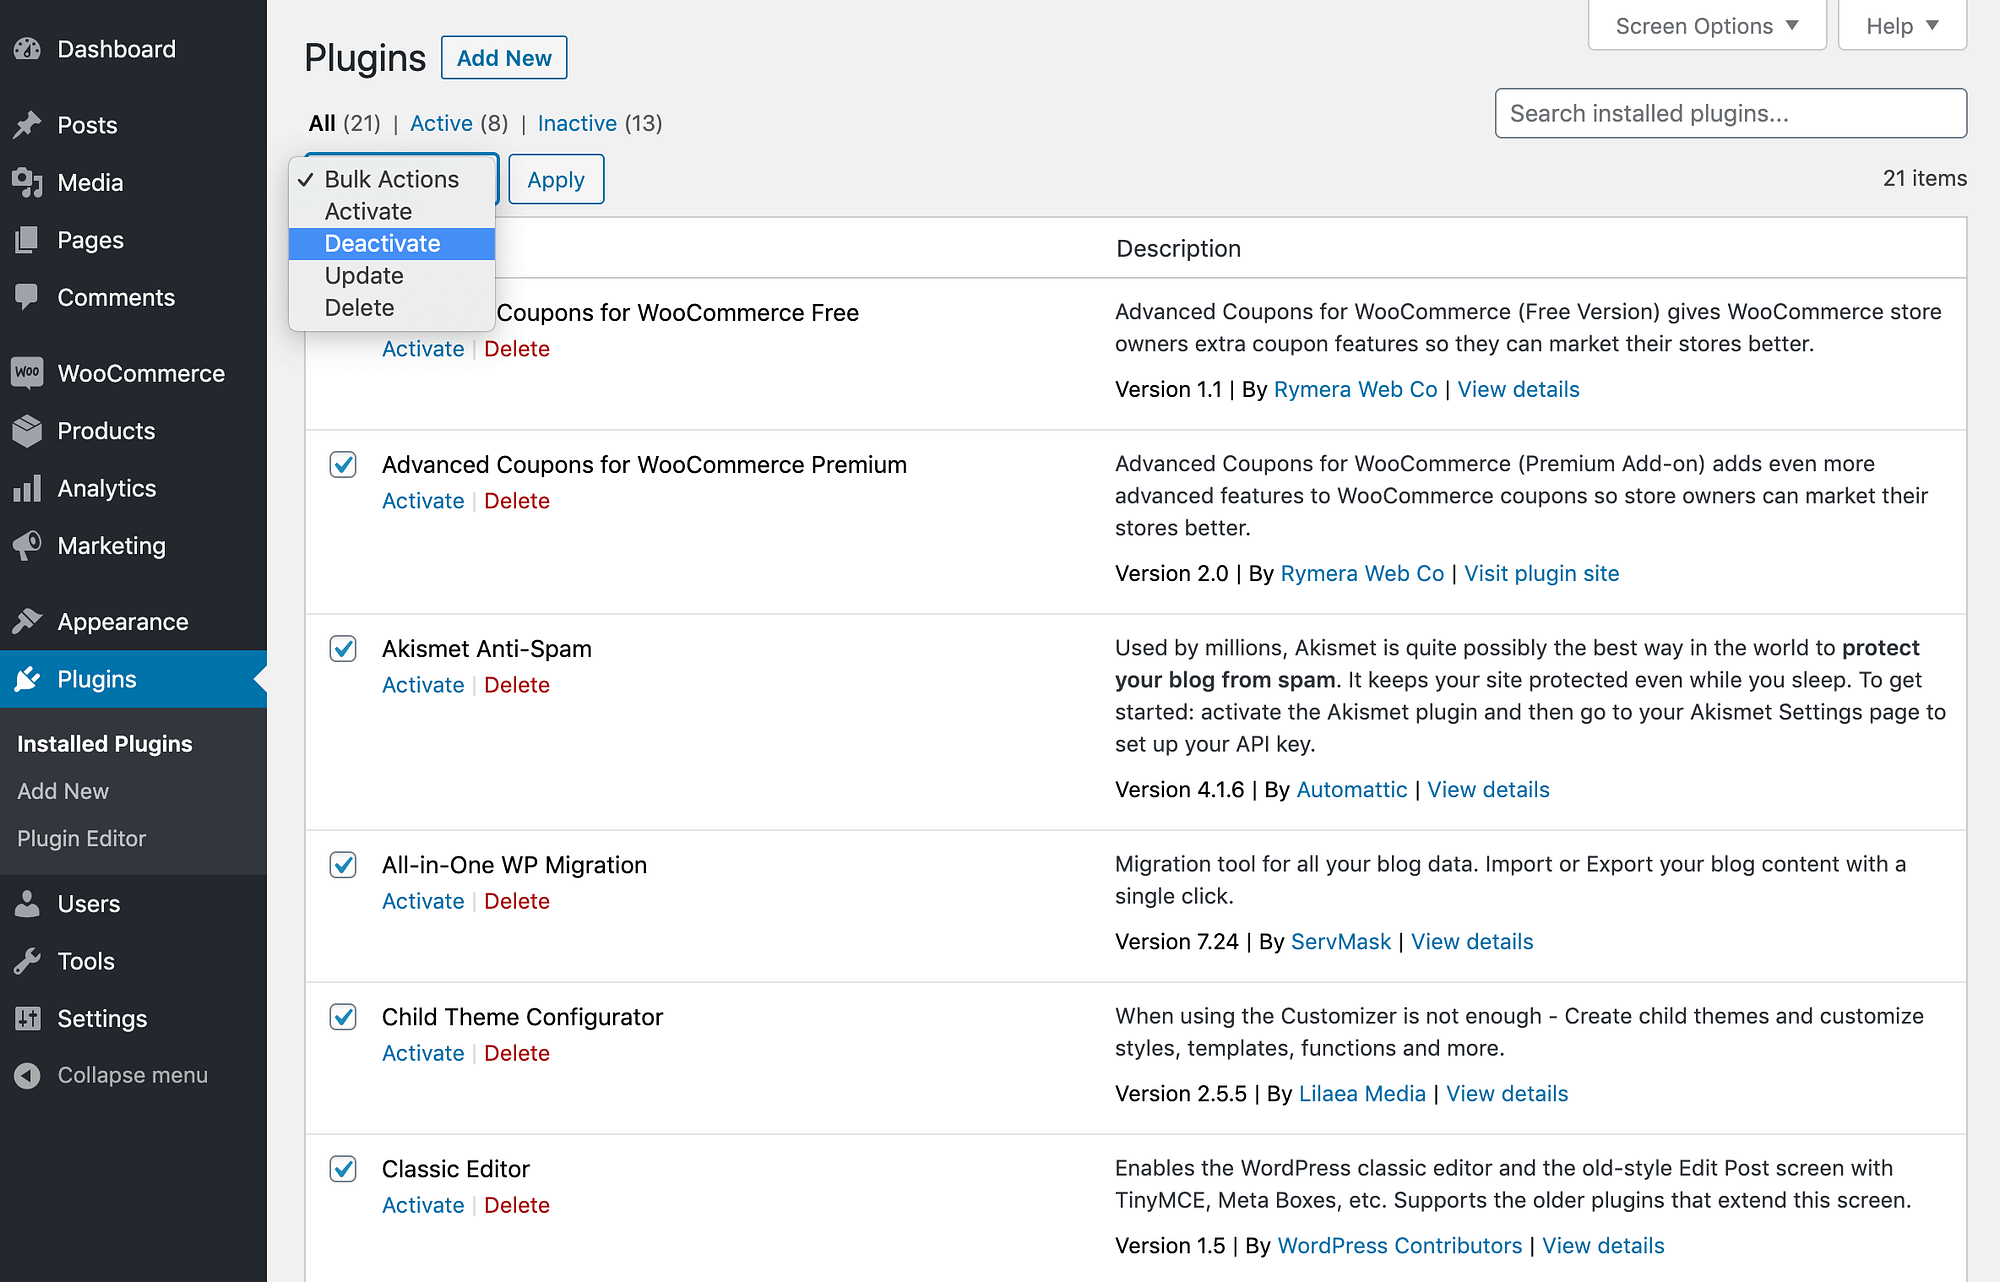
1. Bulk disable all WordPress plugins in the dashboard
Deactivating one plugin at a time can be time-consuming. Instead, you can bulk deactivate all plugins from your admin dashboard:
- Go to Plugins > Installed Plugins.
- Click the checkbox at the top of the list to select all plugins.
- Open the Bulk Actions menu and select Deactivate.
- Click Apply to deactivate all plugins.
2. Disable all WordPress plugins via FTP
If you’re not able to access your WordPress dashboard, you can use FTP instead.
First, connect to your server using an FTP client or your WordPress hosting file manager. If you’re not sure how to do this, you can follow our guide on how to use FTP to connect to your WordPress server.
Once you’ve connected to your server, go to the wp-content folder.
Right-click on the plugins folder and select Rename:
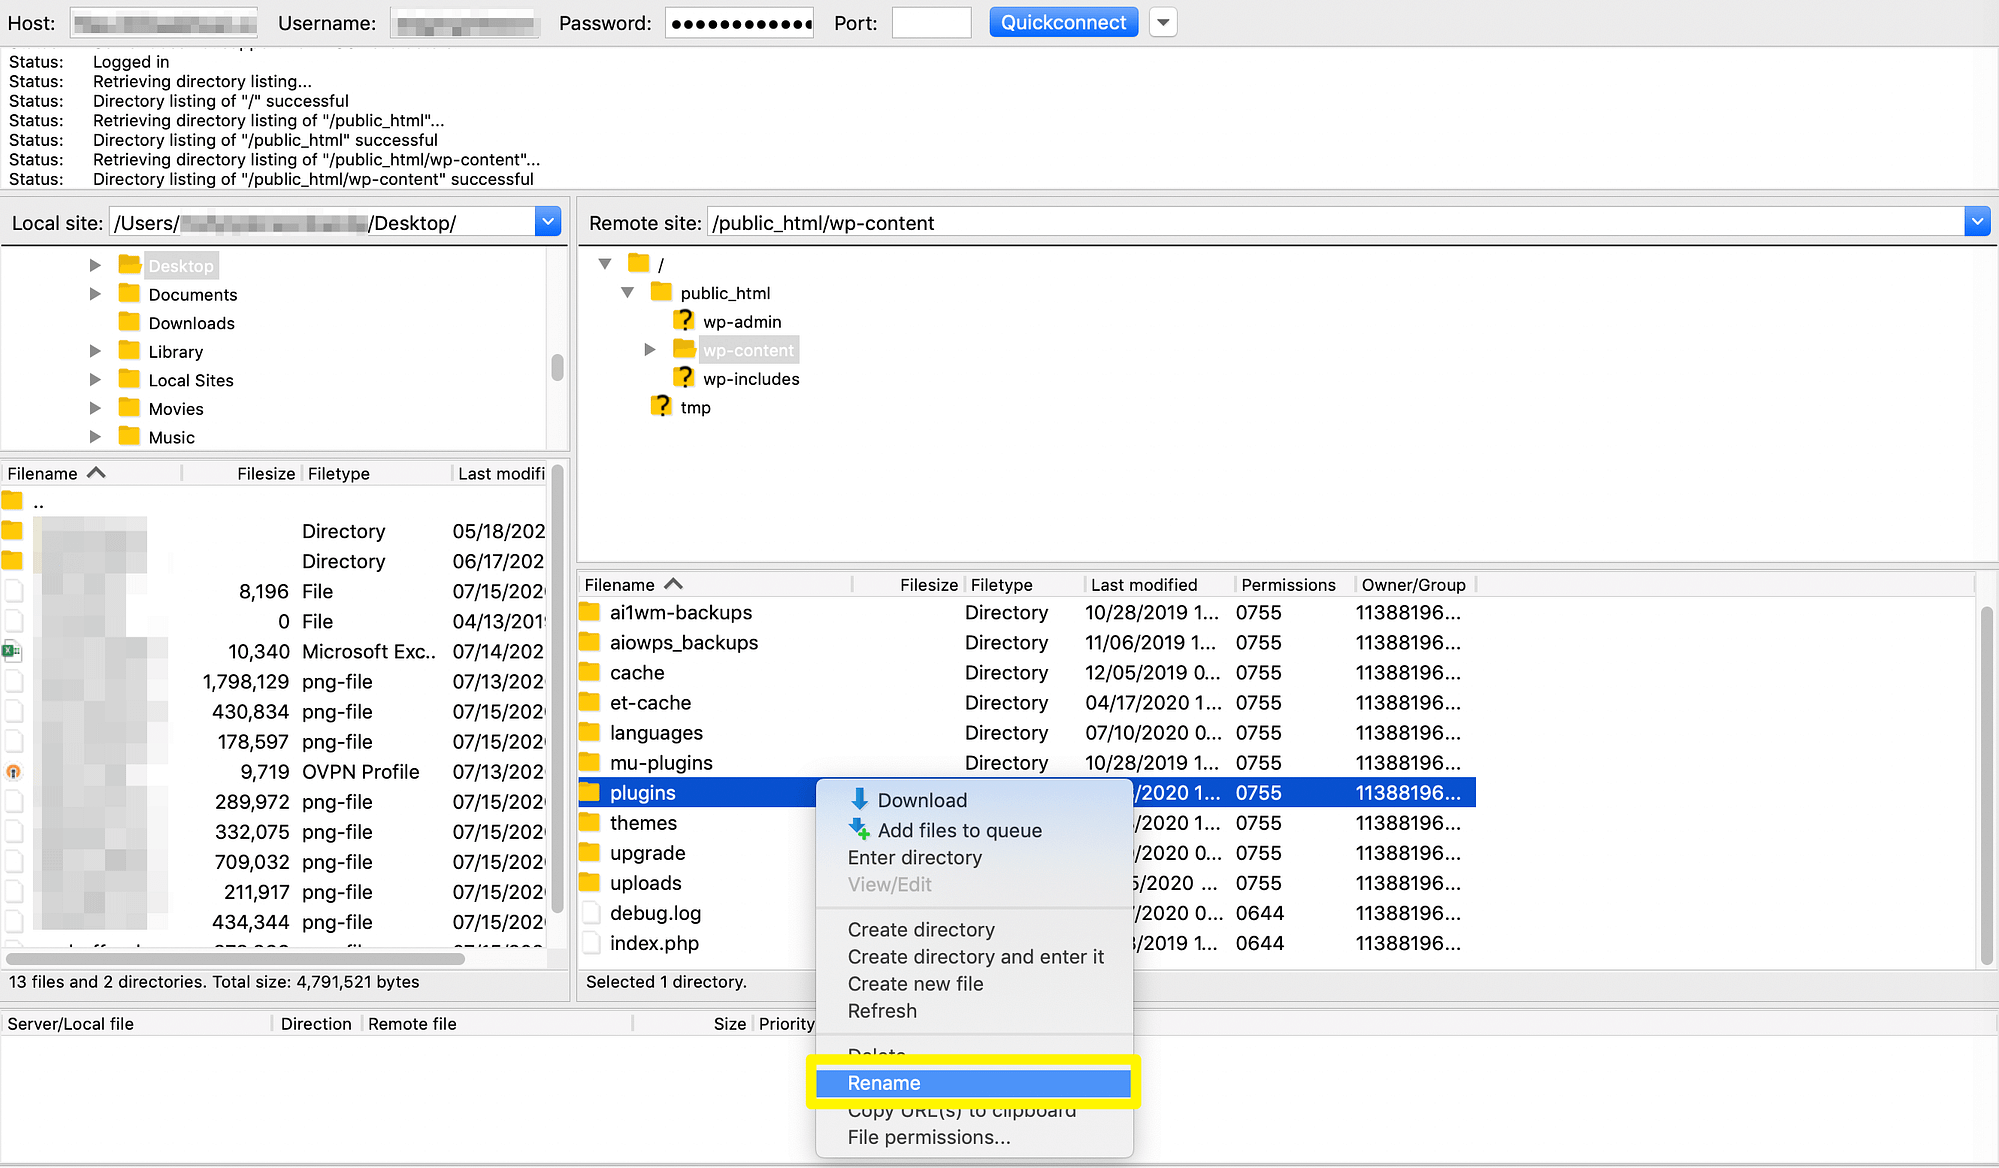
Then, enter a new name in the popup window. For example, plugins-deactivated. WordPress won’t be able to locate the folder and will deactivate all plugins as a result.
If a problem with a plugin was preventing you from logging in, you should now be able to log in to your WordPress dashboard again. Once you’ve logged in, you can use FTP to change the folder name back to plugins. Then, if needed, you can reactivate plugins one-by-one to find the plugin that’s causing problems.
3. Manually deactivate all WordPress plugins via PHPMyAdmin
The last method is more complicated than using FTP, but also works if you’re locked out of your dashboard.
First, you’ll need to access phpMyAdmin. You can usually do so via your hosting account.
Next, select your WordPress database from the menu on the left and click on Browse next to the wp_options table. You might see a slightly different name. For example, some hosts add some extra characters after wp. For example, wpud_options.

Then, scroll to the active_plugins row and click on Edit. Delete the data inside the option_value field, and click on Go. This will deactivate all your plugins.
Conclusion
Next time you experience an issue with your website, we recommend using one of the above methods to disable all your WordPress plugins. You’ll often find that this simple solution helps you troubleshoot the error. You can reactivate the plugins once you have resolved the problem or permanently delete ones you don’t use.
Are you still having any issues with how to deactivate all WordPress plugins on your site? Leave a comment and we’ll try to help!


Or start the conversation in our Facebook group for WordPress professionals. Find answers, share tips, and get help from other WordPress experts. Join now (it’s free)!