
Struggling with how to create WooCommerce variations for your products?
Product variations let you display multiple options for a particular item so that customers can select whichever one they want. While there are a few tricks to using this feature, once you get used to the process it becomes simple to list products with as many variations as you’d like.
🛒 Are you in the middle of building your own ecommerce store? Here’s an in-depth guide on how to start an online store from start to finish.
In this post, we’ll explain what WooCommerce variations are and how they work. Then we’ll walk you through how to set them up for your products. Let’s take a look!
A primer on WooCommerce variations and attributes
Sometimes, a product you list in your WooCommerce store will only come in one type. On the other hand, many items will come with various options. Just a few examples include:
- Clothing that comes in different colors and/or sizes.
- Furniture and other home goods with various material options.
- Food items with multiple flavors, ingredients, toppings, etc. (e.g. for a restaurant website)
Most stores will offer at least a few items with more than one variety, and many rely heavily on these types of products. Fortunately, WooCommerce provides a built-in way to add practically any options to your product pages.
This system is made up of two key features – ‘attributes’ and ‘variations’. The two are often confused, so it’s important to clarify the difference between them.
👉 Attributes
Attributes are descriptors for a product, letting customers know key facts about a product’s size, color, material, and so on.
So, for example, you may have a sweater with the attributes of “blue” and “wool”, or a travel bag with a specific weight and dimensions:
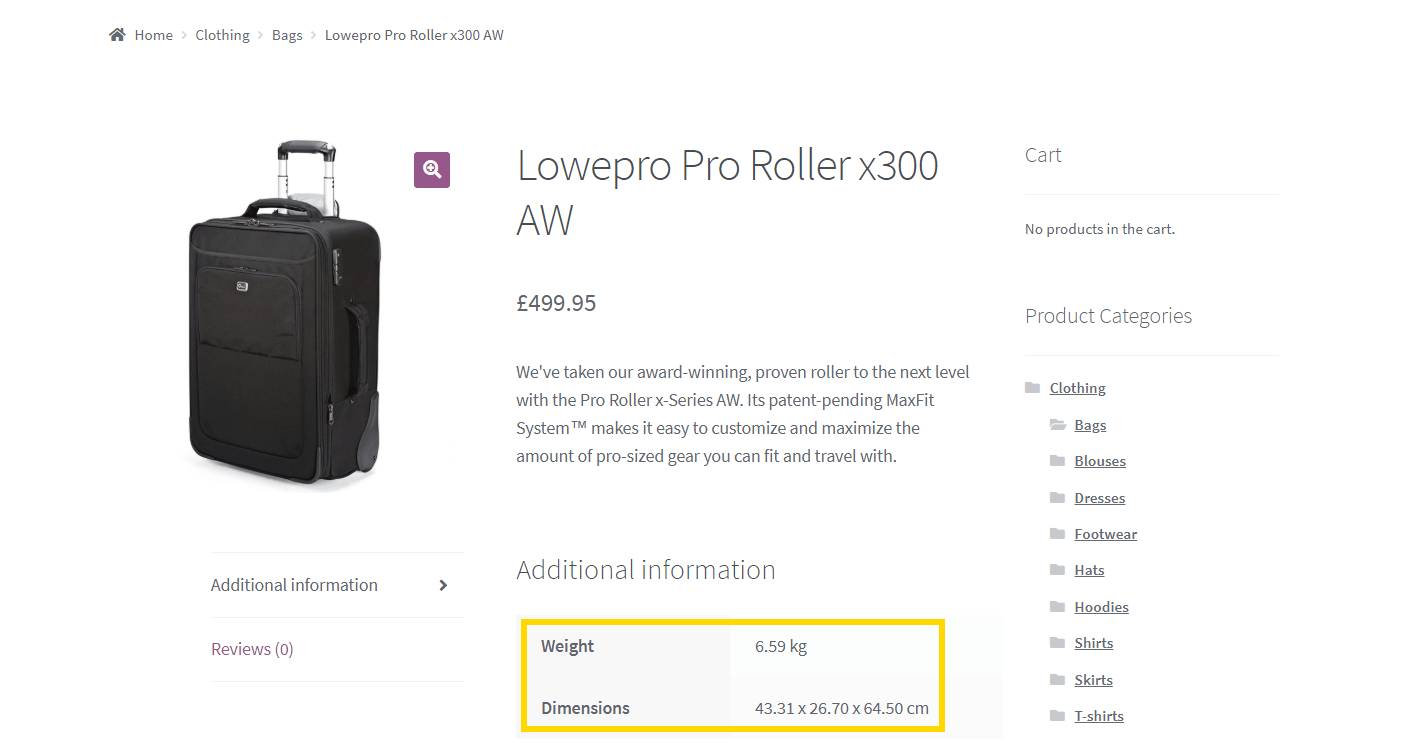
This information is purely descriptive. It’s listed on the product page, but cannot be interacted with or changed by the customer.
👉 Variations
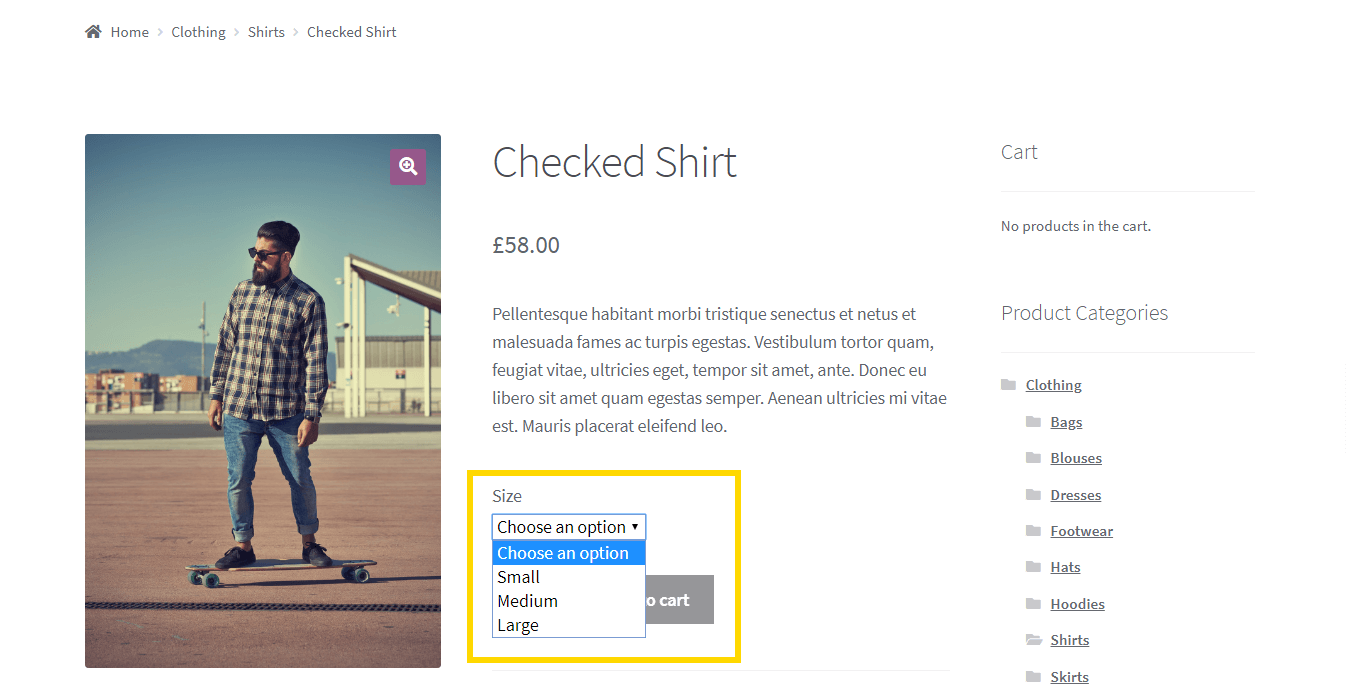
Variations, on the other hand, are actual choices that a customer can make. For example, if a customer can choose between a “blue” and a “red” sweater, that’s a variation.
If you want to let people actually select different options, you’ll also need to add variations. For instance, you could give customers the choice to select between three sizes of the same shirt:
Attributes can be used without variations, merely to provide extra information to your customers. However, if you want to use WooCommerce variations, you’ll first need to set up attributes. If this sounds a little confusing, don’t worry – we’re going to walk you through exactly how the process works.
How to create and display product variations in WooCommerce (in 3 steps)
As promised, throughout the next three steps we’ll show you how to set up WooCommerce variations in your store. If you haven’t already, you’ll first want to install and set up WooCommerce. Then, we can get to work!
- Set up attributes for your WooCommerce products
- Assign attributes to an individual product
- Add WooCommerce variations to your product
1. Set up attributes for your WooCommerce products
The WooCommerce variations system relies on attributes. Therefore, for any variation you want to set up, you’ll need to first create a corresponding attribute.
There are a few ways to do this. While you could create attributes on individual product pages, it’s easiest to set them up in the dedicated Products > Attributes section:
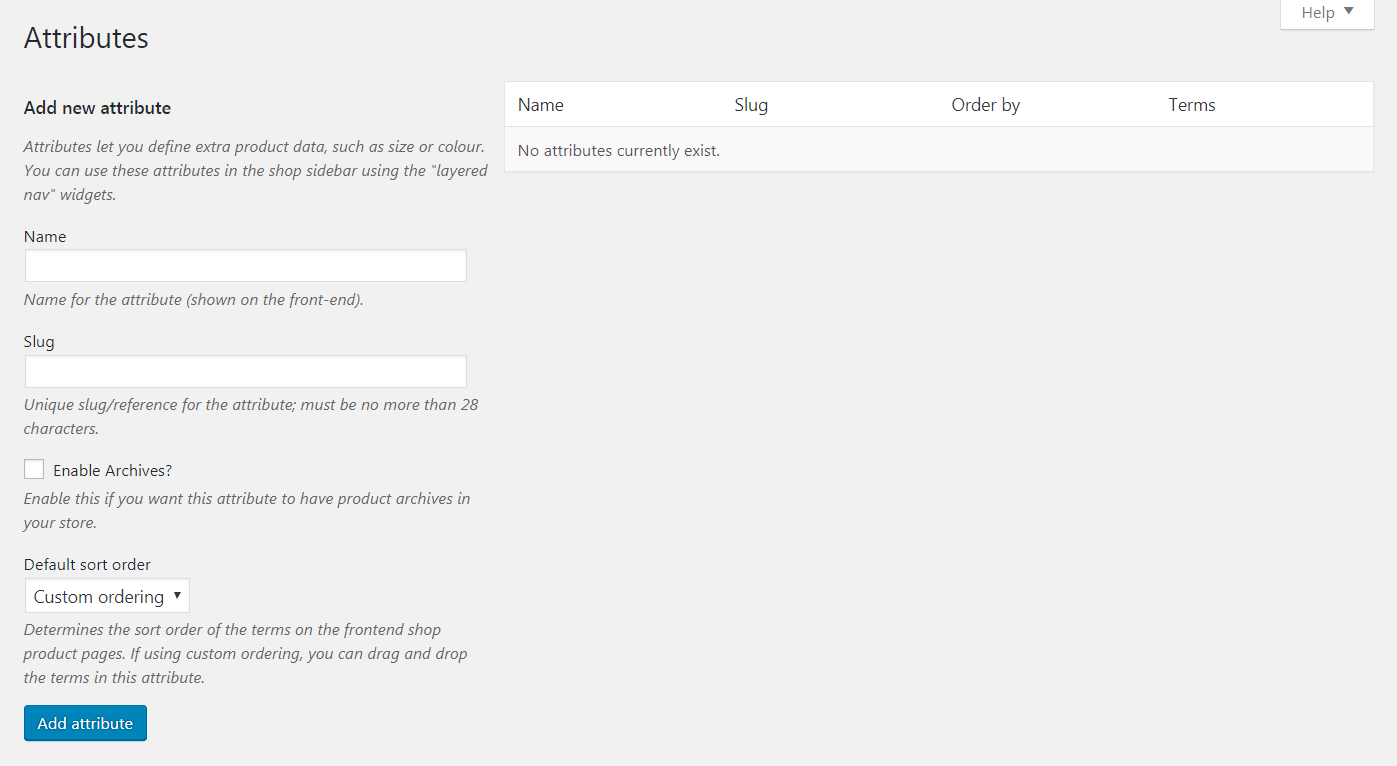
Here, you can add a new attribute. For instance, let’s say you sell clothes in a variety of colors. You might name your attribute “Color”, and assign it the same word as a slug. The name and slug can be whatever you’d like. What’s important is to make sure they’re descriptive and easy to remember.
Once you hit the Add attribute button, your new attribute will appear in the menu to the right:
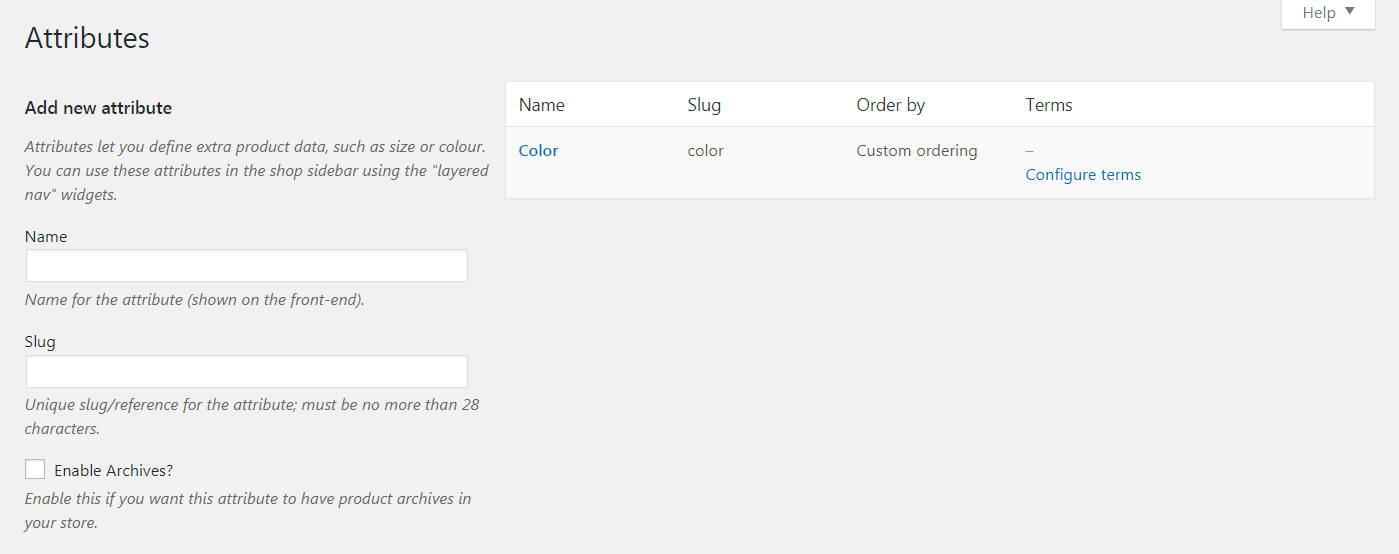
Now, select Configure terms. On this screen, you can add a new entry for each version of the attribute – here this means each color you sell clothing in. Let’s add “Green”:

You can continue to add as many colors as you need, one at a time. You can include a description for each if you’d like, but this isn’t necessary (and won’t be displayed on many WooCommerce themes anyway).
When you’re done setting up your first attribute, you can go back and add as many others as you need. For our clothing store, we might go on to add sizes and materials as individual attributes. You can always come back here later to make additional changes as well.
2. Assign attributes to an individual product
At this point, it’s time to put your new attributes to use. Open up a WooCommerce product – this can be either a new or an existing item – and scroll down to the Product data section:
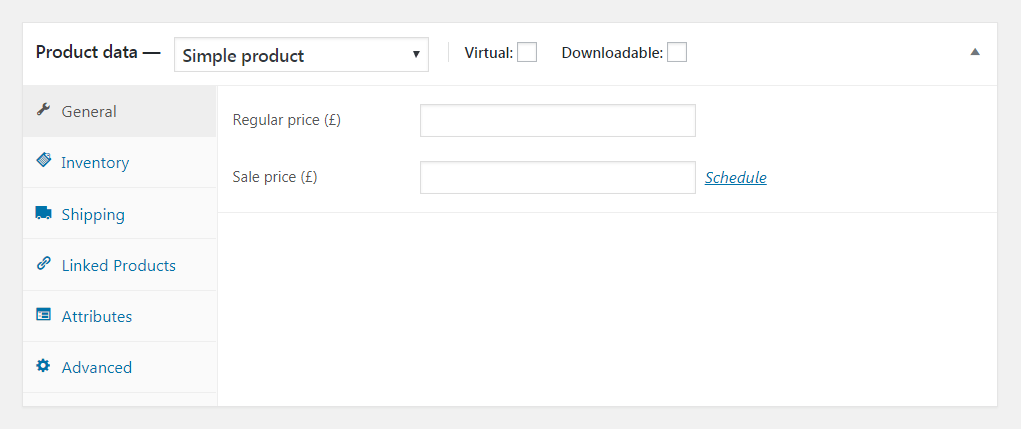
Right next to the Product data heading, select Variable product from the drop-down menu. This will let WooCommerce know you want to create a product with multiple options, and change the settings you have to play with.
Then open up the Attributes tab, select one of the attributes you created, and click on Add:

Now, you can select whatever attributes describe the product you’re currently editing. Click on the Value(s) menu, and your choices will appear:
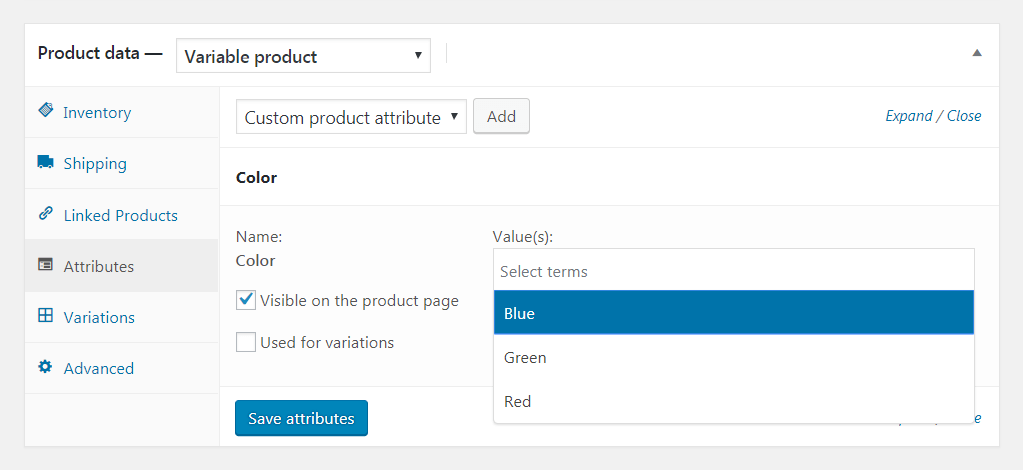
You can select more than one option – for example, if an item comes in both blue and red.
You’ll also want to make sure that both Visible on the product page and Used for variations are checked. Then, hit the Save attributes button.
If needed, you can go on to add more attributes to the item. However, for now, let’s turn our attention to WooCommerce variations.
3. Add WooCommerce variations to your product
Next, select the Variations tab. As long as you’ve set up at least one attribute, you’ll get the option to Add variation:

Hit Go, and you’ll see a new drop-down menu where you can select an attribute (such as a particular color):

Choose the attribute you want, then customize the rest of the settings underneath as needed. The only required field is the price for the variation, but you can also set the item’s stock status, weight, dimensions, and more:
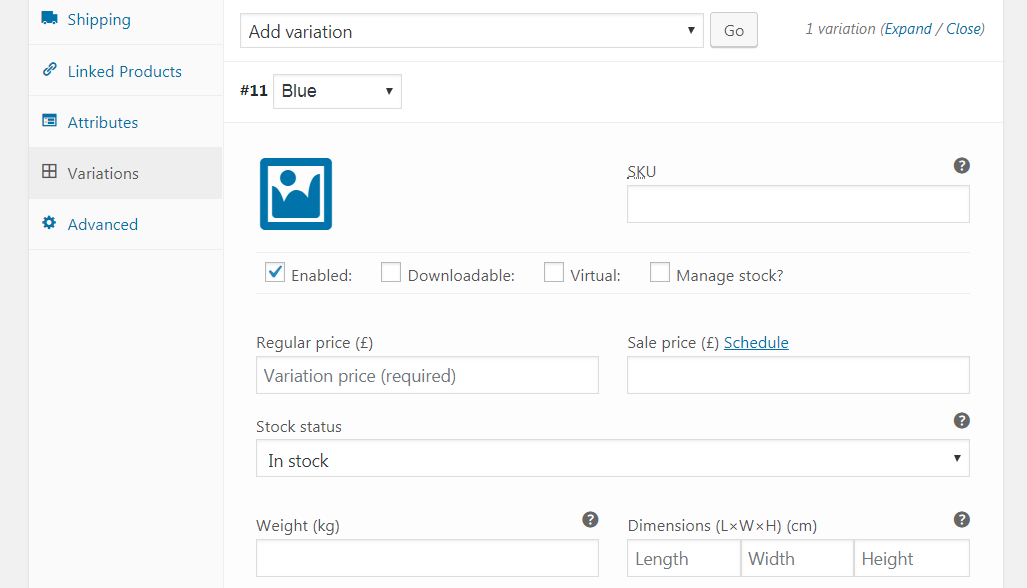
This enables you to add different information for each variation.
For example, you might want to set distinct prices for the same item made from different materials or enter unique dimensions for a product that comes in various sizes.
You can also make each variation’s price and associated details identical – it’s completely up to you.
Save your changes when you’re done. Then, hit Go again to create your next variation:
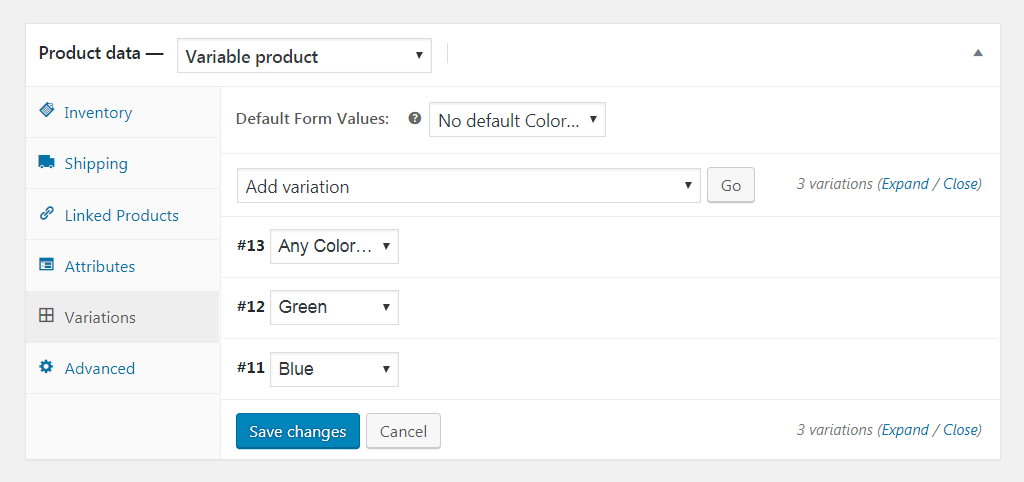
You can select a new attribute here (such as a different color), and customize its information as described above. This process can be repeated to add as many WooCommerce variations as you need. Just don’t forget to save your changes to each variation, and to the product as a whole when you’re done.
Conclusion 🧐
A great thing about WooCommerce is its supreme flexibility. You can create product pages that are as simple or complex as you need. This means you can set up very basic products, or sell items with many different variations.
🛍️ In order to add WooCommerce variations to your store’s products, you’ll want to:
- Create attributes for your WooCommerce products from the Products > Attributes area.
- Assign attributes to an individual product in the Attributes tab.
- Add WooCommerce variations to your product in the Variations tab.
Do you have any questions about how WooCommerce variations work? Share your questions in the comments section below!


Or start the conversation in our Facebook group for WordPress professionals. Find answers, share tips, and get help from other WordPress experts. Join now (it’s free)!